|
|
Ранункулюсы, лютики,Ranunculus, Ranunkulyusy, buttercups, blatouchy, Ranunkulûsy, lûtiki,
|

24.07.2011, 15:46
|
|
Администратор
|
|
Регистрация: 07.09.2010
Сообщений: 7,940
|
|
 Ранункулюсы, лютики,Ranunculus, Ranunkulyusy, buttercups, blatouchy, Ranunkulûsy, lûtiki,
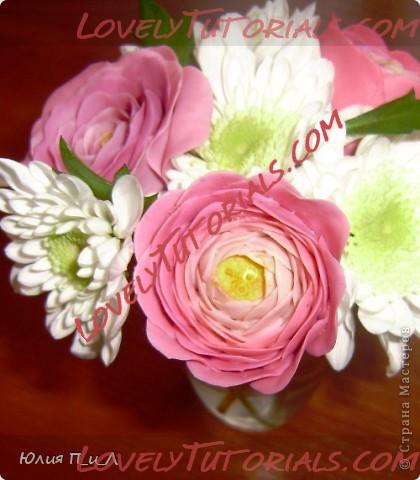
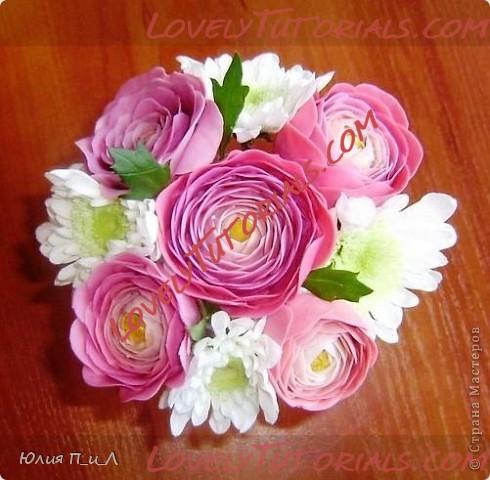
спасибо огромное Юлия П_и_Л за МК
слова и фото автора
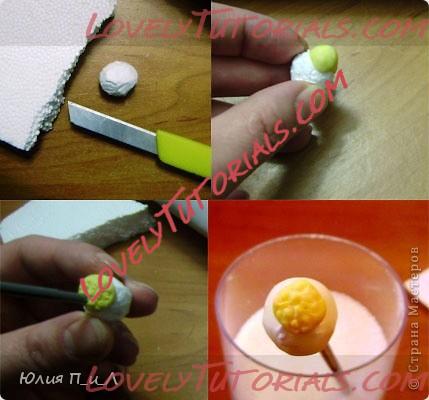
Серединка: приклеиваем кусочек желтой массы на шарик из пенопласта (или предварительно высушеный шарик из массы) и как советовала Джулия Робертс в фильме «Мачеха» при рисовании деревьев – тот же способ – «тюкаем» обратным концом пасты от ручки, создаем «пупырчетость»
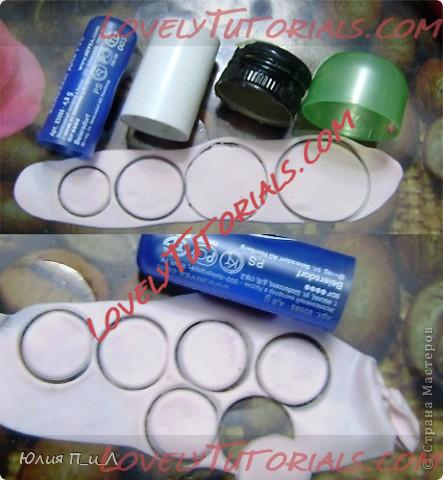
Лепестки от меньшего к большему диаметра в 2-3 мм разница…Каждая серия лепестков от 8-до 12, как вам понравиться…. Принцип вырезания как с нарезкой теста стаканом))) …В ход пошли разные крышечки – колпачки)))Я себе купила кухонную пластиковую клеенку,на ней очень удобно лепить,Масса к ней не липнет. Стол не пачкается, очень удобно у кого творческие детки))))Я её приклеена двусторонним скотчем к столу, чтобы не ездила…
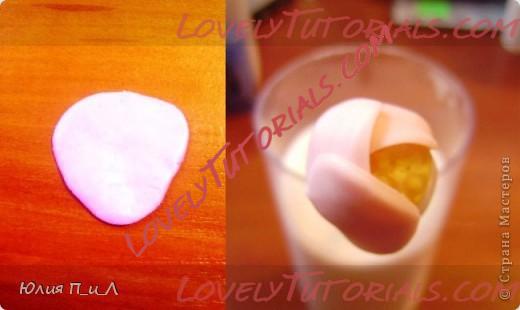
Чуть не забыла...Лепесточки (кроме самых маленьких) должны иметь такой вид на на рис. слева....При формировании чуть отрягиваем низ, и растягиваем кружок в стороны.Клеем лепестки внахлест .... Упс…фотоаппарат разрядился… так что дальше на словах…"и так ряд за рядом"))) Думаю понятно,не нужно добавлять фото?ой, да, еще забыла: вырезанные лепесточки не сразу наклеиваем, даем им минутку подсохнуть.А то они вообще друг к дружке прилипнут - не так как надо))))
|

08.11.2011, 08:08
|
|
Администратор
|
|
Регистрация: 07.09.2010
Сообщений: 7,940
|
|
|

08.11.2011, 08:12
|
|
Администратор
|
|
Регистрация: 07.09.2010
Сообщений: 7,940
|
|
|

09.11.2011, 12:02
|
|
Администратор
|
|
Регистрация: 07.09.2010
Сообщений: 7,940
|
|
|

22.04.2012, 15:50
|
|
Администратор
|
|
Регистрация: 07.09.2010
Сообщений: 7,940
|
|
|

25.04.2012, 16:23
|
|
Администратор
|
|
Регистрация: 07.09.2010
Сообщений: 7,940
|
|

Огромная благодарность Nurainie за Мастер-класс
Ranunculus Tutorial
The Ranunculus, a ball like flower in vibrant colours, available in various sizes, is currently a popular flower for weddings and wedding cakes.
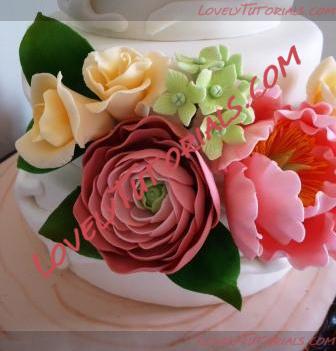
This is for a wedding cake sometime in December last year. I made it in shades by colouring the paste as I go. It looks good among the bouquet of roses, peony and hydrengea.
Below is a tutorial on my version of this flower.
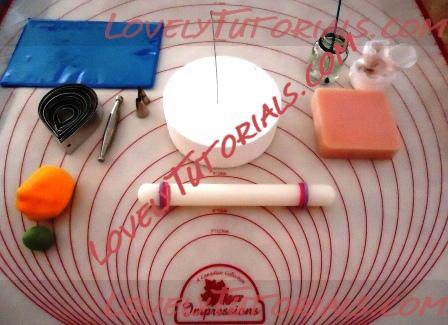
Tools and materials needed.
I used the teardrop cutter in various sizes.
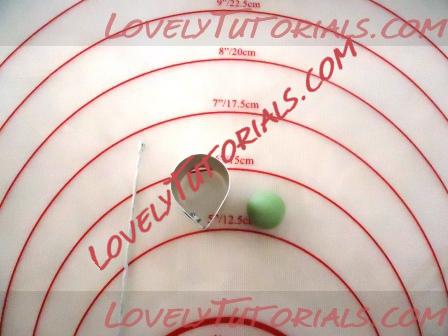
To make the centre you will need an 18 gauge wire, loop it at the end.
A small teardrop cutter and gumpaste ball rolled slightly more that half the size of the cutter.
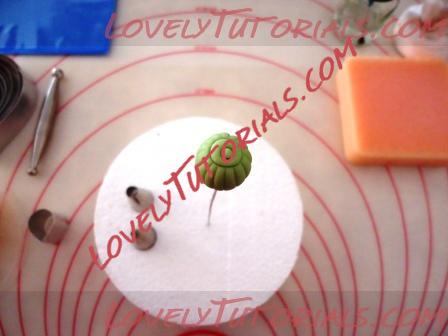
This is how it will look like.
Use the piping tip no.12 and 4 to make circles, and a knife or blade for the lines.
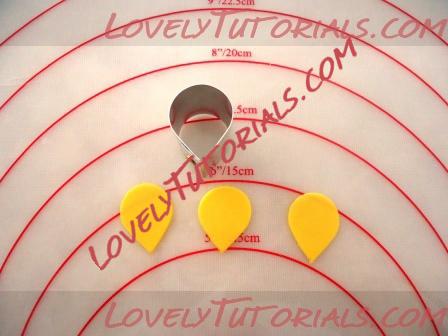
Cut out some petals using the same small teardrop cutter that you measured the ball with.
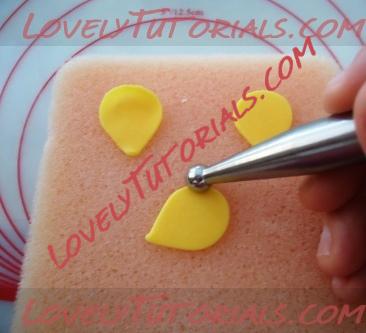
Thin the edges.
This is done by placing the ball too half on the petal, half on the sponge.
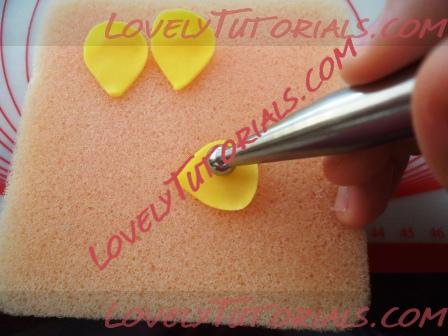
Cup the petals.
Use the same motion as thinning the edges, but this time, place the ball tool completely inside the petal.
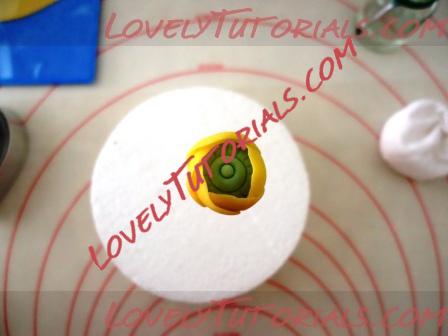
Attach them to the ball. Overlap the previous petal as you attach a new one.
I used a total of 5 petals to complete a circle.
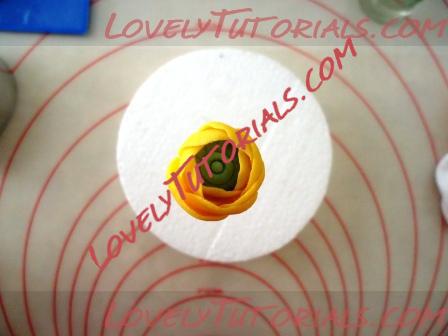
Continue until you find that the petal is too small.
This picture is just before I changed to the next cutter size.
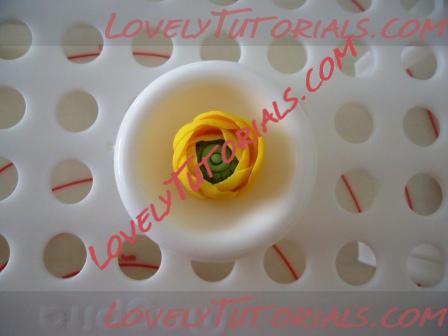
It is also time to give it a stronger support.
This is Wilton's flower former, the smaller size.
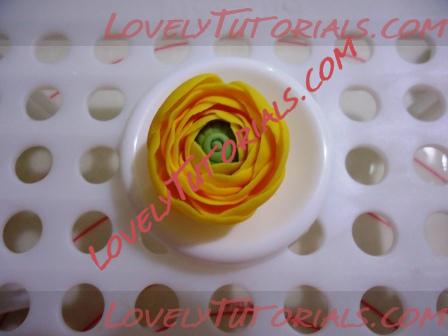
After more layers and another 2 changes in cutter size, a change in ball tool size (to a bigger one) and a change to the bigger flower former.
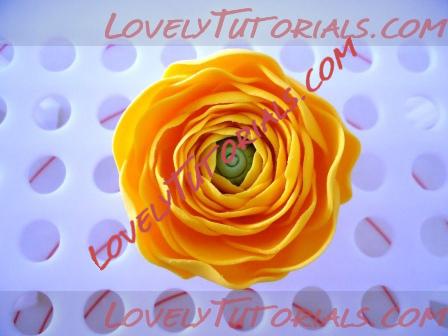
This is the biggest I could go. Notice that the edges started to frill?
For it not to frill, a bigger sized ball tool will do the trick.
A total of 3 ball tool sizes has been used for this particular flower.
Making the ranunculus gives understanding to the workings of a ball tool.
An easy but time consuming flower to make.
What I like most are the colours...fun colours!
|

12.10.2012, 08:58
|
|
Администратор
|
|
Регистрация: 07.09.2010
Сообщений: 7,940
|
|
|
 |
|
|
Метки
|
anlegget, anläggning, armado de los ramos, arranjo, artesanatos passo a passo, augalas, baking, biljka, bitki, blad, blade, blader, bladeren, blatouchy, blatt, bloem, bloemen, blomma, blommor, blomst, blomster, blume, blumen, blüten, blütenpaste, blätter, boeket, boglárka, bouquet, buchet, buket, bukett, bukiet, buquê, buttercups, cake decorating, cake decorating techniques, cerâmica plástica, chiodi di garofano, clavo de olor, clous de girofle, cloves, cold porcelain, cold porcelain figurines, cold porcelain flowers, confeitando bolos, csokor, cukrinių gėlių, curso completo de flores, curso de modelado, cvijet, cvijeće, decoracion de pasteles, decoración de tortas, decorare le torte, decorazioni, deko fondant, dekorace na dort, dekoracija, dekoracije, dekorasyon, dekorácie, düğünçiçeği, el abc del armado de ramos, feuille, feuilles, fimo, fimo flowers, fiore, fiori, fleurs, floare, floarea-broaştei, flogistica, flor, floral inspirations, flores, flores azucar, flores e folhas, flori, floristics, floristik, floristikk, floristique, florística, flower, flower paste, flowering plants, flowers, flowers on a wire, foglia, foglie, folha, folhas, folhas pintadas, fondan, fondant, fondente, fotopostup, frunze, gum pasta, gum paste, gum paste flowers, gumpaste, gumpaste flowers class, gėlė, gėlės, hand painting, handmade, handmodelliert, hideg porcelán, hladno porculan, hoja, hojas, how to, how tцветы на проволоке, impianto, iskerník, jaskier, kaldt porselen, kallt porslin, kalt porzellan, kasvi, kolde porcelæn, koud porselein, kukka, kukkakimppu, kukkia, kvetina, kvety, květina, květiny, kwiat, kwiaty, kylmä posliini, kytica, lapai, lapas, leaf, leaves, lehdet, lehti, levelek, levél, list, listí, lišće, liście, liść, lístia, lûtiki, making sugar flowers, mazzo, modellierpaste, modelləşdirmə, modelovanie, modelování, modelowanie, montando, motivtorten, nelken, növény, oasis o esponja de floristeria, pap, paso a paso, passo a passo, passo-a-passo, pasta flexible, pflanze, plant, planta, plante, plantes, plantă, pocelana fria, podjezični otok zbog zapušene pljuvačne žlijezde, polymer clay, polymer clay flowers tutorial, porcelaine froide, porcelana fria, porcelana fría, porcellana fredda, postup klinček, postupak za ukrasavanje, pryskyřník, puokštė, ramo, ranonkel, ranuncolo, ranunculus, ranunkel, ranunkulyusy, ranunkulûsy, ranúnculo, rastlina, rece porţelan, rododendron, rostlina, roślina, schritt für schritt anleitung, schritt-für-schritt, sculpey flowers, sculpting, simple, soğuk porselen, stamens, steg for steg, step by step, step-by-step, strauß, studený porcelán, styrofoam, sugar cane flowers, sugar cloves, sugar flower, sugar flowers, sugar flowers for cake decorating, sugar paste flowers, sugarcraft, sugarpaste, sukker art, tecnicas de decoracion, tecniche, thai flowers, torte, torte decorate, torten dekorieren, torti, trin for trin, trin-for-trin, trinn for trinn, tutorial, tutorijal, ukrašavanje torti, uputstvo za dekoraciju, virág, virágok, vėdrynas, wedding cake, wedding cakes, wire, yaprak, yapraklar, zimno porcelany, zuckerblumen, ดอกไม้, सजा केक, मॉडलिंग, モデル, çiçek, çiçek modelleme, šalto porceliano, 建模, 裝飾蛋糕, 진달�?, κρύα πορσελάνη, μπουκέτο, αζαλέα, λουλούδι, λουλούδια, τα φύλλα, φύλλα, φυτό, кветка, кветкі, квіти, квітка, казялец, куст, обучение лепке, гвоздика, полимерная глина, полевые цветы, пошагово, природа, мк, моделиране, майстер-класи, маршмеллоу, мастика, масте-класс, мастер-класс, мастер-класс по лепке, мастер-класс по лепке цветов, азалия, азалія, букет, жовтець, завод, листа, листья, листя, лепим цветы, лепка, лютик, лютики, лютиче, ліплення, лісце, рослина, ранункулюс, ранункулюсы-лютики, растение, растения, украшение тортов, украшение торта, свадебный торт, сахарная мастика, сахарный клей, уроки прикрашання, студен порцелан, торт, фимо, флористика, флора, холодного порцеляни, холодного фарфора, холодный фарфор, халоднага фарфору, цветок, цветочная паста, цвете, цветя, цветы, цветы из глины., цветы из полимерной глины, цветы из холодного фарфора, цветы на торт, шаг за шагом  |
|

