Огромная благодарность HowToCAKEThat за Мастер-класс 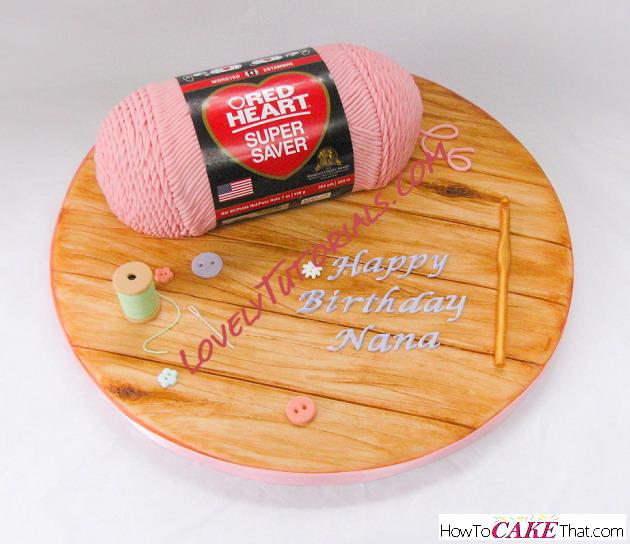
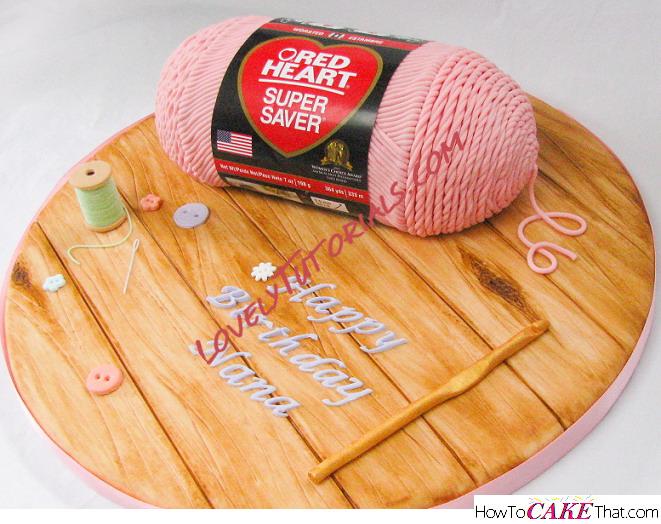
Hi Cake Friends! This year is a very special year - my Grandma turned 80! And to celebrate her special day I wanted to create a cake that represents a few of the many things she has taught me! Years ago when I was just a kid she taught me the art of sewing and crocheting! I remember our very first sewing project together... she had a hodgepodge box of buttons and a mint green sweatshirt, and we sat on her blue living room couch and she taught me how to sew the buttons onto the shirt. So the cake's design includes a mint green spool of thread and a mixture of random fondant buttons to represent her teaching me how to sew. Later on she taught me how to crochet my first afghan! She gave me a box full of Red Heart yarns and my first crochet hook and I spent the summer on Mom and Dad's farmhouse front porch working away at that blanket until it was finally completed. It ended up being a wild mixture of colors, but it's something I treasure to this day <3. So I decided to make the cake into a Red Heart skein of yarn for the time she taught me to crochet. And just as crocheting an afghan is a labor of love, so is this cake. If you plan on making this cake or one like it, plan way ahead... it takes many many hours!

About a week before the cake was due I decided to begin working on the cardboard cake drum. Working on it this early would allow the fondant to have plenty of time to dry. For this project you will need a large cake drum to ensure there will be plenty of room for the decorations and "happy birthday" message. I think my board was about 14 inches in diameter. To cover the cake drum, brush it with a little water or piping gel to help the fondant stick to it. Next, roll out fondant a little larger than the board. Set fondant over the board as you would a cake. Smooth down with a fondant smoother and use a pin to pop any air bubbles. Trim off excess fondant.
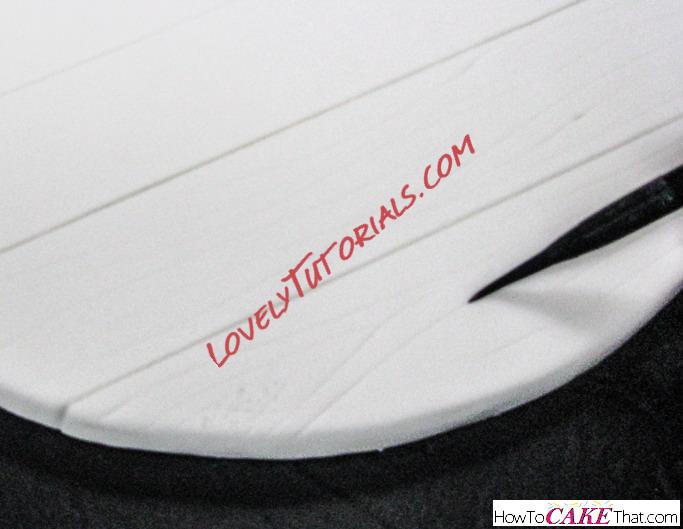
Now it's time to mark the spacing for our wooden boards. I want my boards to be 2 inches wide, so I placed a ruler in the center of the cake drum and used a fondant tool to mark every 2 inches.
Turn the ruler horizontal and line it up with one of the marks. Use a knife and lightly score the surface of the fondant to mark the crevice between the boards. Try not to cut all the way through the fondant.
Next, use a fondant shaping tool that is a little thicker than the knife to trace back over the lines to make them a little wider and deeper this time. Be sure to not cut all the way through. If you do accidentally cut through the fondant and expose the board underneath, just use your fingers to push the fondant together until the board can no longer be seen. Don't forget to make your lines continue down the sides of the board as well.
Next, use a fondant veining tool to create a wood grain effect on the fondant. Use the pointed end to create heavy texture where you plan to have knots in the wood (as seen in the bottom left hand corner - I know it's blurry... sorry!) When creating the wood grain effect, it's best to have a piece of wood nearby to examine as you create your texture... this will help with understanding how the lines should flow.
Once you've finished your texture, allow board to dry for a day or more (I like to wait at least two!) before moving on to the next step.
Once your board has dried, it's time to pain! To paint your board, create a thin watercolor paint using clear alcohol (150 proof or higher) blended with a little brown gel food coloring (I'm using Wilton brown gel color). Paint a thin coating over the entire board to give it a nice base color. And I like to use a medium size paint brush with thick, slightly coarse bristles to give the paint good texture as I am applying it.
Note: Always test your edible paints on a scrap piece of fondant before applying to your project to ensure you like the color. If your brown paint seems a bit too pink, feel free to add a touch of Buttercup yellow gel color.
Now to add some more detail! Using a small brush, add a darker mixture of brown gel color and alcohol to create more depth and texture. Be sure to add dark color to the spaces between the boards, and to the knots.
Before the darker paint has a chance to dry, quickly paint over the darker marks with the lighter brown mixture (same color as the base coat) to blend them in and make them look more natural.
Guys, as soon as I get a good camera I promise I will make a video of how this is done! It will be much easier to understand in a video

Be sure to go back over the knots again with the dark brown paint and small paintbrush to make them darker! For the final darkening touch up on my wood knots, I do not go back over them again with the thick brush, unless needed.
Whoo hoo! Once you're happy with the way your board looks, set it aside to dry for a day or more.
While the board is drying, let's get started on our edible decorations! To make an edible crochet hook, use a fondant extruder fitted with a round disk in a good size for a crochet needle. Add a little tylose powder to the fondant to help it dry fast and press it through the extruder.
Next, shape the end of the fondant into a point - just like the hook. Then press down on the fondant crochet hook to create the flat finger grip.
Trim hook to the appropriate length, and set aside to dry overnight.
Now to make the spool of thread! The color of the center of the spool doesn't matter (it will be covered with fondant thread), so I'm just using the leftover fondant from the crochet hook. Be sure to add tylose powder to the fondant if you haven't already. Roll the piece of fondant into a cylinder shape using a fondant smoother to ensure it's smooth and even. Set spool center aside to dry.
Sorry - the pictures are really bad for this piece! Please bear with me

. To make the tiny needle, fit a fondant extruder with the tiniest round disk you can find. Add tylose to the fondant and press it through the extruder. Shape the fondant into a needle shape. Fold over one end of the fondant string to make the needle's eye.
Use a razor blade to trim a pointed end onto the fondant needle. Set aside to dry overnight.
Be sure to make a couple of needles in case one breaks.

After the crochet hook has dried overnight, it's time to trim out the hook! Carefully use a razor blade to carve out the hook. Be sure to not cut yourself or cut all the way through the hook. This piece is very delicate and takes a gentle hand and a lot of patience.
Phew!! Success!!
Now it's time to paint! Create a paint using luster dust of your choice mixed with clear alcohol (150 proof or higher) and paint on the crochet hook. Once the paint dries, brush dry luster dust over it to give it a good even sheen.
The luster dust I'm using is CK's antique gold.
Carefully paint the needle with luster dust paint, too. When it has dried, paint over once more with dry luster dust. I'm using NU Silver dust.
After the center for our spool of thread has dried, use a razor blade to trim the ends to make them flat.
Our spool of thread is going to be standing up, and I want the top piece of it to appear to have a hole going all the way through it. So we will need to paint the top center of the spool black using black gel color mixed with a little clear alcohol (150 proof or higher).
To create the top and bottom pieces of our spool, roll out a little fondant mixed with tylose (or mixed with a little gum paste), and cut out two round pieces slightly larger than the center of our spool.
A standard size drinking straw was the perfect size for cutting out the center of the top piece of my spool.

Set pieces aside to dry.
Once the pieces have dried, attach them to the spool's center by brushing them with a little water.
Now it's time to add our thread! Using the smallest round disk, press fondant through the extruder. Brush the spool center with a little water and wind the fondant string around the spool.
Dawwww!! It's so cute!!

Next, create little random buttons using whatever decorating tools you have on hand! I love using tiny cutters, fondant shaper (for the button holes), and piping tips!
Never throw away fondant scraps... they come in handy for little decorations like these!
Okay, now on to the fun part! The cake! I baked a cake in a 9 x 13 cake pan and cut the cake down the center. Each half became a layer for this cake. Smear a little buttercream where your cake will sit on a large cardboard cake circle to help the cake stick to the cardboard circle. Place first layer of cake down, fill and place down top layer of cake. Cover with plastic wrap and place in the freezer until frozen solid.
Once frozen, remove the cake from the freezer and begin carving. Trim the cake into the general shape of a skein of yarn.
Begin rounding out the sides, trimming away a little at a time. Remember: you can always take away, but once it's cut you can't put it back!
Don't forget the underside! Trim a little away from the underside to give it more of a round shape.
Okay, I'm happy with that! It looks like a hoagie sandwich!

In order for us to be able to move our cake into it's final place (the fondant covered cake board) without it falling apart, it needs a little cardboard support underneath. Using a good sharp pair of scissors, cut away the cardboard underneath of the cake. Be sure the cardboard doesn't stick out further than the cake - you want it to be even with the edge of the cake.
I cut away an extra scrap piece from that leftover cake cardboard and used it to make it easy to transport the cake from the work area to the refrigerator. Cover the cake in frosting of your choice and place in the refrigerator to harden the frosting and prepare it for fondant.
Once cake frosting is cold and stiff, remove it from the refrigerator. Roll out a thin layer of fondant and cover the cake.
This shape was super hard to cover in fondant and have smooth ends, so I made it easy on myself. I smoothed down the long sides, but on the short round ends I pinched the fondant tightly together right up to the cake.
Then I snipped off the extra pinched fondant with scissors! Ta da!! And it doesn't matter what the fondant looks like because it will be covered by fondant strings and a Red Heart label

.
Next, press fondant through an extruder fitted with a round disk that is the same size as yarn. Place three fondant string pieces together.
Carefully twist these three pieces together. This will create the wound effect on the ends of a skein of yarn.
Wind the twists into a circle, and trim off the end for a nice clean cut. Be sure to cut in the same direction as the fondant string.
Brush end of the cake with water and place the fondant twisty circle on the center of the end of the cake.
Always trim twisted fondant cord ends in the same direction as the strings for seamless joining. Add more twisted fondant strings and wrap around until ends of cake are covered.
Yay! Almost done!!
Sorry again for the blurry picture! Place one string on each side near the wrapped ends. Of course, glue them to the cake with a little water

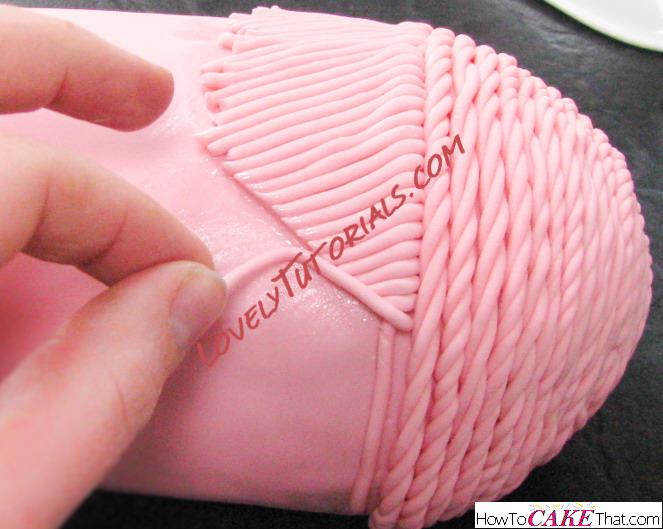
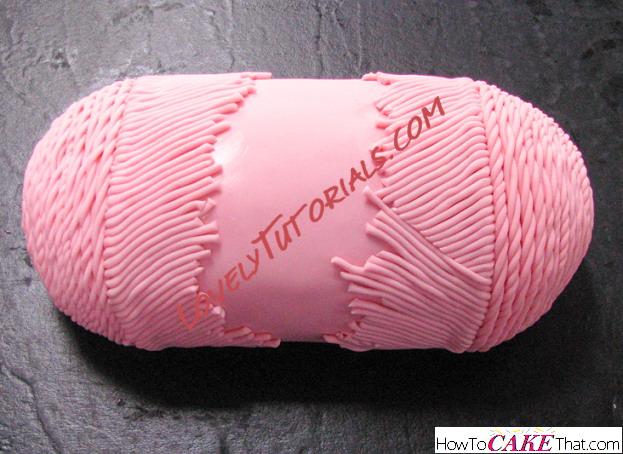
Press more yarn strings through the fondant extruder. Cut small pieces and place pieces on cake, one at a time being sure to drape one end over the vertical strand and use a shaping tool or skewer to tuck in the end of the string. (I am gluing strings to the cake by brushing the cake with a little water).
To change the direction of the wrapped yarn, cut an angle into the ends of the other strings and apply a string in the new direction.
Phew! I'm tired! Lol! The center of the cake can be left undone - it will be covered with a label anyway!
