|
|
МК торт "Пасхальная корзинка с зайчиком" -Cake DIY "Bunny with easter basket" V2
|

18.04.2013, 18:01
|
|
Администратор
|
|
Регистрация: 05.03.2013
Сообщений: 698
|
|
 МК торт "Пасхальная корзинка с зайчиком" -Cake DIY "Bunny with easter basket" V2
Огромная благодарность Автору The Happy Caker за Мастер-класс
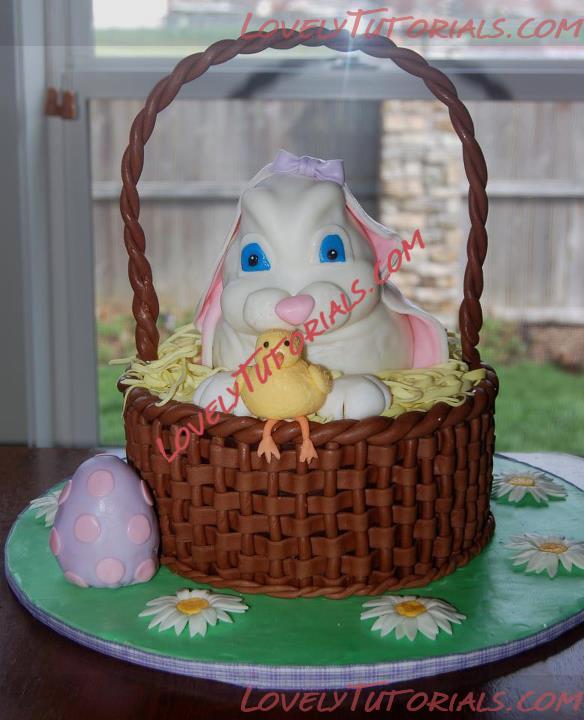
I started by baking two 10" rounds and one 9" round for the basket. You could probably get by using only two 10" rounds but my cakes didn't come out as full as I wanted them to so I added one more to get a total height of 4".
For the bunny body I baked two 6" rounds. The head was baked in a small pyrex bowl so it had a little bit of a dome shape.
I also made a large batch of marshmallow fondant and a batch of milk chocolate modeling chocolate. I kneaded together 1 pound of the fondant and 1 pound of the modeling chocolate to make chocolate fondant for the basket.
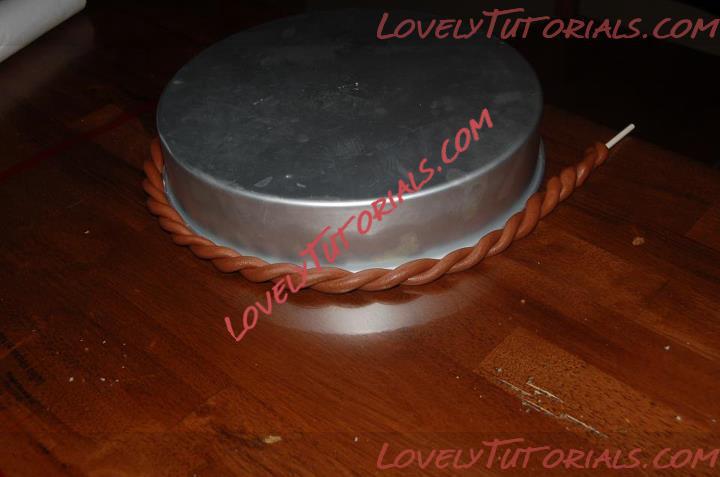
Using the chocolate fondant I rolled out 2 ropes and twisted them together to form the handle of the basket. I inserted lolly pop sticks into both ends so that I could attach it to the basket after it dried. **Important note...if you want the handle to dry hard you should knead some tylose powder into the fondant before you form the handle. I forgot this step and my handle never dried after letting it sit out for 5 days. I had to cheat a little to get my pictures but since the cake was for my family I don't think anyone minded  ** I shaped the handle around a 9" baking pan so that it would be the right shape.
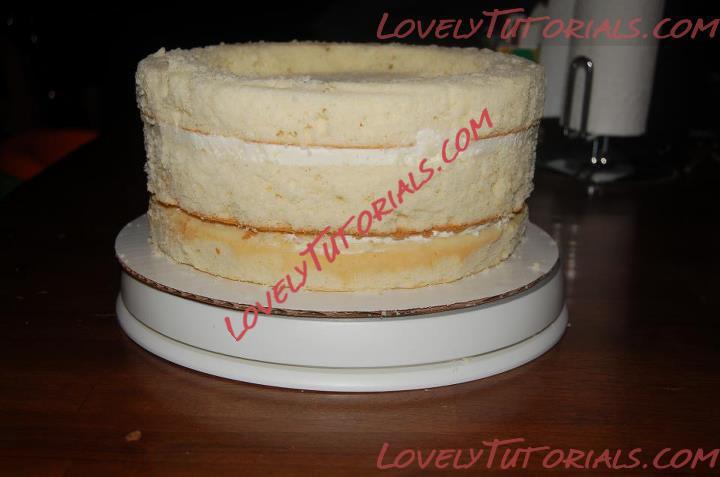
Next I filled and stacked my cakes for the basket. I put the 9" cake on the bottom. Then I carved the cakes so that they were slightly tapered. I actually placed a cardboard round over my top cake and flipped it over. It was a lot easier to carve upside down. When I was happy with the shape I flipped it back over and carved a hole in the top cake so that the bunny would sit a little lower in the basket. (save the carving scraps for use later)
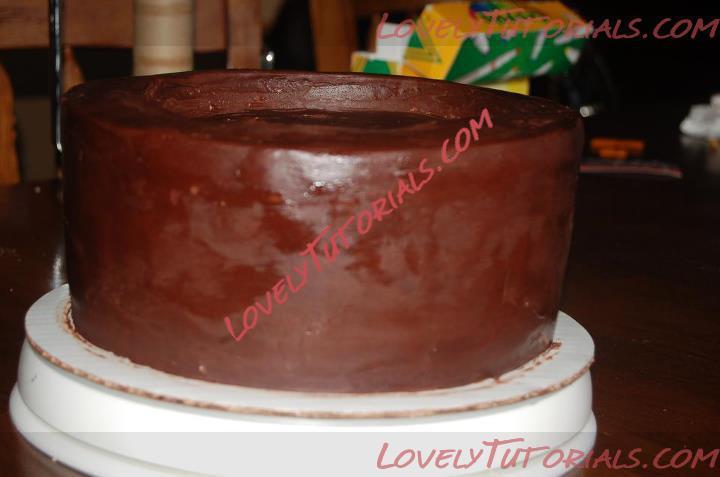
I covered the cake in milk chocolate ganache and let it set overnight so the chocolate would be nice and firm before I put the fondant on. (This was my first attempt at ganache! Overall I was pretty happy with the turn out. I think I am a ganache convert!)
Using the chocolate fondant I rolled out a loooot of 4" sausages for the basket! Then I rolled out some chocolate fondant. I squared it off and then cut 1/2" strips.
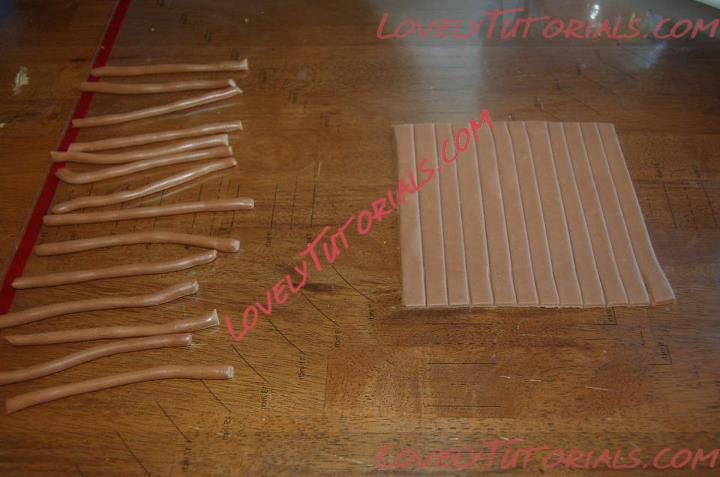
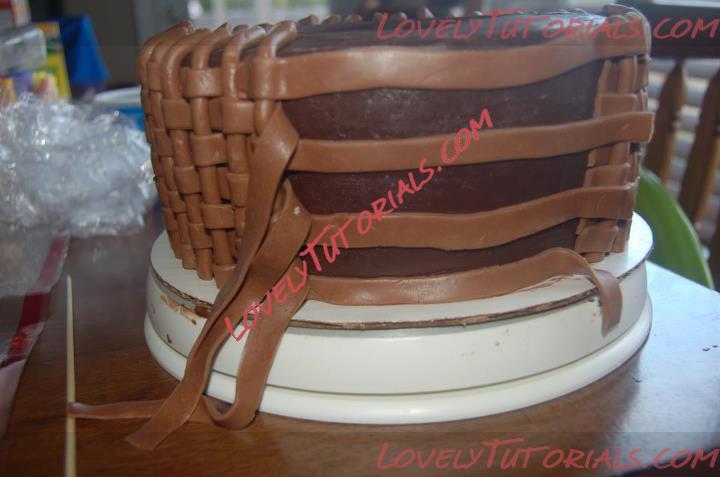
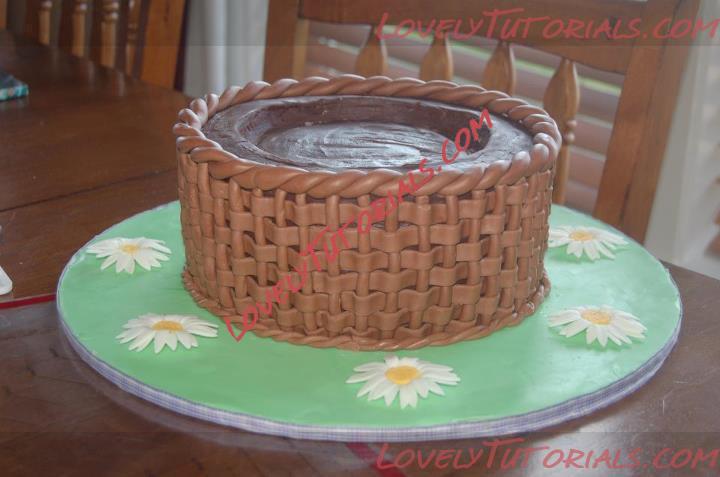
Now for the really fun part  I'm sure there is a much easier way to do this but I actually wove my pieces. I attached the stips horizontally on the cake using a bit of water to help them stick. Then I attached one of the sausages vertically pulling every other strip off one at a time to cross over each sausage. Hope that makes sense!! It's a little difficult to explain but the picture should help. This process took a lot of patience!! I did the cake in 4 sections and by the time I got to the 3rd section I had gotten a lot faster. I rolled two more long ropes and twisted them together to make the top edge of the basket. I also used an extruder to make two thin ropes that I twisted together and attached to the bottom of the basket.
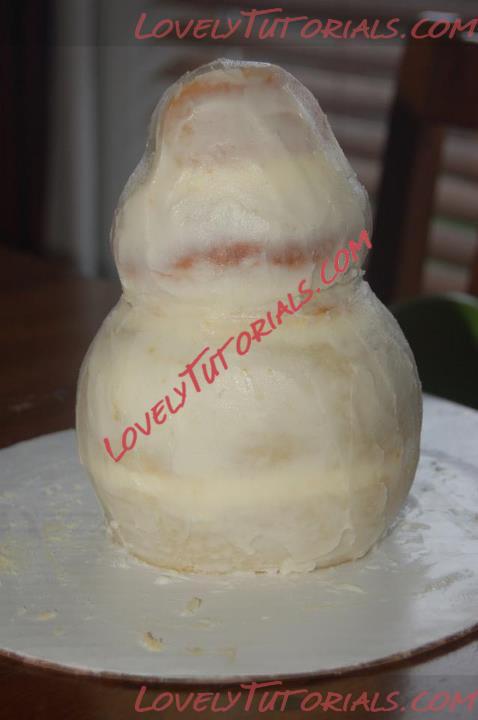
Next I started to work on the bunny. I meant to take more picture of this but totally forgot! I filled and stacked my cakes and let them chill in the freezer for about 30 minutes so it would be easier to carve. The head took me a while to figure out how to get the shape I wanted it but I basically very slowly tapered in from the top of the head to about halfway down and then back out again so it had puffy cheeks. After I had the head carved how I wanted it I placed it on top of the body so I could get the proportions correct. The body was carved in an egg shape. I added a dowell through the center of the bunny for support and crumb coated the bunny with swiss meringue buttercream.
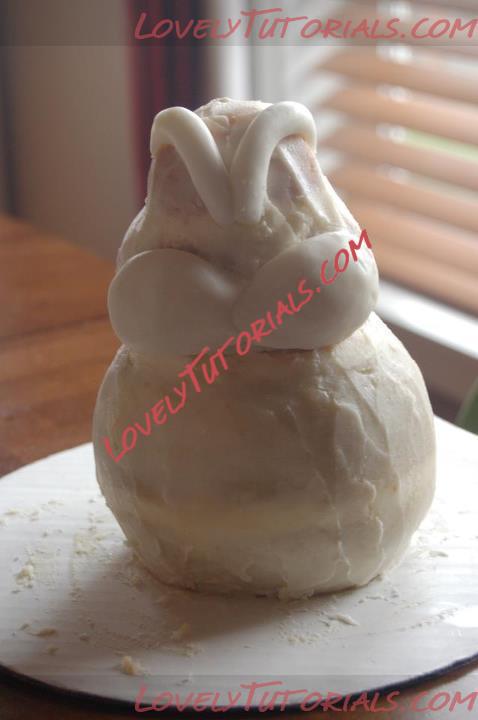
Using my white fondant I rolled out two sausages and attached the to the eye area of the bunny so there would be more definition to once I covered it with fondant. I also added 2 balls of fondant to the cheek area so that it was a bit puffier.
I don't have a picture of this but next I covered the bunny with a layer of fondant.
At this point I covered my cake board with green fondant and moved the basket to the center of the board. I placed the bunny in the center of the basket. I also added daisies all around the board. (There is a tutorial for the daisies I made in my notes).
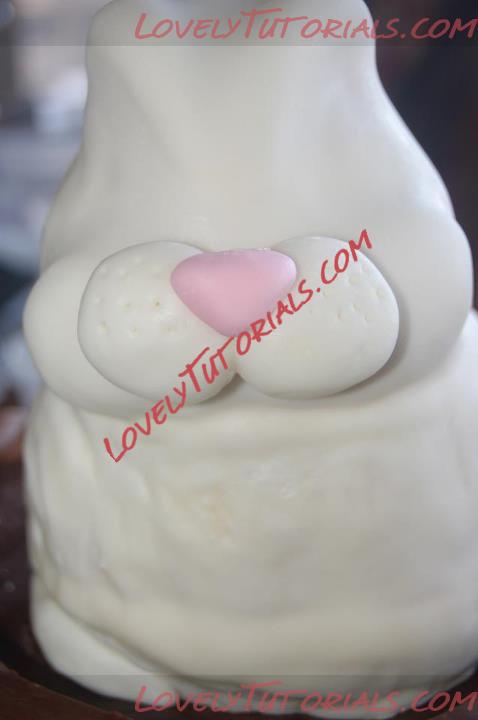
I made a mouth and nose out of fondant and attached with a bit of water. Using a toothpick I made little holes on either side of the nose.
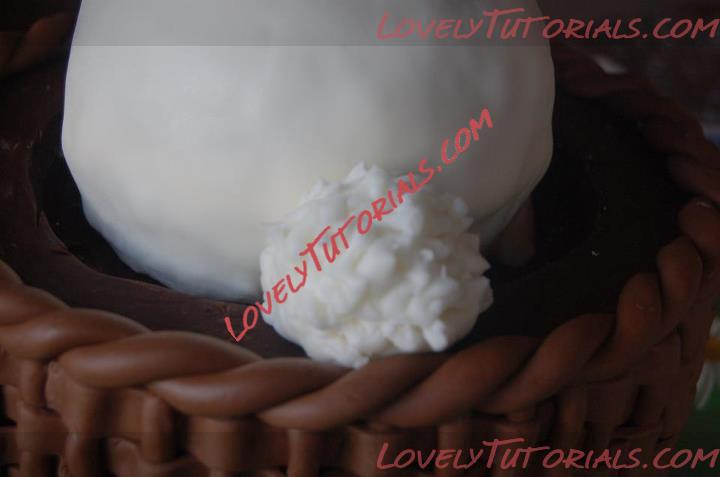
I made the tail using a ball of fondant. I made little cuts all around the tail using a small pair of scissors to make the tail look fluffy.
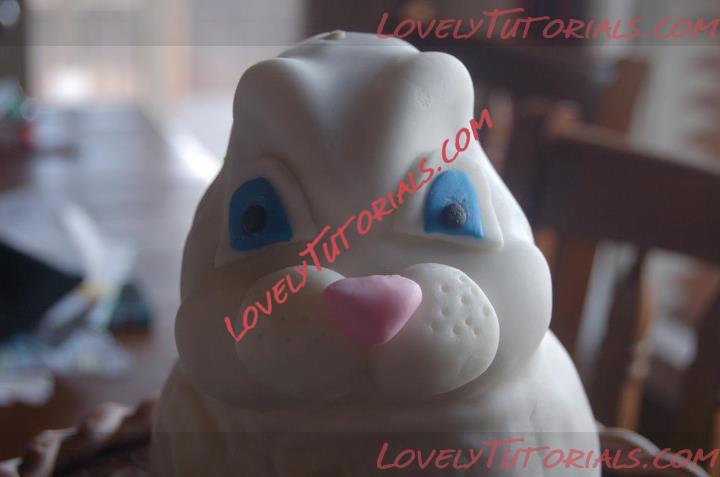
I cut out some white fondant ovals and cut the bottom portion off so it had a flat bottom. I then cut out blue ovals a little smaller than the white and cut the bottom off. I attached the two pieces and then added a small ball of black fondant that I flattened slightly. Using white food coloring I added a small dot in the middle of the black for a highlight. Then I attached the eyes to the bunny right above the fleshy part of the cheek.
I rolled out some white fondant and cut out some floppy bunny ears. Then I rolled out some pink fondant and cut it out slightly smaller than the white. I glued the two pieces together with water and attached them to the top of the bunny's head with the white part facing the outside. I gave the ears some shape by "fluffing" it out and attaching it to the body in a few places using a little water.
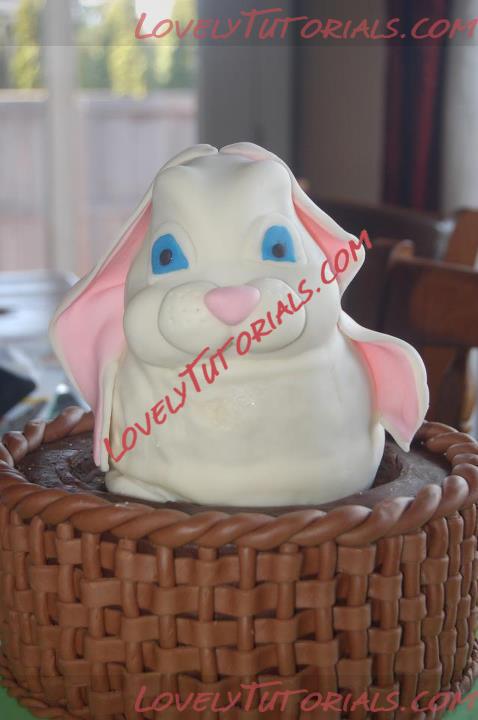
Using some left over cake scraps from my carving and a little bit of frosting I squished everything together tightly and created an egg shape. I then wrapped it in saran wrap and popped it in the freezer for an hour to firm up.
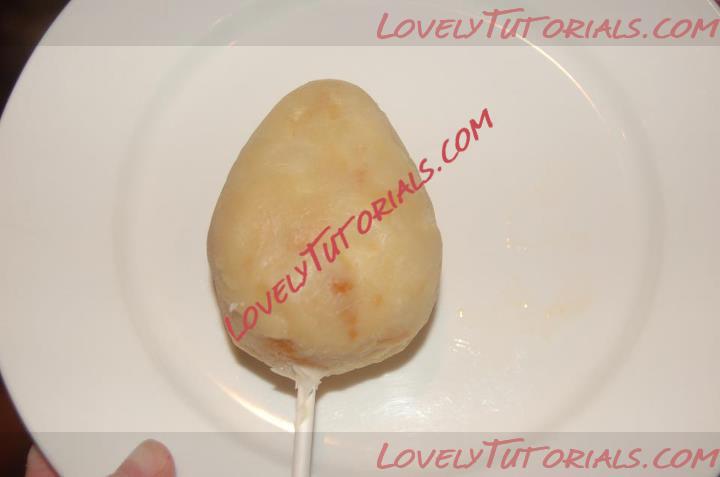
I melted some white candy melts and added vegetable oil so the chocolate was very smooth and pourable. I dipped about a 1/2" of a lolly pop stick in the chocolate and then inserted it halfway in the bottom of the egg and popped it back in the freezer to set. After a few minutes I took it back out and covered the surface of the egg with the rest of the melted chocolate and let it dry upright on a block of styrofoam. When it dried the surface was not very smooth so I smoothed it out using a knife dipped in hot water. Use a paper towell to wipe off the knife after dipping it in the water.
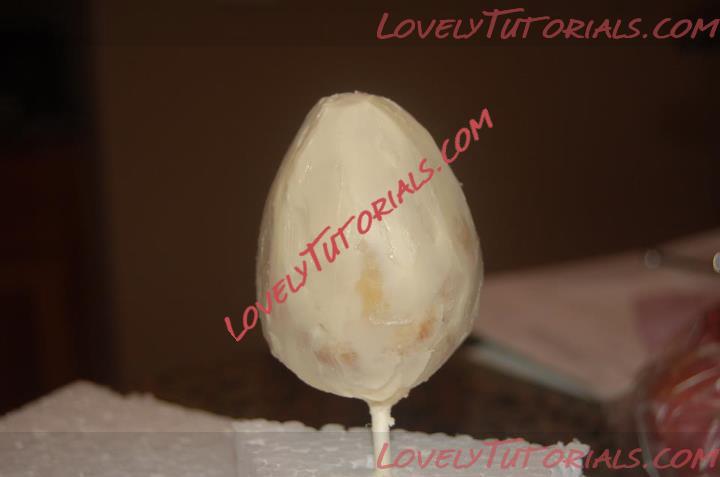
Once the surface of the egg was nich and smooth I rubbed a very small amount of shortening on the egg and covered it with fondant. (The shortening helps the fondant stick). Then I cut out small pink circles using a piping tip and attached them randomly to the egg. (I actually covered the egg with two layers of fondant because I totally messed up when I tried to add decorations to the first layer)
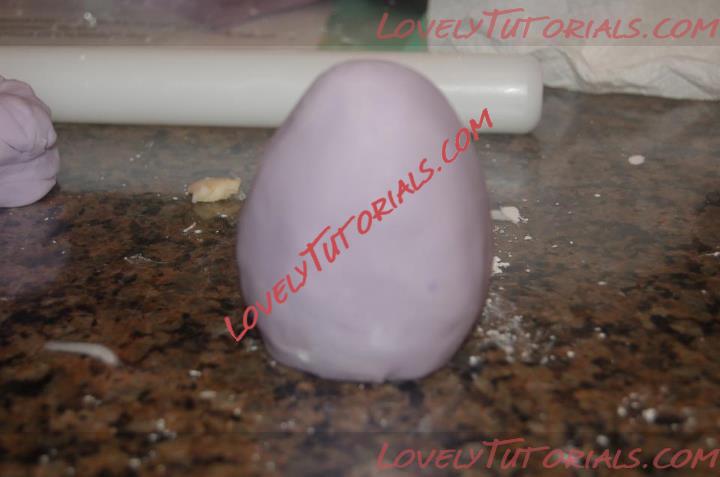
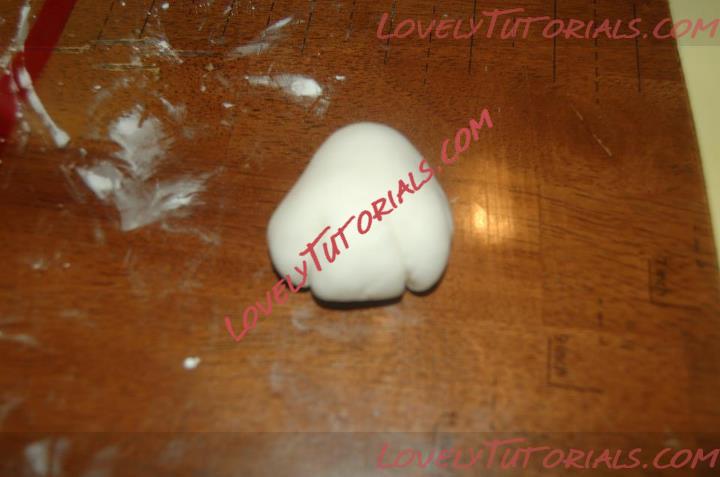
Back to the bunny...I rolled some white fondant into balls that I flattened slightly and shaped into a paw. Then I cut tow slits using an exacto knife. I then attached them to the front of the bunny so they were right at the edge of the basket.
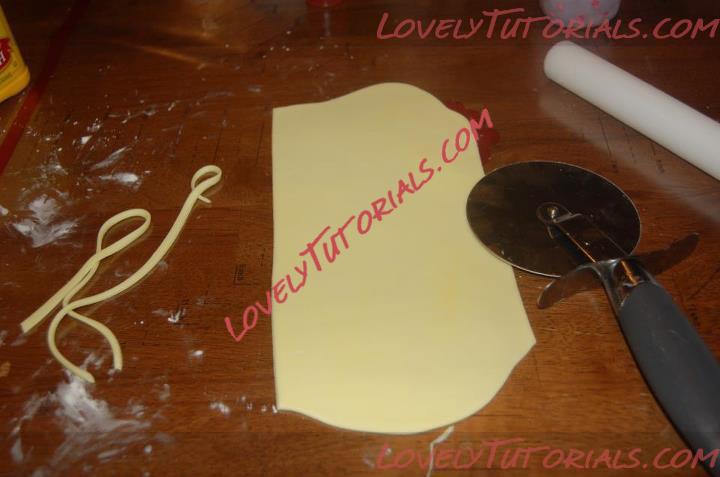
Next I rolled out some yellow fondant and using a pizza cutter I cut out some very thin strips to make the grass. I placed the pieces all around the basket making sure to cover any areas that you could see the ganache coming through.
The last thing I did was add the handle by inserting the lolly pop sticks into the cake.
I also made a small chick to nuzzle with the bunny. I forgot to take pictures of the process!! It was pretty easy to make though. It is basically two balls of yellow fondant attached together. Then I added some wings legs and feet. I made him look a little fluffy by cutting random slits all over with an exacto knife.

|
 |
|
Метки
|
3d bizcocho, 3d bolo, 3d cake, 3d dort, 3d figures, 3d kage, 3d kager, 3d kake, 3d kek, 3d pastel, 3d tarta, 3d torta, 3d torte, 3d torti, 3d torty, 3d κέικ, addım-addım, addım-addım təlimat, adherido a cabo plstilina, adım, adım adım, adım adım yönergeler, aita, anak kue, arcilla polimérica, argila do polímero, argila polimèrica, argile polymère, arrautzak, arrautzak margotu, artesanatos passo a passo, arxila do polímero, askel askeleelta, auksts porcelāns, bajd, bajd kulur, bakod, baldi, baquets, baridi porcelain, barilo, barmil, barna kaka, barnas cake, barnens cake, barvanje jajc, barvení vajíček, bata cake, bemutató, benna, birthday cake, biscuit, bojanje jaja, bokit, bolando bolos, bolo infantil, bolo para as crianças, bolo para os nenos, bolos decorados, bucket, buicéad, bunnies, bunny, bwced, børns cake, bøtte, bánh cho trẻ em, bērnu kūka, cacen i blant, cacen plant, cake decorating, cake decorating techniques, cake detské, cake diy "bunny with easter basket", cake dětské, cake for kids, cake para sa mga bata, cake për fëmijë, cake topper, cake toppers, cake tops, cake ສໍາລັບ kids, cake ຂອງເດັກນ້ອຍ, cerca, cerâmica plástica, character figures, characters, children's cake, clôtures, coca infantil, coelho, coelhos, coello, coellos, cola de plstilina, cold porcelain, colla da plstilina, colle de plstilina, colorantes ova, colorat, coloreando ovoj, coloring egg, coloring eggs, coloring mayai, conejito, conejitos, confeitando bolos, conigli, conillet, conillets, creazione e decorazione torte, crustulam pro kids, cré polaiméir, cub, cubo, cupă pentru excavat, curso de modelado, céim ar chéim, císte do na páistí, dažymas kiaušiniai, de balde, decoracion de pasteles, decoración de tortas, decorada en fondant, decorare le torte, decorazioni, deko fondant, dekorace na dort, dekoracija, dekoracije, dekorasyon, dekorácie, des œufs, des œufs à colorier, dingin porselen, diy cake for kids "egg-painter bunnies", dječja torta, dort pro děti, easter, egg, eggs, eier, eieren, eiers, eimer, ember, emmer, especializada em modelagem de biscuit, etap pa etap, farbenie vajíčok, farvestoffer æg, fence, fender, ffens, figur kager, figuras, figure making tutorials, figuren, figures, figurice, figurice od fondana, figurine on the cake, figurines, figurinhas, figurky, figúrky, figür modelleme, filiorum crustum, fimo, fixando a cabencinha, fjölliða leir, flower paste, fondan, fondant, fondente, fondente di zucchero, fotopostup, foundant, frigus murrina, frèt porselèn, fál, färben von ostereiern, färgämnen ägg, fötu, gam dari plstilina, gam wrth gam, gard, gardh, gato pou timoun, gato pou timoun yo, gebak, girðing, gjerde, glazuur, gliú ó plstilina, glud o plstilina, glue from plstilina, gluo de plstilina, gluten de plstilina, gom uit plstilina, gradatim, gum pasta, gum paste, gumpaste, gundi kutoka plstilina, gyermek cake, gâteau enfants, gâteau pour les enfants, hakbang-hakbang, hand-made, handmade, hap pas hapi, hasar, hasen, hatua kwa hatua, haurren cake, haurrentzako tarta, hegn, heining, hesi, hideg porcelán, hladno porcelan, hladno porculan, hotz portzelana, how to, how-to's, huevos, huevos para colorear, húsvét, hàng rào, iepuras, iepurași de paști, immudellar, infana cake, instrucţiuni, instrukcijas, instrukcje, itlog, jaja, jajca, jak na, jílu polymeru, kage dekoration, kage til børn, kagedekoration, kaka fyrir börn, kake for barn, kakebaking, kakku lapsille, kaldt porselen, kall porslin, kalt postulín, kalten porzellan, kanak-kanak kek, kaniner, kanál, kanína, kaušas, kejk għat-tfal, kejk tat-tfal, kek untuk anak-anak, keki kwa ajili ya watoto, kepçe, kerítés, kiaušiniai, kiesaħ porċellana, kinder kuchen, kinders se koek, klei, kleur eiers, kleuren eieren, kloti, koek vir kinders, kold porcelæn, kolla minn plstilina, koloran ze, kolorit yumurta, kook lastele, kopp, korak, korak po korak, korak za korakom, korak za korakom navodila, korak-po-korak upute, korečkové, koristeet ja koristelu, korčekové, koud porselein, koue porselein, kovë, krok, krok po kroku, krok za krokem, krok za krokom, krok-za-krokem, króliczek, króliczki, krāsojamās olas, kuchen für kinder, kue untuk anak-anak, kuko por infanoj, kylmä posliini, külm portselan, kūka bērniem, l-għid, la modélisation, lakòl soti nan plstilina, langkah demi langkah, lapen, lapin, lapins, las instrucciones, las técnicas, laste tort, lasten cake, le tecniche, leanaí císte, leim aus plstilina, lem dari plstilina, lepidlo z plstilina, lepilo plstilina, lepur, les techniques, lieldienas, lihavõtted, liimaa plstilina, lim fra plstilina, lim från plstilina, lipici la plstilina, lita egg, ljepila iz plstilina, lukie, lạnh sứ, lễ phục sinh, lépésről lépésre, líkan, lím frá plstilina, malamig porselana, mallintaminen, malvarma porcelano, manekenstvo, marcipanové figurky, marshmallow, marsipanfigurer, masa flexible, master-class, master-klasse, master-klasy, mayai, meistras klasės, metodikas, mistr třídy, model, modelado, modelage, modelagem, modelando a barriga, modelando a cabencinha, modelando a perninha, modelando as maozinhas, modelando o cabelinho, modelando o corpinho, modelando os bracinhos, modelando os pezinhos, modelare, modelat, modelatze, modelaxe, modelerte figurer, modeliavimas, modelim, modeling, modeling paste, modeliranje, modelizasyon, modellazione, modelleerimine, modelleerimine alates plstilina, modelleme, modellering, modellering van plstilina, modellezés, modellieren, modellierpaste, modelling, modelling past, modellismo, modelləşdirmə, modelovanie, modelování, modelování krok za krokem, modelowanie, modelowanie od plstilina, modelu, modelēšana, modelēšana no plstilina, motivtorten, munad, munat, mune värvima, mô hình, mô hình từ plstilina, na cásca, ndoo, nuo plstilina modeliavimas, nyuszi, návod, návody a postupy, návody na květy a lístky, ograda, ograje, ogrodzenia, olas, omheining, ontzi, oplocení, oplotenie, opplæringen, orelhas, ostern, otroška torta, ous, ous per pintar, ouă, ova, ovoj, ovos, ovos de coloração, ovos de cor, ozdoby, paasfees, pagar, pagmomolde, pak, pamoka, pangkulay itlog, pangola mula plstilina, pap, pas, pas a pas, pas cu pas, pas à pas, pas-cu-pas, pas-à-pas et modèles, pasaka, pasche, pascua, pasen, pashkëve, paskah, paskalya, pasko, paso, paso a paso, pasqua, pass pass, passo, passo a passo, passo dopo passo, passo-a-passo, passo-passo le istruzioni, pasta de goma, pasta de miel, pasta flexible, pasta laminada, pastel para los niños, pastís per als nens, pasxa, pazko, paŝon post paŝo, pemodelan, pintura dos olhos, plstilina dən modelləşdirmə, plstilina from kola, plstilina yapışkan, plstilina માંથી ગુંદર, plstilina ರಿಂದ ಮರವಜ್ರ, plstilina से गोंद, plstilina থেকে আঠালো, plstilina இருந்து பசை, plstilina నుండి జిగురు, plstilina سے گلو, plstilinaからグルー, plstilina에서 접착제, pocelana fria, polimer agyag, polimer argilă, polimer balta, polimer gil, polimer gline, polimer kil, polimer luad, polimer tanah liat, polimerna glina, polimero argilo, polimero buztin, polimero molis, polimeru tafal, polimēra māls, polymeer klei, polymeerin savi, polymer argilla, polymer clai, polymer clay, polymer leire, polymer ler, polymer lera, polymer udongo, polymer đất sét, polymère ajil, polümeersavist, porcelain fuar, porcelain ເຢັນ, porcelaine froide, porcelana fria, porcelana fría, porcelani ftohtë, porcellana freda, porcellana fredda, porselin sejuk, porslen oer, porțelan rece, postup na 3d torty, postupak za ukrasavanje, pravljenje figurica za torte, preto, puput, påsk, påske, pâques, páscoa, pâtisserie, pääsiäinen, předměty z marcipánu, ragasztó plstilina, recinzione, renklendirme yumurta, rubujo, saepemque, samhaltú, samm-sammult, schmelzend, schritt für schritt, schritt für schritt anleitung, schritt-für-schritt, schritt-für-schritt-anleitungen, sculpting, sculpturae, situla, sić, skopa, skref fyrir skref, soggetti, soli pa solim, souvenirs, soyuq çini, soğuk porselen, spainis, spand, staket, stap, stap vir stap, stap voor stap, stap-voor-stap, stap-voor-stap instructies, steg for steg, steg för steg, steg-för-steg, steg-för-steg-instruktion, step, step by step, step-by-lépésre, step-by-step, step-by-step instructions, studený porcelán, styrofoam, sugarcraft, sugarpaste, suikerglazuur, színező tojás, taart voor kinderen, tanca, tara, tavşan, technieken, techniken, techniki, techniky, technikák, techniques, tecnicas de decoracion, tecniche, tehnici, tehnike, teknikker, teknikler, telgopor, telur, telur mewarnai, telur pewarna, tips och trix, tojás, topo de bolo, topo do bolo, topos de bolo, tort dla dzieci, tort pentru copii, torta gyerekeknek, torta infantil, torta per bambini, torta per i bambini, torta pre deti, torta za djecu, torta za otroke, tortas vaikams, torte, torte decorate, torten dekorieren, torti, tortë për fëmijët, trin, trin for trin, trin-for-trin, trin-for-trin instruktioner, trinn, trinn for trinn, trinn-for-trinn-instruksjoner, trucs et questions sur la décoration de gateaux, trẻ em bánh, trứng, trứng màu, tutorial, tutoriale, tutorias, tutorias/ideas para decorar los bizcochos, tutoriel, tutoriels, tutorijal, tvoros, từng bước, tårta för barn, tårtbottnen, tårtor, técnicas, udžbenik, uibheacha, uibheacha dathú, ukrašavanje torti, uova, uova coloranti, uputstvo za dekoraciju, urratsez urrats, uskrs, uzio, uşaq cake, uşaqlar üçün tort, vaikų pyragas, vajcia, valla, vedro, vejce, velika noč, velikonoční, velykų, vezë, vezë për t'u ngjyrosur, veľkonočné, värjäys munat, watoto cake, wielkanoc, wyau, wyau lliwio, xô, y pasg, yumurta, zajačikovia, zajíčci, zajček, zam nga plstilina, zaun, zaķis, zaķus, ze, zeko, zimnej porcelany, zuckerfigürchen, zuckermasse, zuikiai, การสร้างแบบจำลอง, กาวจาก plstilina, กระต่ายกระต่ายอี� � � � � �เตอร์, รั้ว, พอร์ซเลนเย็น, ขั้นตอนโดยขั้นตอ� � � � � �, ดินโพลิเมอร์, ถัง, ກາວຈາກ plstilina, સસલાંનાં પહેરવેશમાં, પોલિમર ક્લે, ສ້າງແບບຈໍາລອງ, ચિલ્ડ્રન્સ કેક, ຂັ້ນຕອນທີໂດຍຂັ້ນ� � � � � �ອນ, ઇસ્ટર, ઇંડા, ઉત્તરોત્તર, ດິນເຜົາ polymer, ઠંડા પોર્સેલેઇન, બન્ની, બાળકો માટે કેક, બાલદી, ຮົ້ວ, મોડલ બનવું, રંગપૂરણી ઇંડા, વાડ, ಪಾಲಿಮರ್ ಕ್ಲೇ, ಈಸ್ಟರ್, ಬನ್ನಿ, ಬಣ್ಣ ಮೊಟ್ಟೆಗಳು, ಬೇಲಿ, ಬಕೆಟ್, ಮಾಡೆಲಿಂಗ್, ಮೊಟ್ಟೆಗಳು, ಮಕ್ಕಳ ಕೇಕ್, ಮಕ್ಕಳು ಕೇಕ್, ಶೀತ ಪಿಂಗಾಣಿ, ಹಂತ ಹಂತವಾಗಿ, सजा केक, ट्यूटोरियल मास्टर वर्ग, अंडे, ईस्टर, केक बच्चों, कदम, कदम से कदम, कदम दर कदम निर्देश, ठंड चीनी मिट्टी के बरतन, तकनीक, बनी, बाल्टी, बाड़, बच्चों के लिए केक, बहुलक मिट्टी, मॉडलिंग, मोडलिंग, रंग अंडे, পলিমার মৃন্ময়, ডিম, ইস্টার, খরগোশ, ঠান্ডা চীনামাটির বাসন, ধাপে ধাপে, বালতি, বাচ্চাদের জন্য পিষ্টক, বেড়া, ভাব ডিম, মূর্তিনির্মাণ, শিশুদের ইসলাম, শশ, பாலிமர் களிமண், படிப்படியாக, பன்னி, ஈஸ்டர், குழந்தைகளுக்கு கேக், குழந்தைகள் கேக், குளிர் பீங்கான், முயல் குட்டிகள், முட்டை, மாடலிங், வேலி, வாளி, வர்ண முட்டைகள், స్టెప్ బై స్టెప్, పాలీమర్ క్లే, పిల్లల కేక్, పిల్లల కోసం కేక్, చల్లని పింగాణీ, ఈస్టర్, కలరింగ్ గుడ్లు, కంచె గుడ్లు, బన్నీ, బన్నీస్, బకెట్, మోడలింగ్, เค้กสำหรับเด็ก, เค้กเด็ก, ไข่, ไข่สี, ໄຂ່, ໄຂ່ coloring, აღდგომა, ც�?ვ�? ფა�?ფურ�?, პოლ�?მერ�?ს თ�?ხ�?ს, საღებარ�? კვერცხ�?, ტორტ�? საბავშვო, ბავშვთა ტორტ�?, ბოცვერ�? bunnies, ეტაპობრ�?ვად, კვერცხ�?, მოდელ�?რება, მოდელ�?რებ�?ს საწყ�?ს�? plstilina, ღობე, バニー、イースター、フェンス、卵� � � � � �着色卵、バケット, ポリマー�?土, モデリング, モデル, ägg, ämpäri, æg, çit, çocuk kek, çocuklar için pasta, étape, étape par étape les instructions, ílu polyméru, öğretici, 一步, 一步一步來, 一步一步来, 一步一步的指示術, ċint, žingsnis, žingsnis po žingsnio, žogu, šalto porceliano, łyżka kolorowanki, 儿童蛋糕, 兒童蛋糕, 兔子,兔子,復活節,圍欄,雞蛋,� � � � � �色雞蛋,桶, 兔子,兔子,复活节,围栏,鸡蛋,� � � � � �色鸡蛋,桶, 冷たい磁器, 冷瓷, 子供のためのケーキ, 子供のケーキ, 宗師級教程, 宗師級教程,一步,一步一步的指示� � � � � � �技術,udžbenik, 少しずつ, 建模, 聚合物�?土, 胶从plstilina, 裝飾蛋糕, 膠從plstilina, 蛋糕为孩子们, 蛋糕為孩子們, 造型, 黏土教程, 계란, 모델링, 단계적으로, 만들기 제작 과정, 부활절, 색칠 달걀, 울타리, 슈가모델링, 아이들�? 케이크, 어린이를위한 케이크, 차가운 도자기, 폴리머 클레이, 토끼, 통, κουνελάκια, κουβάς, κέικ παιδικά, κρύο πορσελάνη, κόλλα από plstilina, βήμα, βήμα προς βήμα, βήμα προς βήμα οδηγίες, οδηγίες βήμα βήμα, μοντελοποίηση, πολυμερές πηλό, πάσχα, παντεσπάνι art, τούρτα για τα παιδιά, τα αυγά, τα αυγά χρωματισμός, τεχνικές, φροντιστήριο, φράχτη, дитячий торт, декорация на торти стъпка по стъпка, детска торта, децата торта, дзіцячы торт, инструкция, корак по корак, кофа, кофата, как сделать, кашика, клей из plstilina, клей з plstilina, крок за кроком, крок за крокам, ограда, от днес за днес, оцветители яйца, великден, велигден, вядро, відро, покроково, полимер глина, полимерной глины, полимерна глина, полимерная глина, полимерске глине, полімерної глини, пошагово, пошаговые фотки, пакрокава, палімернай гліны, паркан, паска, пасха, персонажи, плот, миниатюра, мк, мк детский тортик "зайчики -художники", мк торт "пасхальная корзинка с зайчиком", моделиране, моделиране от plstilina, моделирање, моделирање из плстилина, моделовање, майстор-класа урок, майстар-клас, майстер-клас, майстер-класи, маршмеллоу, мастика, мастер-класс, бо�?адисување �?а�?ца, бунни, бъни, зд торт, зд торта, зайчики, зайчета, зайчыкі, заяц, заєць, зеке, ладно порцелан, лепка, лепак од plstilina, ліплення, ліплення з плстіліна, розфарбовування яєць, размалёўка яйкаў, ручной работы, ручная работа, украшение тортов, сахарная мастика, уроки прикрашання, ускрс, студен порцелан, стъпка, стъпка по стъпка, стъпка по стъпка инструкции, яйкі, яйца, яйця, торт для дзяцей, торт для дітей, торта за деца, торта за децу, торта стъпка по стъпка, техники, техника, техніка, туториал, туторіал, тэхніка, фигурки, фигурка на торт, фимо, фарбање �?а�?а, фігурки, фігуркі, холодний фарфор, холодный фарфор, халодны фарфор, хладно порцелана, чекор по чекор, шаг за шагом, інструкцыя, інструкція, �?а�?а, �?а�?ца, ארנבות, מאָדעלינג, עמער, עגגס, עוגה לילדים, באני, בונניעס, ביצי צביעה, ביצים, גדר, דלי, דבק מplstilina, חימר פולימרים, יס�?ער, כיור, פּאָלימער ליים, פּלוי�?, פסחא, פורצלן קר, צעד אחר צעד, קאַלערינג עגגס, קאַל�? פּאָרצעלייַ, קראָליק, קליי פון פּלס�?ילינאַ, קינדער 'ס ש�?יקל, שרי�? דורך שרי�?, ש�?יקל פֿאַר קידס, بنی، bunnies، ایسٹر، باڑ، انڈے، رنگائ انڈے، بالٹی, بچوں کے لئے کیک, بچوں کے کیک, سرد چینی مٹی کے برتن, پولیمر مٹی, قدم بہ قدم, ماڈلنگ  |
|

