|
|
–Ь–Ъ –ї–µ–њ–Ї–∞ "–°—Г–Ї–Ї—Г–ї–µ–љ—В —В–µ—А—А–∞—А–Є—Г–Љ"-How to make a succulent terrarium V3
|

28.08.2013, 07:10
|
|
–Ь–µ—Б—В–љ—Л–є
|
|
–†–µ–≥–Є—Б—В—А–∞—Ж–Є—П: 14.08.2013
–°–Њ–Њ–±—Й–µ–љ–Є–є: 1,101
|
|

–Ю–≥—А–Њ–Љ–љ–∞—П –±–ї–∞–≥–Њ–і–∞—А–љ–Њ—Б—В—М –Р–≤—В–Њ—А—Г Donna –Ј–∞ –Ь–∞—Б—В–µ—А-–Ї–ї–∞—Б—Б
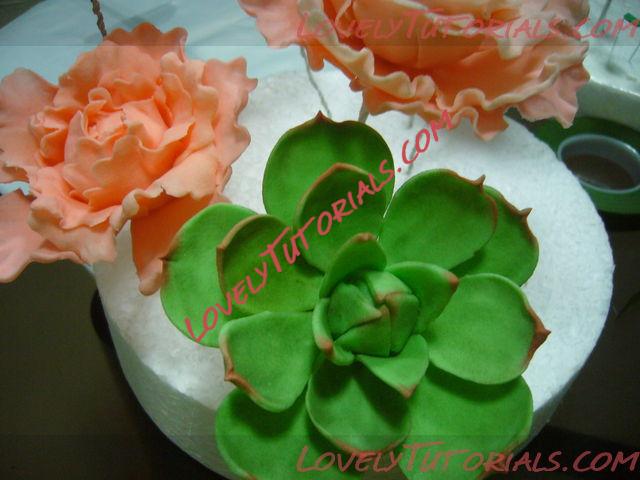
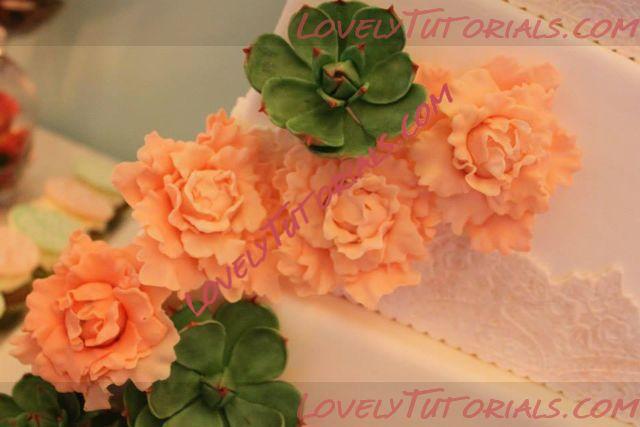
HereвАЩs how I made the sugar succulents.
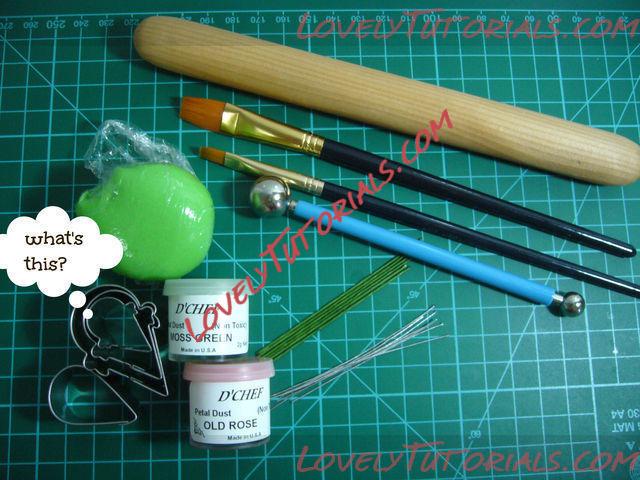
You will be needing:
1. Colored gumpaste. For this project I had colored it mint green with a little moss green. Let the colored gumpaste rest before using.
2. Floral wires gauge # 22 and # 26, cut into four inches long. (gauge # may vary depending on the size and thickness of your leaf). In the photo the thin floral wire, guage #26 has a silver foil coating. It is not a naked wire  .
3. Teardrop or rose cutters. I know you are wondering why my cutter looks odd  it is because it is an ice cream on a cone cutter. My teardrop cutters are way too big for the size I am going to make. So, I made used of what I have. YouвАЩll see later.
4. Petal Dust: Moss Green and Old Rose.
5. Ball tool.
6. Flat medium stiff bristle paint brush.
7. Cutting Mat.
8. Rolling pin
9. Sharp Craft Knife (not in photo)
10. Foam pad (not in photo)
11. Gum glue (not in photo)
12. Styrofoam block, flower formers, drying rack. (not in photo)
13. Vegetable shortening (not in photo) вАУ used to prevent gumpaste from sticking on cutting mat, rolling pin and from the ball tool.
14. Floral Tape (not in photo)
15. Pearl Luster dust (not in photo)
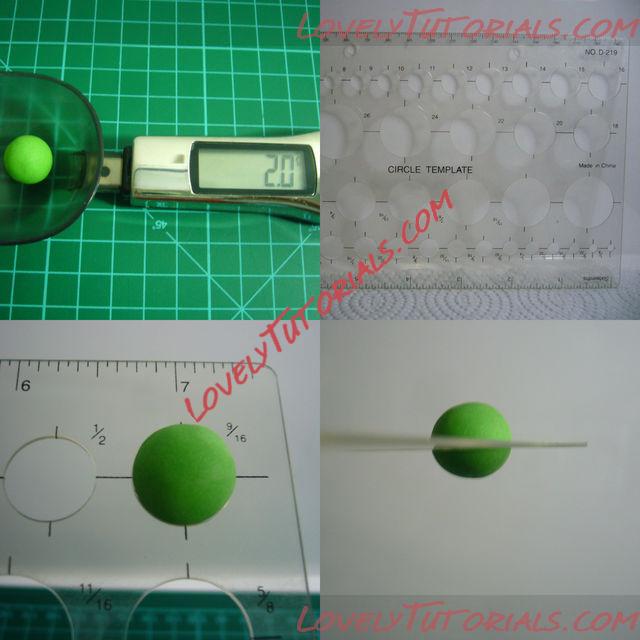
1. We will start with the bud. Roll out a small ball about 2 grams of gumpaste. If you donвАЩt have a weighing scale, you can eye ball the size depending on how small or big you wanted to create. Another method is by using a circle template that you can purchase in your local craft store or school and office supplies store. Just roll a ball of gumpaste and let it sit through the size of the hole you wanted. Making sure that the ball sits snugly half way through the hole.
2. For the bud, I used the floral wire gauge #22. With a pliers, bend one end to form a hook. Dip that end into water or gum glue. Thread the other end into the ball until the hook is secured in the ball.
Please keep in mind that the size of the first four leaves should be big enough to wrap around the ball.
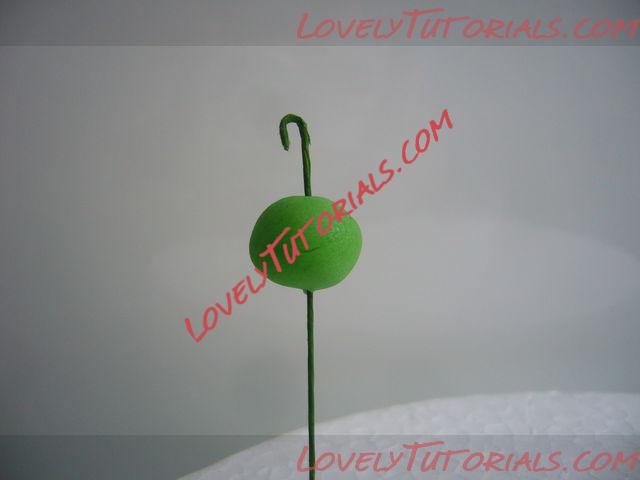
3. Let it dry. Drying time varies depending on the weather and the area you are working or where you are placing your buds to dry. Always keep it away from humidity. It is also important that the bud is completely dry when working on the next step which is attaching the leaves.
4. Succulents are known to have fat/thick leaves. So we need to roll the gumpaste into an eighth or a fourth
of an inch thick. If you have a rolling pin rings, that will do the job easier to have an even thickness.
Once rolled, I used the smallest cutter that I have to cut the first four leaves to cover the ball to make the bud. Since IвАЩm using an ice cream on a cone cutter, I have to trim out the sides to make a clean teardrop shape.
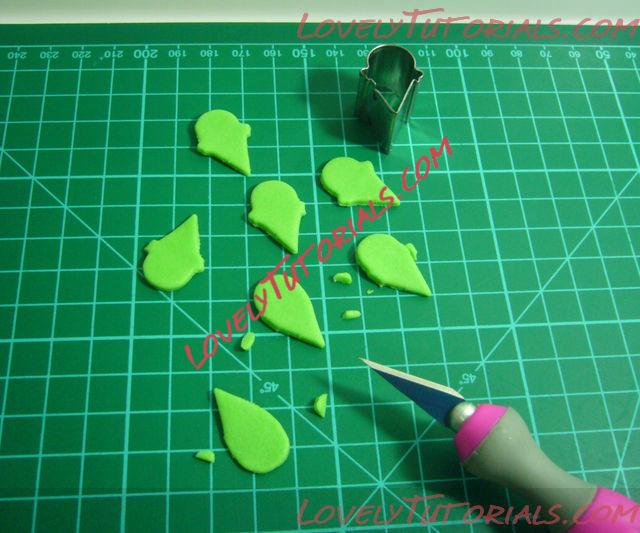
5. Place the teardrop shaped gumpaste onto a foam pad and make an indentation using a ball tool so it will cupped perfectly with the ball. Dab some gum glue and stick it to the ball. Repeat with the remaining three leaves.
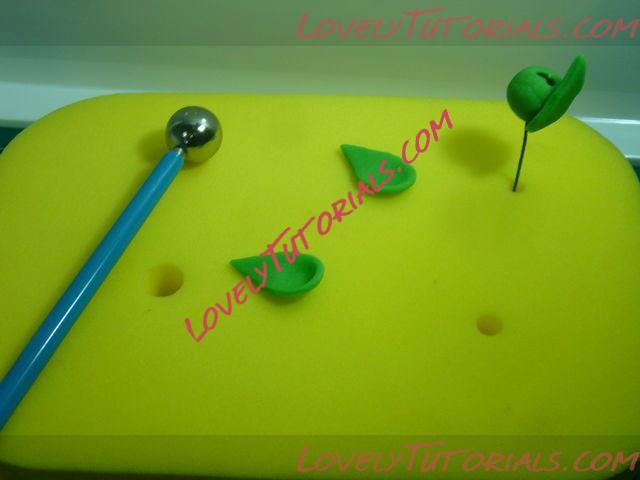
6. After all the four leaves are attached, gather the tips of the leaves and twist it to create a spiral look. Set it aside to dry. I forgot to take a photo before this was dusted 
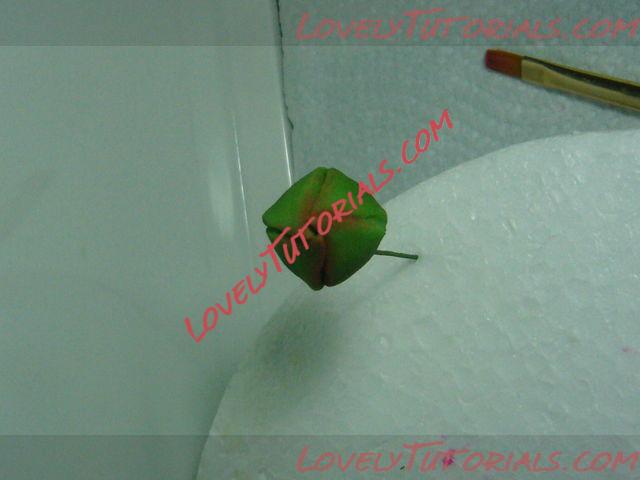
7. For the leaves, cut another four leaves, same size used in making the bud. Make an indentation again and stick it on the side of the bud with a dab of gum glue.This time let the pointed end upright. Pinch the ends to make a pointy end. Hang it to dry on a drying rack or stick the wire on a foam block. When it dries, dab some old rose petal dust on the pointy ends and sides of the bud and dust the the rest of the bud with moss green petal dust. Set aside.
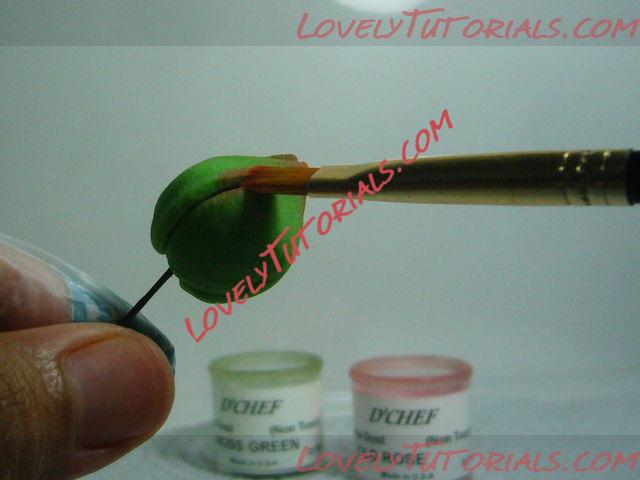
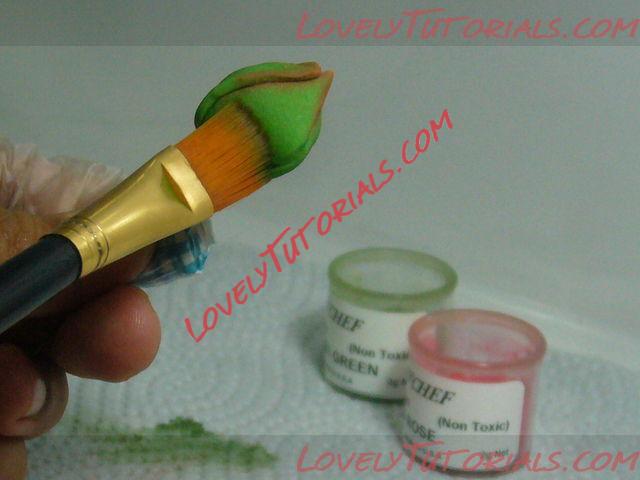
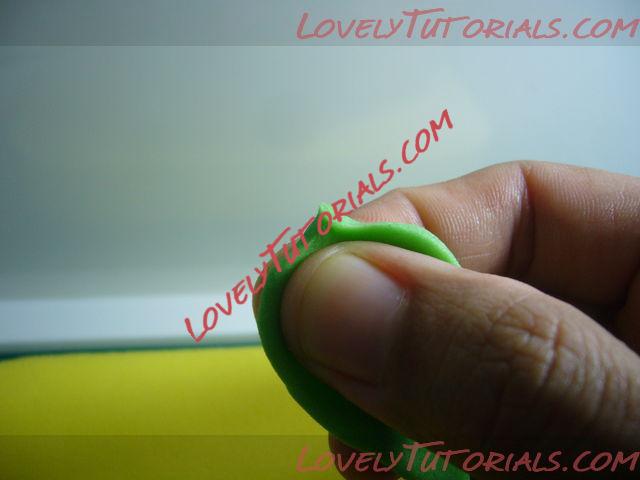
8. For the next set of leaves you need to cut ten to twelve leaves (depending on the size of your bud). Once cut and trimmed, place your left thumb on the edge of the wide part of the leaf. Gently push it towards your two right fingers, while doing so, pinch until you get the center pointy.
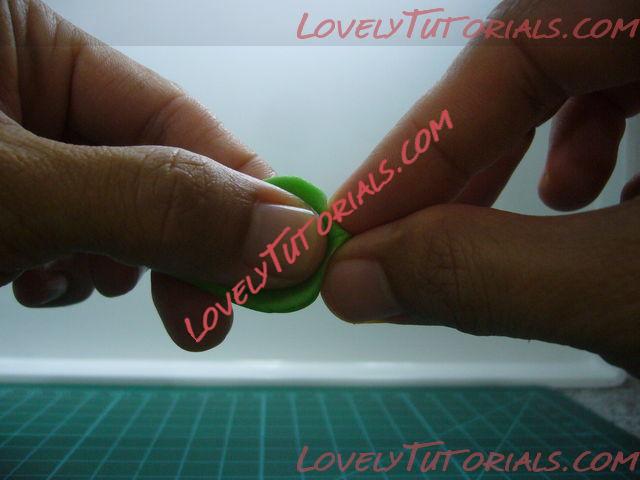
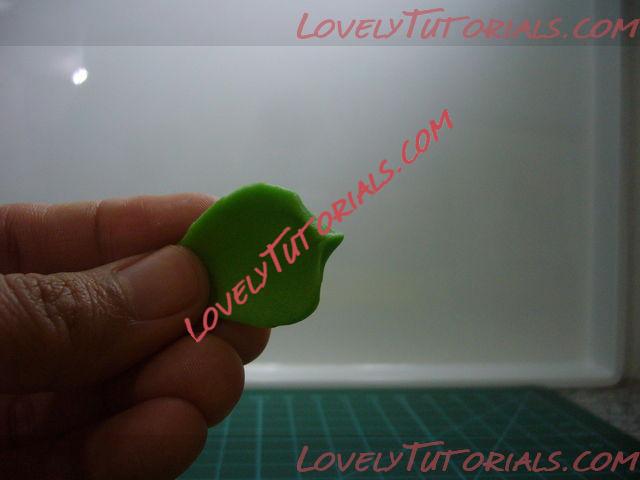
9. Lay it on the foam pad. With a ball tool, starting at the middle, run it through just before the edge of the leaf. Do the same to the other side.
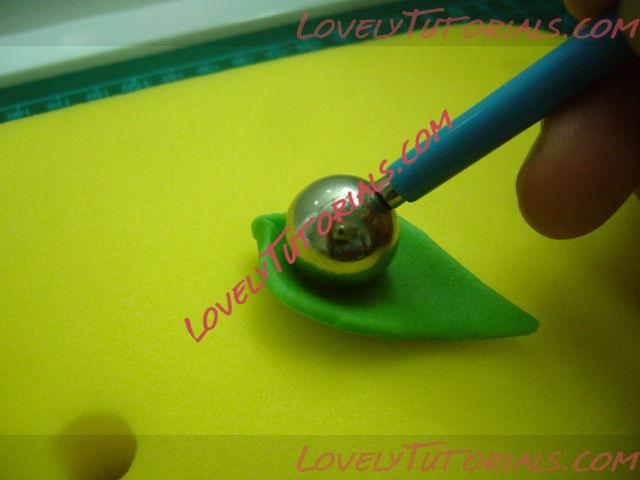
10. To have a nice cupped and wide look, pinch the sides of the leaf like in the photo.
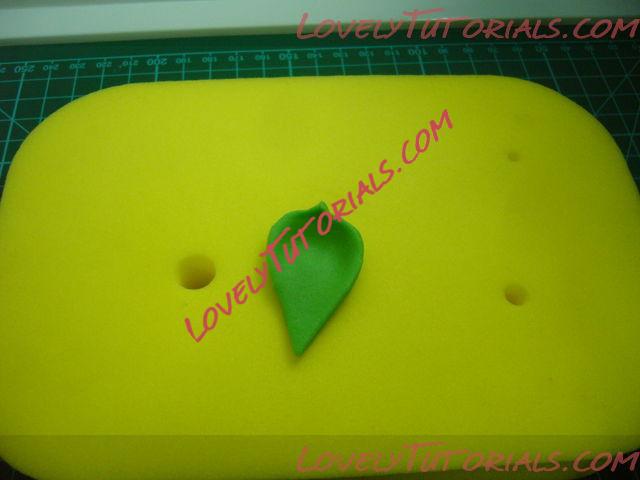
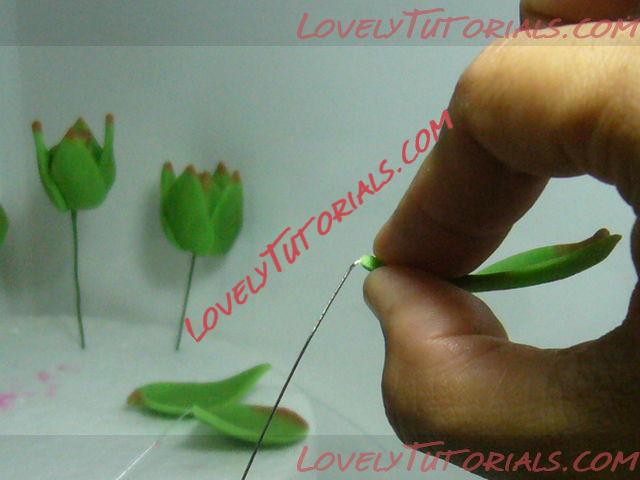
11. Once you get the desired shape, you can get the floral wire gauge #26. Dip it in gum glue and thread it through the end of the pointed part of the leaf. Lay it on flower formers to dry. Do the same to the remaining eleven leaves. If you want a fuller look, just use the next large size of your cutter and make more leaves.
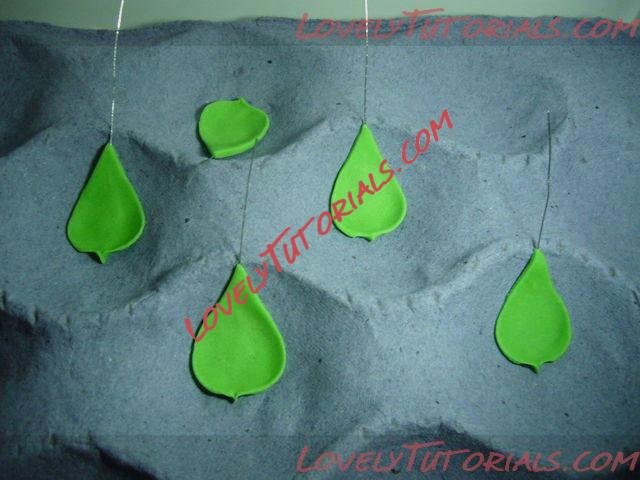
12. Once the leaves are dried, dust the pointed part first with old rose petal dust and the sides near the point before dusting the rest of the leaf with moss green petal dust.
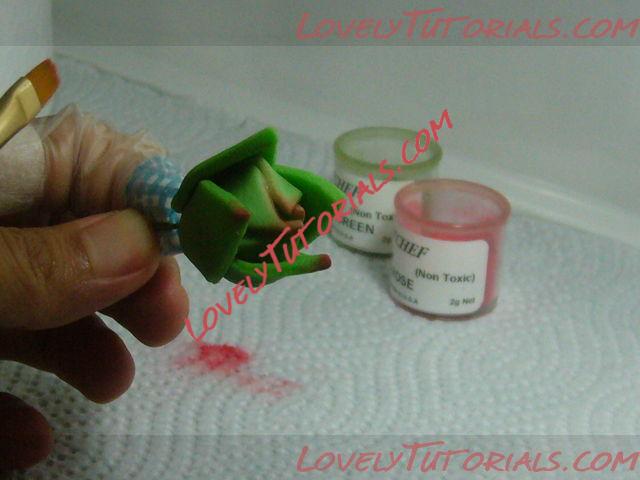
13. Holding the tip of the the leaf, bend the wire down. This will make attaching to the budвАЩs stem easier.
14. To attach the leaf, wrap both wires (from the bud and the leaf) with a floral tape. Wrap every wire to the tip before attaching another. Continue until all leaves are attached.
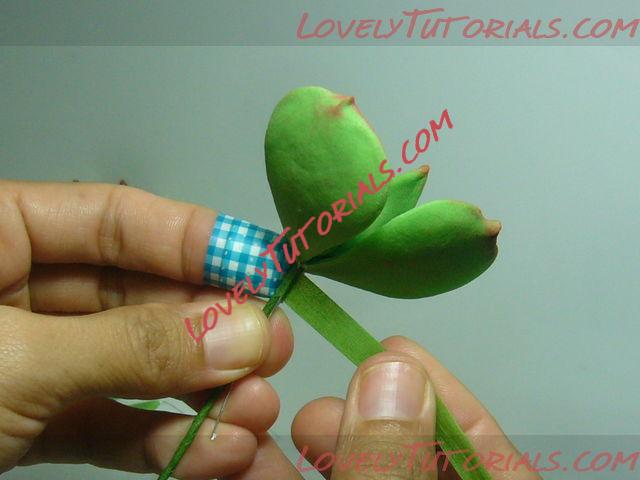
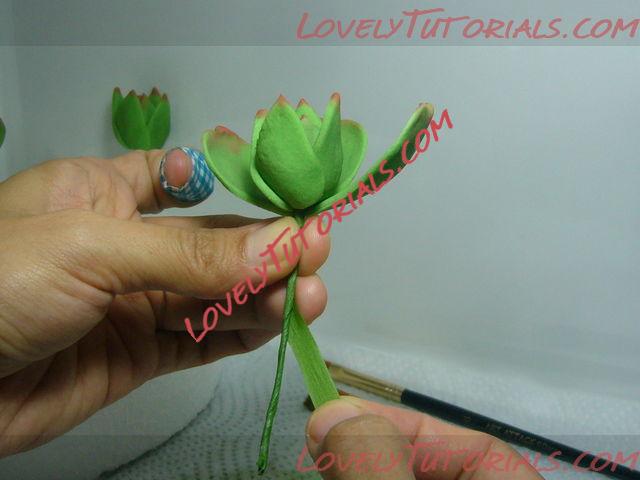
15. See how lovely it is as it starts to take shape 
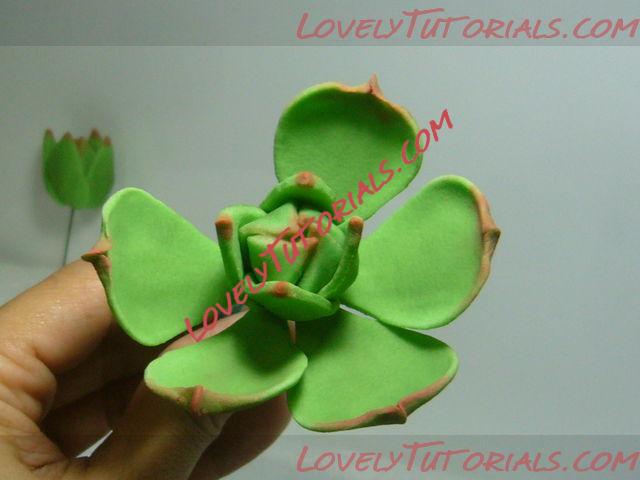
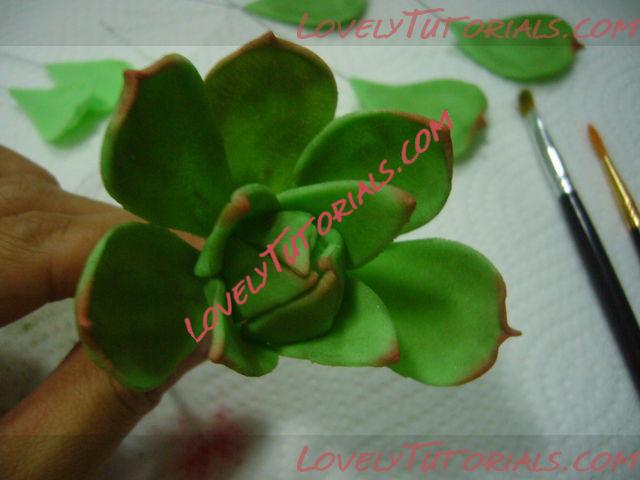
You can now dust it with a pearl luster dust to give it life! And here they are вА¶ before they were wrapped and placed in the cake box.
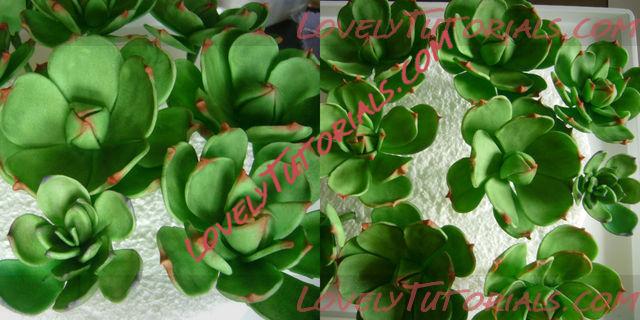
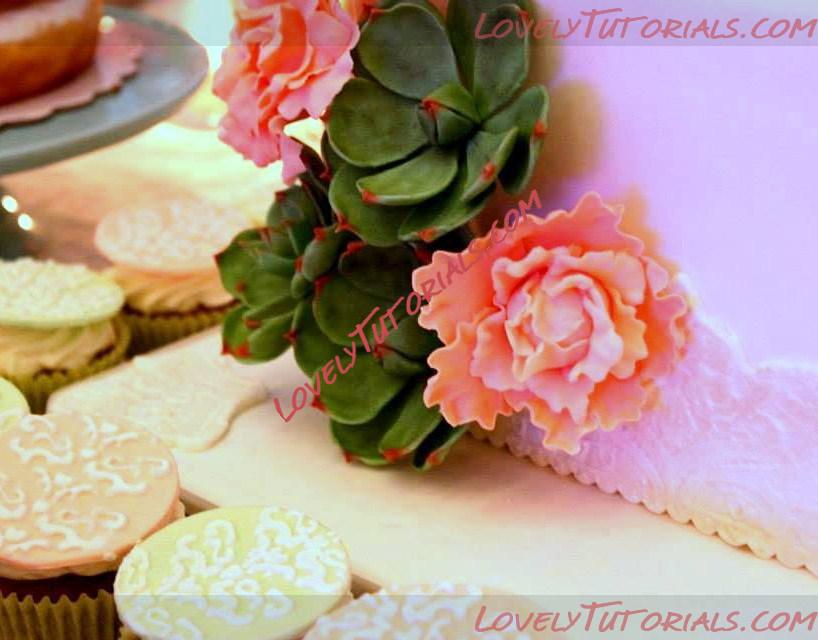
You can vary the sizes and number of leaves to give it character and variations on your sugar succulents.
 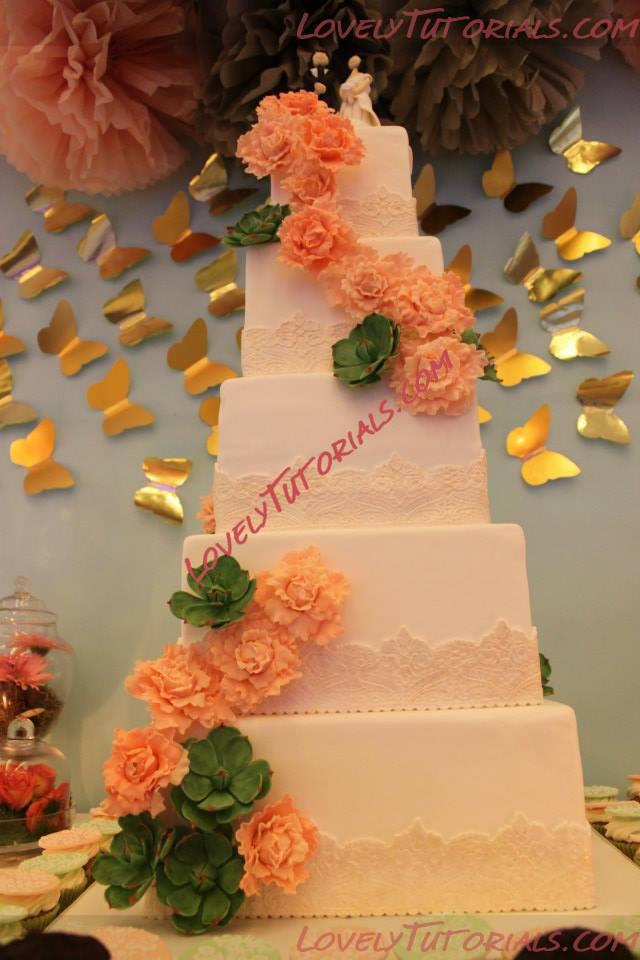
|

14.11.2020, 16:04
|
|
–Р–і–Љ–Є–љ–Є—Б—В—А–∞—В–Њ—А
|
|
–†–µ–≥–Є—Б—В—А–∞—Ж–Є—П: 10.03.2016
–°–Њ–Њ–±—Й–µ–љ–Є–є: 1,030
|
|
|
 |
|
–Ь–µ—В–Ї–Є
|
anlegget, anl√§ggning, armado de los ramos, arranjo, artesanatos passo a passo, augalas, baking, biljka, bitki, blad, blade, blader, bladeren, blatt, bloem, bloemen, blomma, blommor, blomst, blomster, blume, blumen, bl√Љten, bl√Љtenpaste, bl√§tter, boeket, bouquet, buchet, buket, bukett, bukiet, buqu√™, buttercream frosting recipe, cake decorating, cake decorating techniques, cer√Ґmica pl√°stica, chiodi di garofano, chocolate cupcake, clavo de olor, clous de girofle, cloves, cold porcelain, cold porcelain figurines, cold porcelain flowers, confeitando bolos, csokor, cukrini≈≥ gƒЧli≈≥, cupcake, curso completo de flores, curso de modelado, cvijet, cvijeƒЗe, decoracion de pasteles, decoraci√≥n de tortas, decorare le torte, decorazioni, deko fondant, dekorace na dort, dekoracija, dekoracije, dekorasyon, dekor√°cie, edible flower, el abc del armado de ramos, feuille, feuilles, fimo, fimo flowers, fiore, fiori, fleurs, floare, flogistica, flor, floral inspirations, flores, flores azucar, flores e folhas, flori, floristics, floristik, floristikk, floristique, flor√≠stica, flower, flower paste, flowering plants, flowers, flowers on a wire, foglia, foglie, folha, folhas, folhas pintadas, fondan, fondant, fondente, food coloring, fotopostup, frunze, graham cracker crumbs, gum pasta, gum paste, gum paste flowers, gumpaste, gumpaste flowers class, gƒЧlƒЧ, gƒЧlƒЧs, hand painting, handmodelliert, hideg porcel√°n, hladno porculan, hoja, hojas, how to make a succulent terrarium, how t—Ж–≤–µ—В—Л –љ–∞ –њ—А–Њ–≤–Њ–ї–Њ–Ї–µ, impianto, kaldt porselen, kallt porslin, kalt porzellan, kasvi, kolde porcel√¶n, koud porselein, kukka, kukkakimppu, kukkia, kvetina, kvety, kvƒЫtina, kvƒЫtiny, kwiat, kwiaty, kylm√§ posliini, kytica, lapai, lapas, leaf, leaves, lehdet, lehti, levelek, lev√©l, list, list√≠, li≈°ƒЗe, li≈Ыcie, li≈ЫƒЗ, l√≠stia, l√≠stky na dr√°tku, mazzo, mexican chocolate, modellierpaste, modell…Щ≈Яdirm…Щ, modelovanie, modelov√°n√≠, modelowanie, montando, motivtorten, nelken, n√°vody a postupy, n√°vody na kvƒЫty a l√≠stky, n√ґv√©ny, oasis o esponja de floristeria, pap, paso a paso, passo a passo, passo-a-passo, pasta flexible, petal, pflanze, plant, planta, plante, plantes, plantƒГ, pocelana fria, polymer clay, polymer clay flowers tutorial, porcelaine froide, porcelana fria, porcelana fr√≠a, porcellana fredda, postup klinƒНek, postupak za ukrasavanje, puok≈°tƒЧ, ramo, rastlina, rece por≈£elan, rododendron, rostlina, ro≈Ыlina, schritt f√Љr schritt anleitung, schritt-f√Љr-schritt, sculpey flowers, sculpting, simple, soƒЯuk porselen, stamens, steg for steg, step by step, step-by-step, strau√Я, studen√љ porcel√°n, styrofoam, succulent, sugar cane flowers, sugar cloves, sugar flower, sugar flowers, sugar flowers for cake decorating, sugar paste flowers, sugarcraft, sugarpaste, sukker art, technique utilis√©e fleurs en sucre cru, tecnicas de decoracion, tecniche, terranium, thai flowers, torte, torte decorate, torten dekorieren, torti, trin for trin, trin-for-trin, trinn for trinn, tutorial, tutorijal, ukra≈°avanje torti, uputstvo za dekoraciju, vir√°g, vir√°gok, wedding cake, wedding cakes, wire, yaprak, yapraklar, zimno porcelany, zuckerblumen, аЄФаЄ≠аЄБаєДаЄ°аєЙ, а§Єа§Ьа§Њ а§Ха•За§Х, а§Ѓа•Йа§°а§≤а§ња§Ва§Ч, гГҐгГЗгГЂ, √Іi√Іek, √Іi√Іek modelleme, ≈°alto porceliano, еїЇж®°, и£Эй£ЊиЫЛз≥Х, мІДлЛђлЮ?, ќЇѕБѕНќ± ѕАќњѕБѕГќµќїќђќљќЈ, ќЉѕАќњѕЕќЇќ≠ѕДќњ, ќ±ќґќ±ќїќ≠ќ±, ќїќњѕЕќїќњѕНќіќє, ќїќњѕЕќїќњѕНќіќєќ±, ѕДќ± ѕЖѕНќїќїќ±, ѕЖѕНќїќїќ±, ѕЖѕЕѕДѕМ, –Ї–≤–µ—В–Ї–∞, –Ї–≤–µ—В–Ї—Ц, –Ї–≤—Ц—В–Є, –Ї–≤—Ц—В–Ї–∞, –Ї–µ—А–∞–Љ–Є—З–µ—Б–Ї–∞—П —Д–ї–Њ—А–Є—Б—В–Є–Ї–∞, –Ї—Г—Б—В, –≥–≤–Њ–Ј–і–Є–Ї–∞, –њ–Њ–ї–Є–Љ–µ—А–љ–∞—П –≥–ї–Є–љ–∞, –њ–Њ–ї–µ–≤—Л–µ —Ж–≤–µ—В—Л, –њ–Њ—И–∞–≥–Њ–≤–Њ, –њ—А–Є—А–Њ–і–∞, –Љ–Ї, –Љ–Ї –ї–µ–њ–Ї–∞ "—Б—Г–Ї–Ї—Г–ї–µ–љ—В —В–µ—А—А–∞—А–Є—Г–Љ", –Љ–Њ–і–µ–ї–Є—А–∞–љ–µ, –Љ–∞–є—Б—В–µ—А-–Ї–ї–∞—Б–Є, –Љ–∞—А—И–Љ–µ–ї–ї–Њ—Г, –Љ–∞—Б—В–Є–Ї–∞, –Љ–∞—Б—В–µ—А-–Ї–ї–∞—Б—Б, –Љ–∞—Б—В–µ—А-–Ї–ї–∞—Б—Б –њ–Њ –ї–µ–њ–Ї–µ, –∞–Ј–∞–ї–Є—П, –∞–Ј–∞–ї—Ц—П, –±—Г–Ї–µ—В, –Ј–∞–≤–Њ–і, –ї–Є—Б—В–∞, –ї–Є—Б—В—М—П, –ї–Є—Б—В—П, –ї–µ–њ–Є–Љ —Ж–≤–µ—В—Л, –ї–µ–њ–Ї–∞, –ї–µ–њ–Ї–∞ –Є–Ј –≥–ї–Є–љ—Л, –ї–µ–њ–Ї–∞ –Є–Ј –њ–ї–∞—Б—В–Є–Ї–Є, –ї–µ–њ–Ї–∞ —Ж–≤–µ—В–Њ–≤, –ї—Ц–њ–ї–µ–љ–љ—П, –ї—Ц—Б—Ж–µ, —А–Њ—Б–ї–Є–љ–∞, —А–∞—Б—В–µ–љ–Є–µ, —А–∞—Б—В–µ–љ–Є—П, —Г–Ї—А–∞—И–µ–љ–Є–µ —В–Њ—А—В–Њ–≤, —Г–Ї—А–∞—И–µ–љ–Є–µ —В–Њ—А—В–∞, —Б–≤–∞–і–µ–±–љ—Л–є —В–Њ—А—В, —Б–∞—Е–∞—А–љ–∞—П –Љ–∞—Б—В–Є–Ї–∞, —Б–∞—Е–∞—А–љ—Л–є –Ї–ї–µ–є, —Г—А–Њ–Ї–Є –њ—А–Є–Ї—А–∞—И–∞–љ–љ—П, —Б—В—Г–і–µ–љ –њ–Њ—А—Ж–µ–ї–∞–љ, —В–Њ—А—В, —Д–Є–Љ–Њ, —Д–ї–Њ—А–Є—Б—В–Є–Ї–∞, —Д–ї–Њ—А–∞, —Е–Њ–ї–Њ–і–љ–Њ–≥–Њ –њ–Њ—А—Ж–µ–ї—П–љ–Є, —Е–Њ–ї–Њ–і–љ–Њ–≥–Њ —Д–∞—А—Д–Њ—А–∞, —Е–Њ–ї–Њ–і–љ—Л–є —Д–∞—А—Д–Њ—А, —Е–∞–ї–Њ–і–љ–∞–≥–∞ —Д–∞—А—Д–Њ—А—Г, —Ж–≤–µ—В–Њ–Ї, —Ж–≤–µ—В–Њ—З–љ–∞—П –њ–∞—Б—В–∞, —Ж–≤–µ—В–µ, —Ж–≤–µ—В—П, —Ж–≤–µ—В—Л, —Ж–≤–µ—В—Л –Є–Ј –њ–Њ–ї–Є–Љ–µ—А–љ–Њ–є –≥–ї–Є–љ—Л, —Ж–≤–µ—В—Л –Є–Ј —Е–Њ–ї–Њ–і–љ–Њ–≥–Њ —Д–∞—А—Д–Њ—А–∞, —Ж–≤–µ—В—Л –љ–∞ —В–Њ—А—В, —Ж–≤–µ—В—Л —А—Г—З–љ–Њ–є —А–∞–±–Њ—В—Л, —И–∞–≥ –Ј–∞ —И–∞–≥–Њ–Љ  |
|

