|
|
Мак,poppy,mák,pavot,Mohn,papavero,amapola
|

03.05.2012, 17:41
|
|
Администратор
|
|
Регистрация: 07.09.2010
Сообщений: 7,669
|
|
|

22.05.2012, 11:33
|
|
Администратор
|
|
Регистрация: 07.09.2010
Сообщений: 7,669
|
|
 Мак в технике квиллинг
Огромная благодарность Ольга Ольшак за Мастер-класс
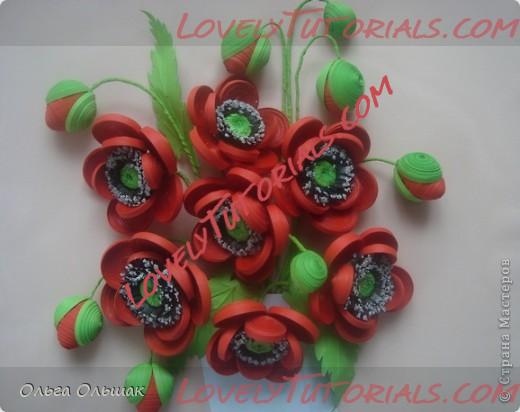 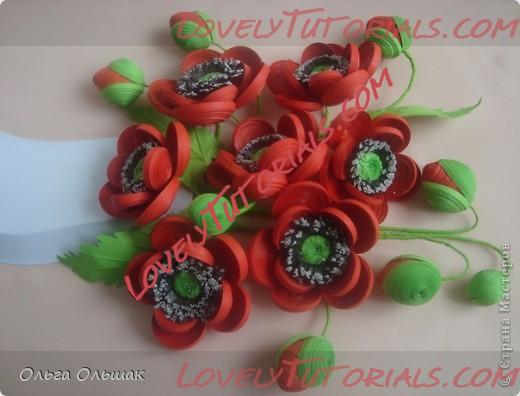 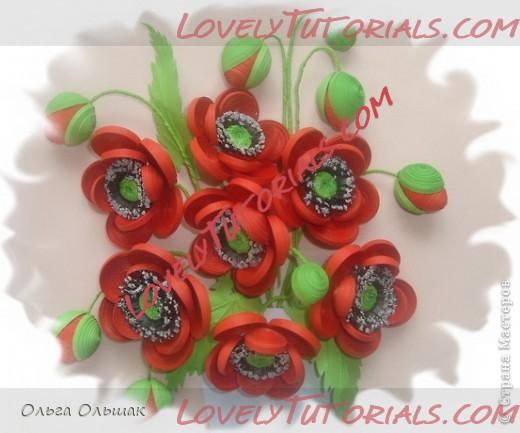
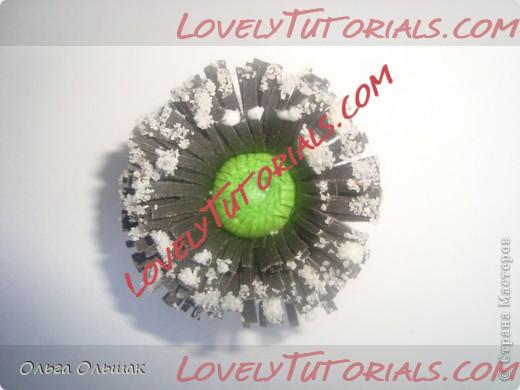
Небольшой урок по изготовлению цветка мака.Для лепестков надо скрутить по 8 полосочек 4 раза и по 12 полосочек 5 раз,получится 9 лепестков для одного цветка.Для серединки приготовить что показано на фото.Далее скрутить в этом же порядке: полоска зелёного цвета,бахрома зелёного цвета и бахрома чёрного цвета.
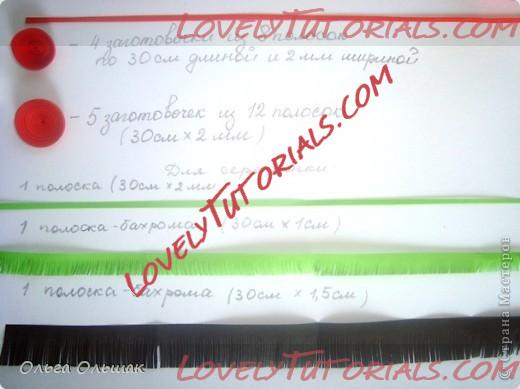
Зелёную бахрому отогнуть к центру и на клей,а чёрную отогнуть от центра намазать клеем и в манку.
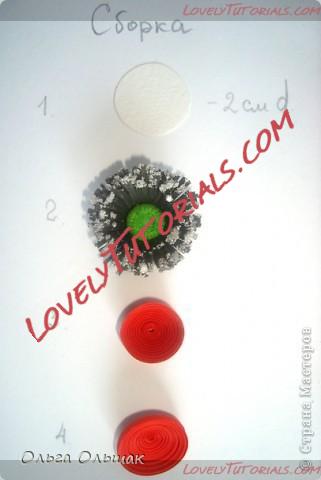
Сборку делала так: вырезала круг диаметром 2 см,намазала его клеем и приклеила серединку.Затем 4 маленьких лепестка на круг как бы "стоя", а большие приклеила под круг "лёжа" и между собой,где прикасались боками.
|

20.07.2012, 18:55
|
|
Администратор
|
|
Регистрация: 07.09.2010
Сообщений: 7,669
|
|
 урок "мак из фимо"
Огромная благодарность Автору otvalentini за Мастер-класс
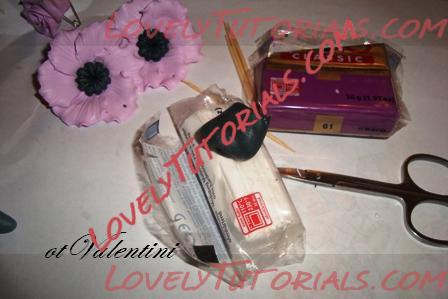 итак начнем:
нам понадобится: ФИМО белый фиолетовый и зеленый
ножнички
палочки зубочистки
и хорошее настроение)))
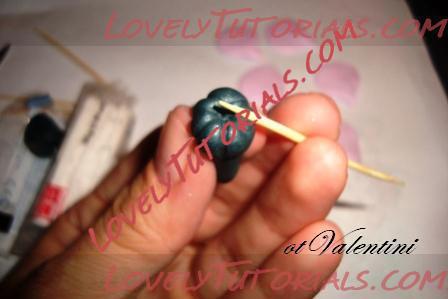
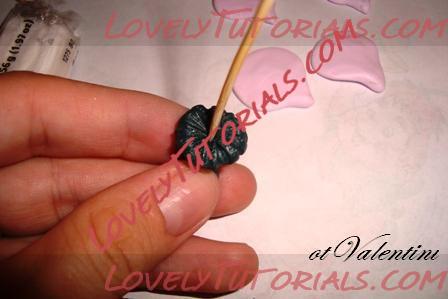
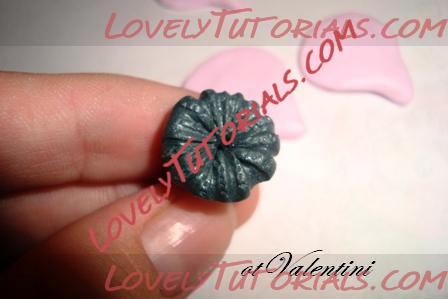
в начале лепим серединку цветка
формируем с помощью зубочистки рельеф
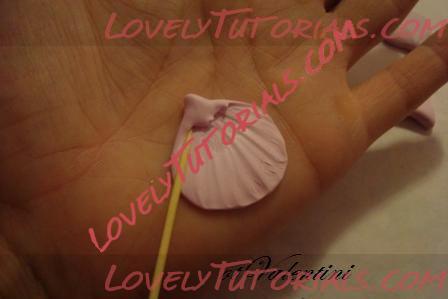
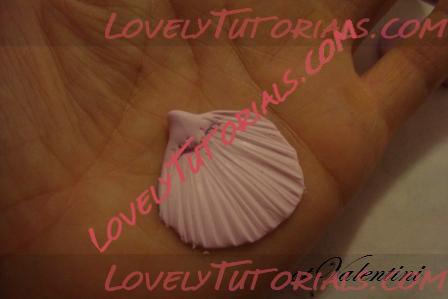
делаем лепестки нам нужно 6 шт, немного сплющив лепесток, кладем его на ладонь
и палочкой з/ч раскатываем движения от серединки к краям, ничего страшного что получается немного грубая текстура, это даже хорошо
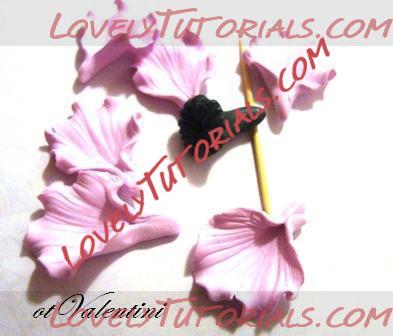
затем с помощью указательного и большого пальца очень аккуратно обрабатываем края получается воланчик...
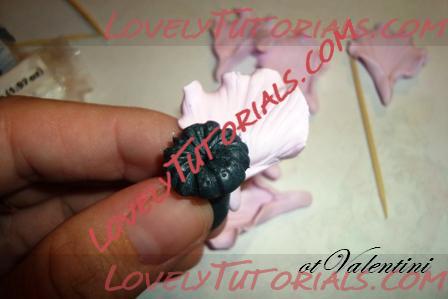
приступаем к сборке, прикладываем первый лепесток и прижимаем его посерединке к тычинке и слева СПРАВА НЕ НАДО!!!
далее так же аккуратно прикладываем все лепестки один к другому...
вот собственно и все, осталось его запечь, только не забываем как я, сделать дырочки для дальнейшего крепления на украшение,теперь придется его приклеивать
|

06.10.2012, 12:19
|
|
Администратор
|
|
Регистрация: 07.09.2010
Сообщений: 7,669
|
|
|

08.10.2012, 15:00
|
|
Администратор
|
|
Регистрация: 07.09.2010
Сообщений: 7,669
|
|
 Iceland poppies tutorial
Огромная благодарность Автору? за Мастер-класс
Iceland poppies
Iceland poppies
All the splendor and warmth of orange and red poppies, together with leaves, assemble a very original and colorful set lor an informal, funny wedding party.
Materials
■ 14-cm diameter round cake
• 20-cm diameter round cake
• 26-cm diameter round cake
• 32-cm diameter cake board
• Sugarpaste I rolled fondant, uncolored
• Royal icing, white and orange
• Gum paste/flower paste, uncolored, green and red
• Paste food coloring, green and orange
• Colors of petal dust yellow, orange and red
•Yellow thread
• Floristry wire
•Floristry tape, green
Method
Coat the cakes and the board with uncolored sugarpasre (see page 8). Arrange the cakes in layers and stick them together, and to the board, with royal icing Using a piping bag with white royal icing, decorate the base of each cake with some tufts. With a small paper with orange-colored icing, pipe some dots and details on the surface (a). To prepare the Iceland poppies, make a small cone of green gum paste; mark the base with a stick and wire it Wind up several rounds of thread, secure with a wire and cut one of the ends. Place the bundle of thread surrounding the green center (b).
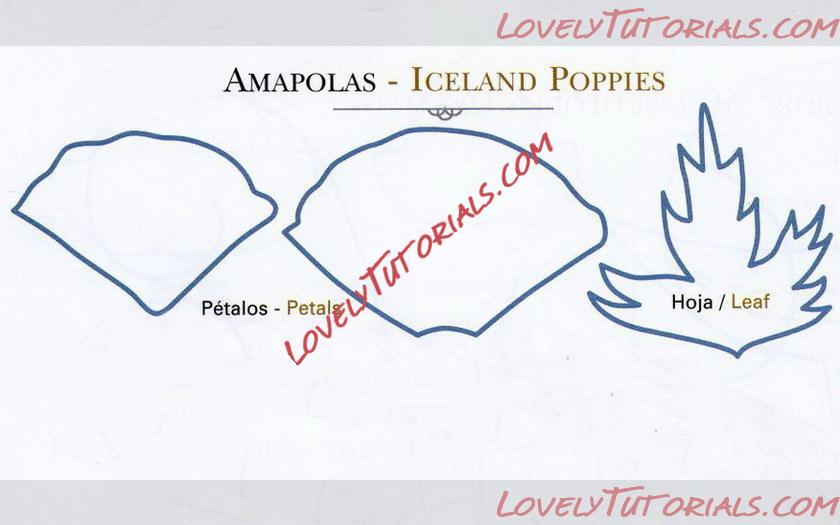
Roll out uncolored gum paste, leaving it thicker at the center. Cut out the petals, two small ones and two large ones for each flower Stamp them with a tool for petals. Refine and curl the edges with a celstick. Wire the petals and allow to dry.
Paint the petals with color dust in yellow, orange and red; make some flowers darker than others |d). Set out four petals around the center and secure with f foristry tape. Form some cones with gum paste; wire them and allow to dry. Roll out paste and cut out two petals. Stamp them and thin the edges. Attach the petals around the cone. Model two small cones of green gum paste and flatten them. Place them at the base of the cone as sepals. Once dried, paint the petals with color dust in yellow and orange, and the sepals with green paste coloring (el Roll out green gum paste and cut the leaves. Mark the veins and rub the edges with a ball tool . Wire the leaves and let dry. Paint the leaves with green paste coloring, and orange at the borders. To assemble the stalks of Virginia creepers, duster the leaves in fives and secure them together Add some little coils made of brown-tinted wire .
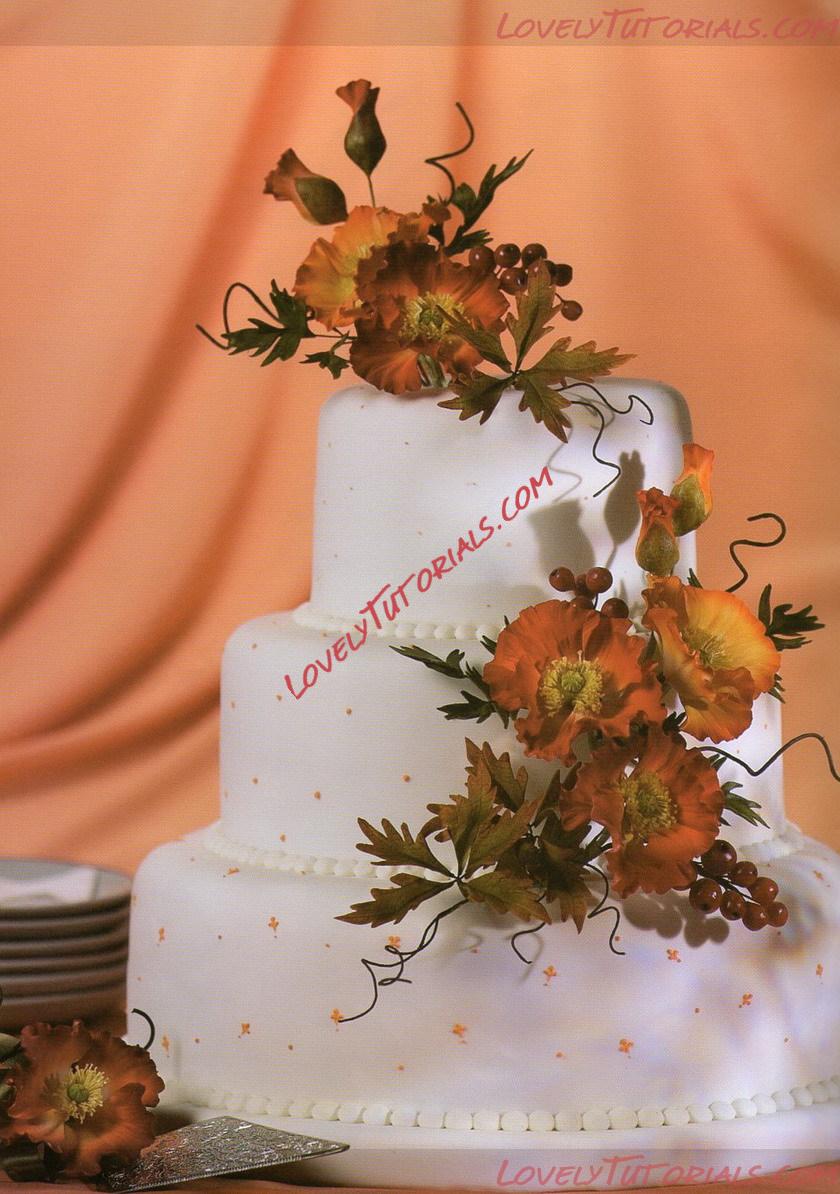
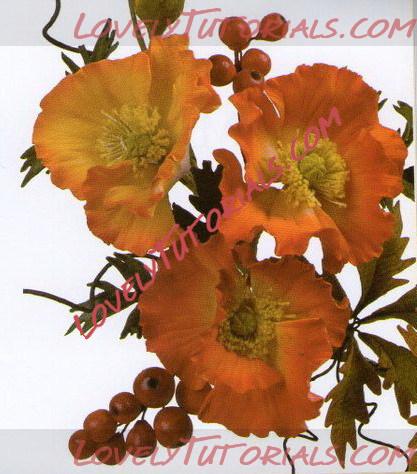
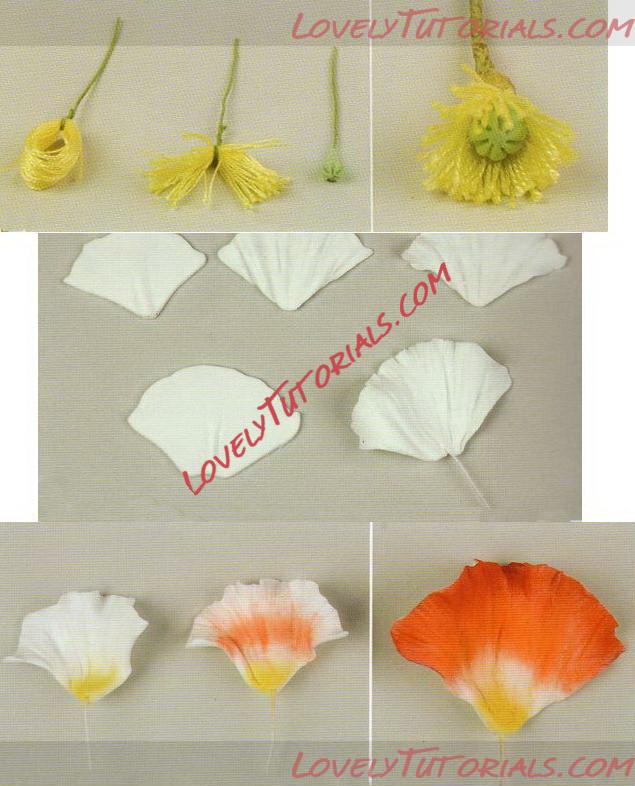
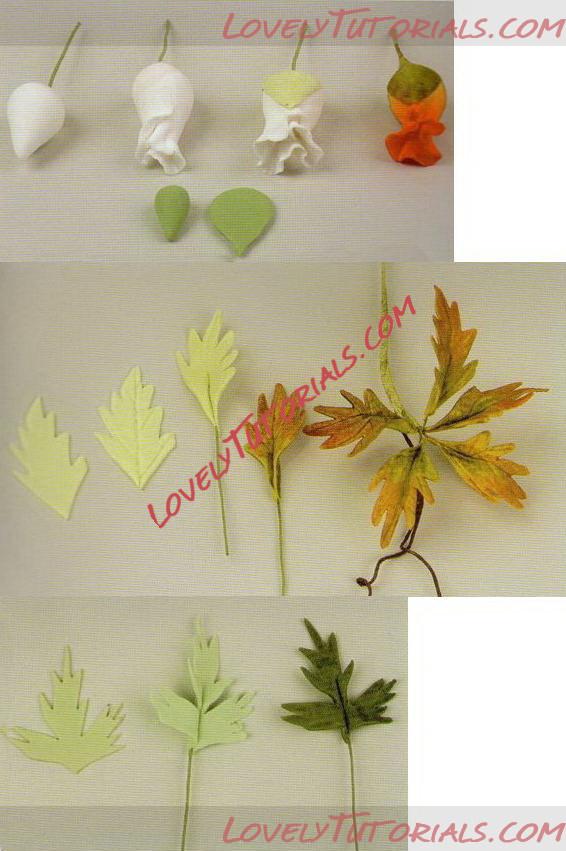
Make some other poppy leaves, following the method above, but with the difference that these are not veined
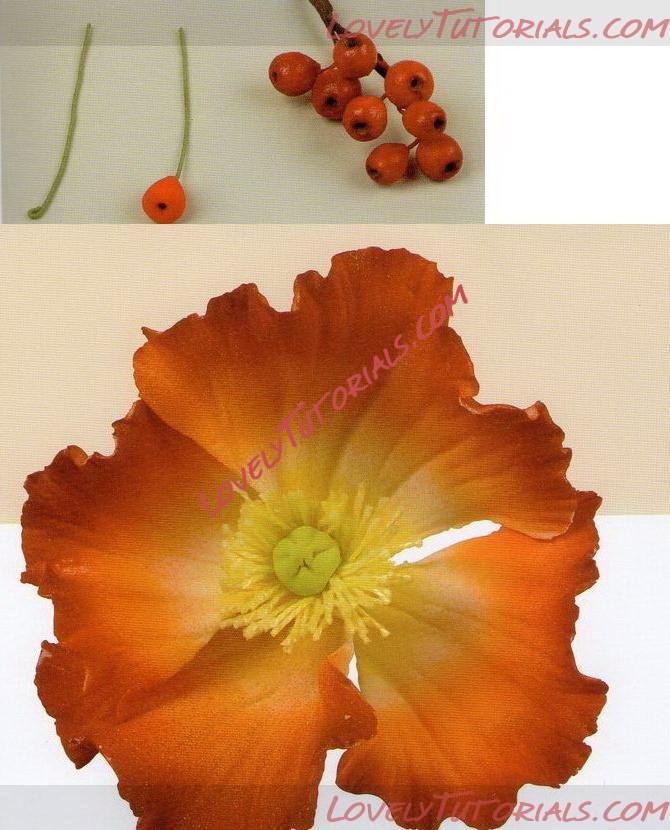
The berries are little balls of red gum paste, wired and stamped on one end. Form clusters of several berries . Assemble the sprays with the poppies at the center, surrounded by clusters of leaves and berries The buds are placed in the upper section of the arrangement
Note: For the bouquets on this cake you will need 5 poppies, 4 buds, 5 clusters of three poppy leaves, 3 clusters of b Virginia leaves and 24 red berries.
|
 |
|
|
Метки
|
aguona, amapola, anlegget, anläggning, armado de los ramos, arranjo, artesanatos passo a passo, augalas, baking, biljka, bitki, blad, blade, blader, bladeren, blatt, bloem, bloemen, blomma, blommor, blomst, blomster, blume, blumen, blüten, blütenpaste, blätter, boeket, bouquet, buchet, buket, bukett, bukiet, buquê, cake decorating, cake decorating techniques, cerâmica plástica, chiodi di garofano, clavo de olor, clous de girofle, cloves, cold porcelain, cold porcelain figurines, cold porcelain flowers, confeitando bolos, csokor, cukrinių gėlių, curso completo de flores, curso de modelado, cvijet, cvijeće, decoracion de pasteles, decoración de tortas, decorare le torte, decorazioni, deko fondant, dekorace na dort, dekoracija, dekoracije, dekorasyon, dekorácie, el abc del armado de ramos, feuille, feuilles, fimo, fimo flowers, fiore, fiori, fleurs, floare, flogistica, flor, floral inspirations, flores, flores azucar, flores e folhas, flori, floristics, floristik, floristikk, floristique, florística, flower, flower paste, flowering plants, flowers, flowers on a wire, foglia, foglie, folha, folhas, folhas pintadas, fondan, fondant, fondente, fotopostup, frunze, gum pasta, gum paste, gum paste flowers, gumpaste, gumpaste flowers class, gumpaste poppy tutorial, gėlė, gėlės, hand painting, handmade, handmodelliert, haşhaş, hideg porcelán, hladno porculan, hoja, hojas, how to, how to make poppy, how tцветы на проволоке, how-to's, hřebíček, impianto, jak na, kage dekoration, kagedekoration, kakebaking, kaldt porselen, kallt porslin, kalt porzellan, kasvi, kolde porcelæn, koud porselein, krok za krokem, kukka, kukkakimppu, kukkia, kvetina, kvety, květina, květiny, kwiat, kwiaty, kylmä posliini, kytica, la modélisation, lapai, lapas, leaf, leaves, lehdet, lehti, levelek, levél, list, listí, lišće, liście, liść, lístia, lístky na drátku, mac, mak, making sugar flowers, marshmallow, masa flexible, mazzo, modelado, modelagem, modelare, modeling, modeling paste, modeliranje, modellazione, modelleme, modellering, modellieren, modellierpaste, modelləşdirmə, modelovanie, modelování, modelowanie, mohn, montando, motivtorten, mák, nelken, návody a postupy, návody na květy a lístky, növény, oasis o esponja de floristeria, pap, papaver, papavero, papoula, paso a paso, passo a passo, passo-a-passo, pasta flexible, pavot, pflanze, plant, planta, plante, plantes, plantă, pocelana fria, polymer clay, polymer clay flowers tutorial, poppy, porcelaine froide, porcelana fria, porcelana fría, porcellana fredda, postup klinček, postupak za ukrasavanje, puokštė, ramo, rastlina, rece porţelan, rododendron, rostlina, roślina, schritt für schritt anleitung, schritt-für-schritt, sculpey flowers, sculpting, simple, soğuk porselen, stamens, steg for steg, step by step, step-by-step, strauß, studený porcelán, styrofoam, sugar cane flowers, sugar cloves, sugar flower, sugar flowers, sugar flowers for cake decorating, sugar paste flowers, sugarcraft, sugarpaste, sukker art, technique utilisée fleurs en sucre cru, tecnicas de decoracion, tecniche, thai flowers, torte, torte decorate, torten dekorieren, torti, trin for trin, trin-for-trin, trinn for trinn, tutorial, tutorijal, ukrašavanje torti, unikko, uputstvo za dekoraciju, vallmo, valmue, virág, virágok, wedding cake, wedding cakes, wire, yaprak, yapraklar, zimno porcelany, zuckerblumen, ดอกไม้, सजा केक, मॉडलिंग, モデル, çiçek, çiçek modelleme, šalto porceliano, 建模, 裝飾蛋糕, 진달�?, κρύα πορσελάνη, μπουκέτο, αζαλέα, λουλούδι, λουλούδια, παπαρούνα, τα φύλλα, φύλλα, φυτό, кветка, кветкі, квіти, квітка, керамическая флористика, куст, гвоздика, полимерная глина, полевые цветы, пошагово, природа, мк, моделиране, мак, майстер-класи, маршмеллоу, мастика, мастер-класс, мастер-класс по лепке, азалия, азалія, букет, завод, листа, листья, листя, лепим цветы, лепка, лепка из глины, лепка из пластики, лепка цветов, ліплення, лісце, рослина, растение, растения, украшение тортов, украшение торта, свадебный торт, сахарная мастика, сахарный клей, уроки прикрашання, студен порцелан, торт, фимо, флористика, флора, холодного порцеляни, холодного фарфора, холодный фарфор, халоднага фарфору, цветок, цветочная паста, цвете, цветя, цветы, цветы из полимерной глины, цветы из холодного фарфора, цветы на торт, цветы ручной работы, шаг за шагом  |
|

