|
|
подсолнухи,sunflowers, slunečnice, tournesols, Sonnenblumen, girasoli, girassóis, gir
|

19.05.2012, 19:25
|
|
Администратор
|
|
Регистрация: 07.09.2010
Сообщений: 7,669
|
|

Огромная благодарность ЕМ за Мастер-класс
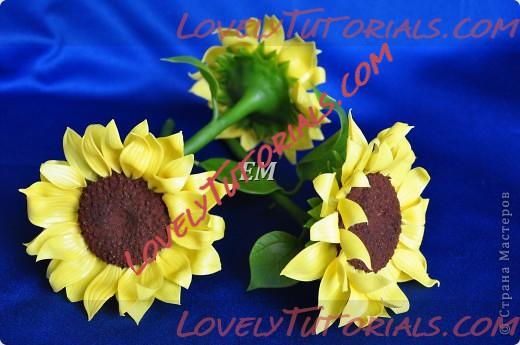
Пока снимался процесс работы - слепились ещё 3 подсолнуха)))
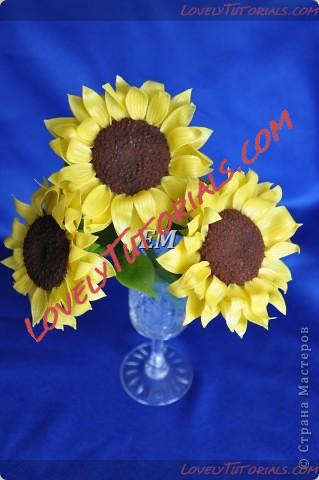
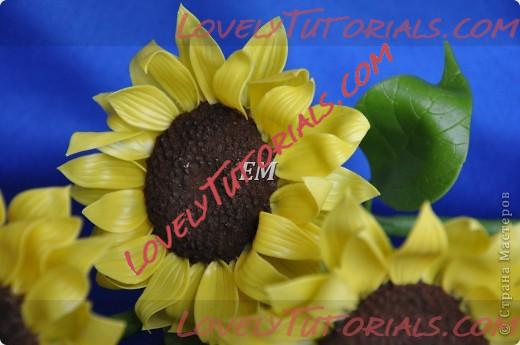
Теперь моё размноженное солнышко на ножке можно раздарить по родным)))
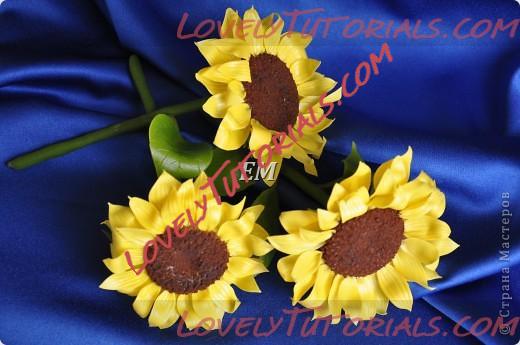
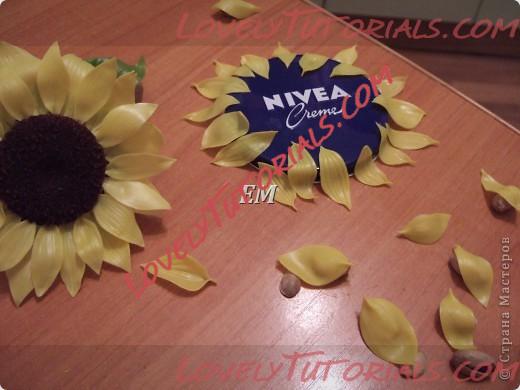
Итак. Сначала лепим лепестки. Что потребуется для работы - всё на фото, письменно не буду перечислять -думаю и так понятно.
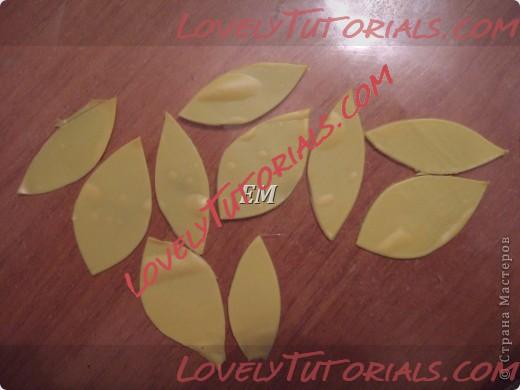
Единственное - я вырезала лепестки каттером листа пиона (всё что есть), поэтому они получились разного размера, но это даже лучше - реалистичнее смотрится.
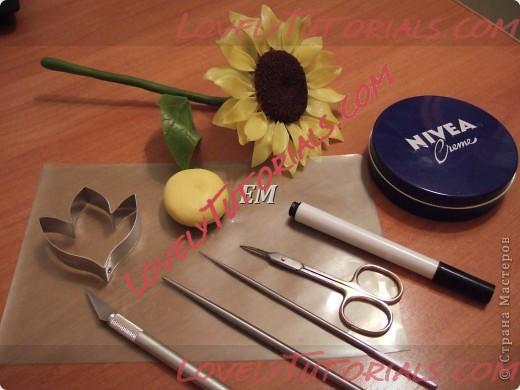
Раскатываем в плёнке кусочек ХФ и каттером вырезаем лепестки.
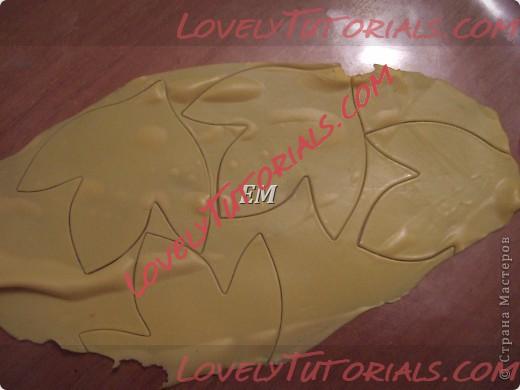
Вот такие лепесточки...
Придаём текстуру и форму лепесткам. Низ лепестка прижимаем и заостряем..
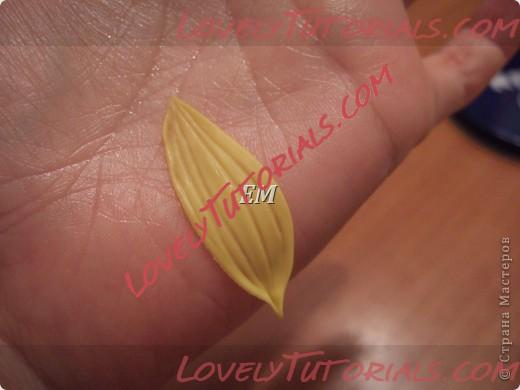
и оставляем сушиться... (у меня где и как только они не сохнут...)
Таких лепестков на один подсолнух с диаметром сердцевинки 5 см у меня ушло около 30-ти штук.
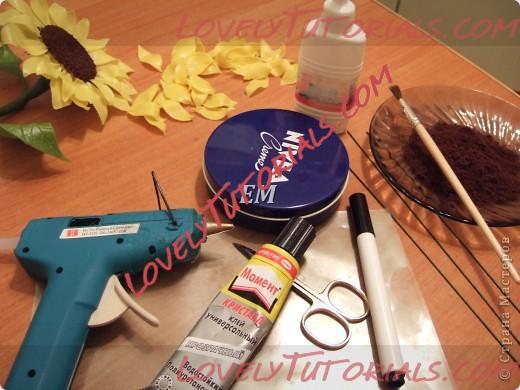
Приступаем к сердцевинке подсолнуха – самой интересной работе. Всё, что потребуется - на фото, в блюдце -молотый кофе.
Понимая, что с такой внушительной серединкой вес цветка будет в итоге не менее внушительным, я решила как-то облегчить серединку. Решала недолго)
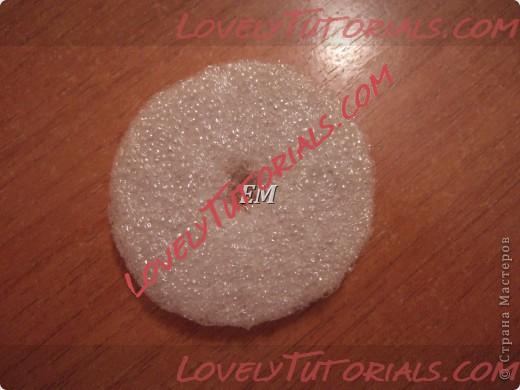
Берём поролон (на фото выше я его как раз и забыла включить в список). Вырезаем из него круг в диаметре на 1 см. меньше желаемого размера серединки цветка. ( У меня серединка была 5 см. в диаметре, значит вырезаем круг, диаметром 4 см.)
Для бОльшей реалистичности – прорезаем в центре круга небольшую воронку.
Толщина поролона у меня 7мм.
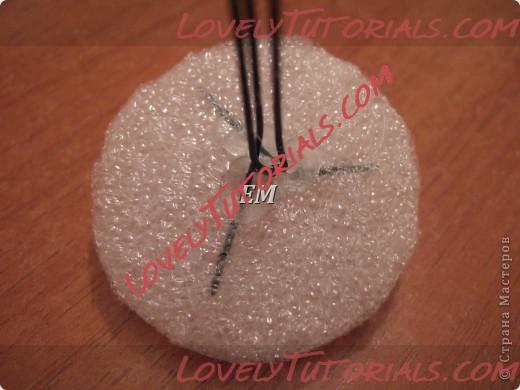
Дальше –делаем стебель. Поскольку вес цветка будет внушительный - нам понадобится 3 проволоки и клей-пистолет.
Смазываем кончик проволоки силиконом и, пока он не застыл, вставляем в поролон – как на фото. В центре все проволоки загибаем и соединяем.
Приклеивается намертво. Проволоки между собой можно скрутить в косичку)))
Берём ХФ, раскатываем блин, толщиной примерно 4-5 мм. (НО не тоньше 3 мм.!). Получившийся блин должен быть больше нашего поролона где-то на 1 см. от края по всему кругу (надеюсь понятно высказалась….на фото – всё видно)
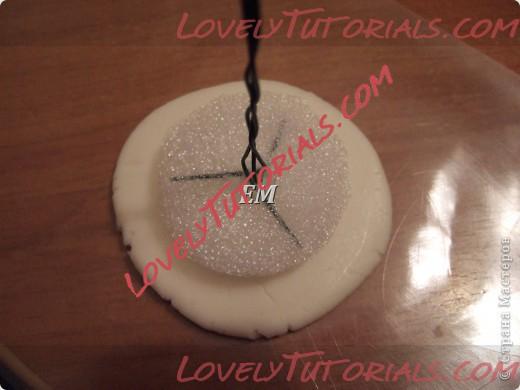
Смазываем наш блин клеем и накладываем его на нашу заготовку из поролона, прижимая края (красоту наводить на внутренней стороне и выравнивать –не обязательно –нам она не пригодится...-это я так оправдала свою неаккуратность)))
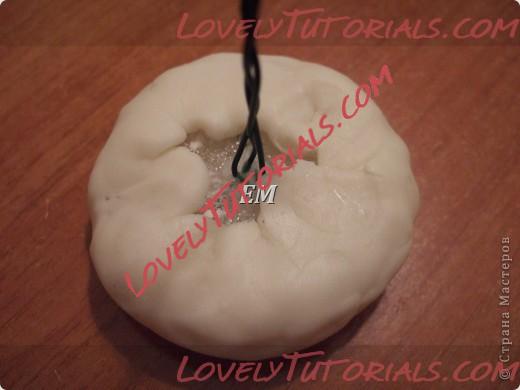
Делаем углубление в нашей воронке, в центре.
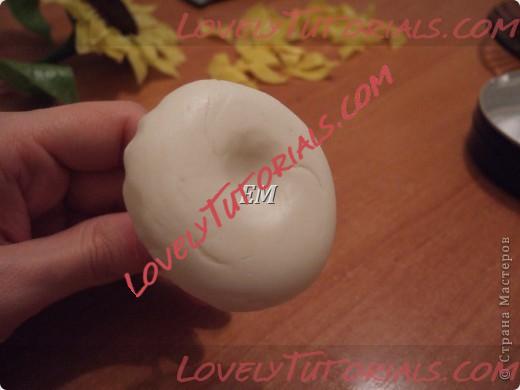
и...от центра начинаем стричь иголки...
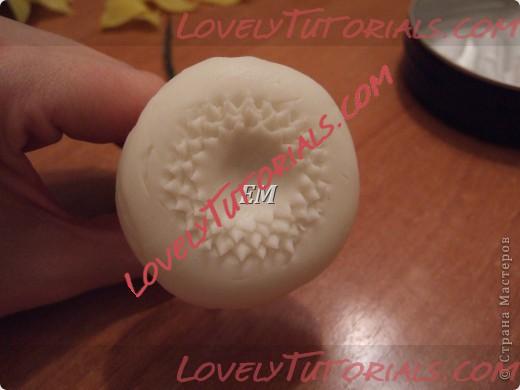
Вот такой ёжик получился)
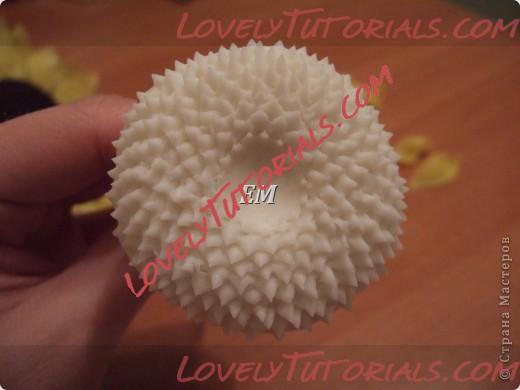
Теперь кисточкой промазываем нашего ёжика клеем по всей поверхности движениями против шерсти иголок – чтобы их растопырить))) (ну и жаргон…уж извините -по-другому не знаю как сказать)
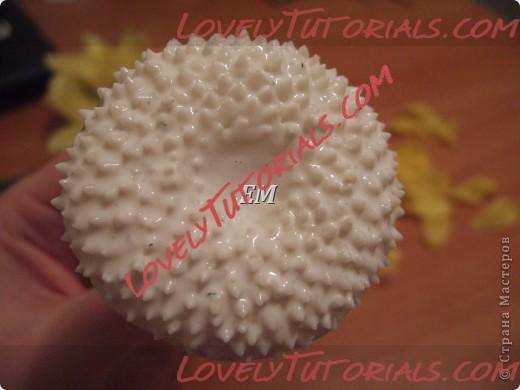
А затем макаем в кофе.
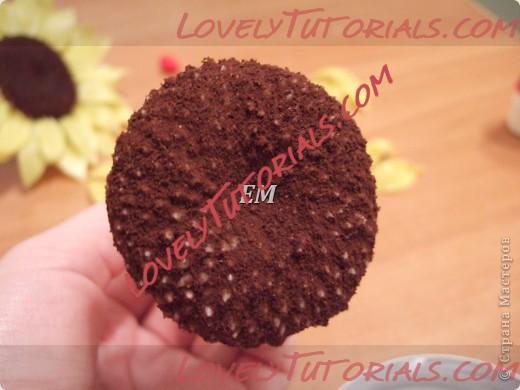
Теперь берём наши полностью высохшие лепесточки и начинаем, макая основание лепестка в клей, втыкать их в ещё не высохшие бока серединки подсолнуха.
Сначала внешний ряд лепестков...
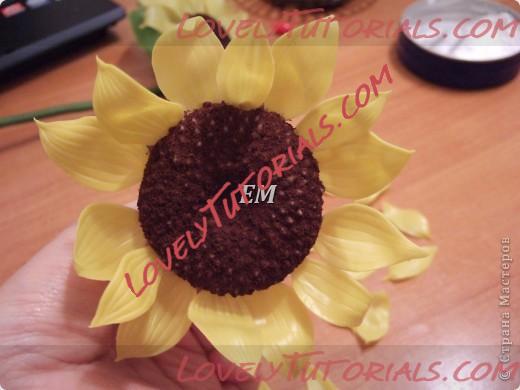
а потом заполняем внутренний ряд...
Вот что получилось...
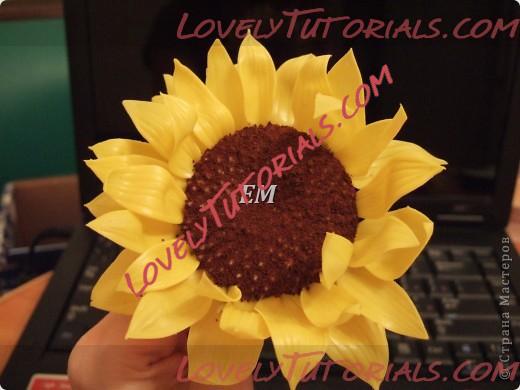
и...оставляем сушиться...
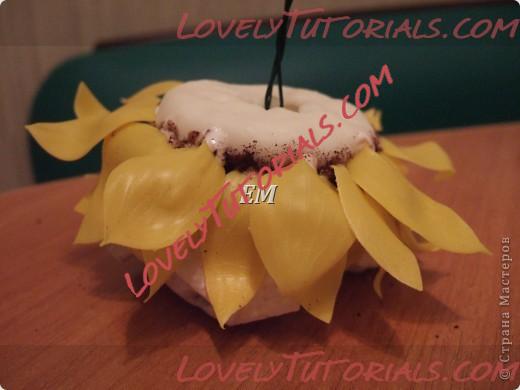
Теперь переходим к зелени.
Но здесь у меня учиться нечему, поскольку с зеленью у меня дела обстоят ужасно -так что покажу только свой вымученный процесс (благо у подсолнухов толщина позволяет, а то я, наверное, совсем не рискнула бы показать весь процесс...)
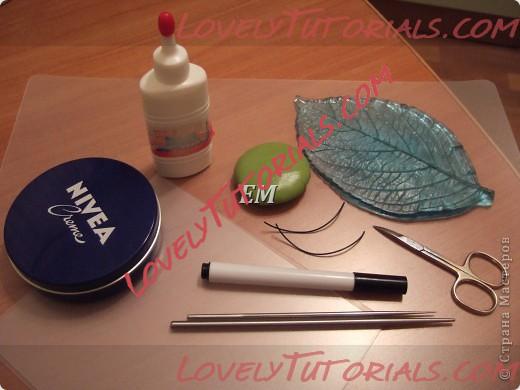
Перед оформлением зелени можно опять немного облегчить конструкцию и я опять использовала кружочек поролона...вот так:
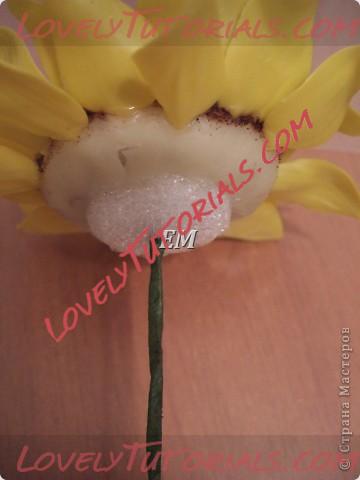
Раскатываем, вырезаем и придаём вот такую форму чашелистикам. Диаметр круга должен быть таким, чтобы кончики чашелистиков на одну треть прикрывали лепестки подсолнуха с внутренней стороны.
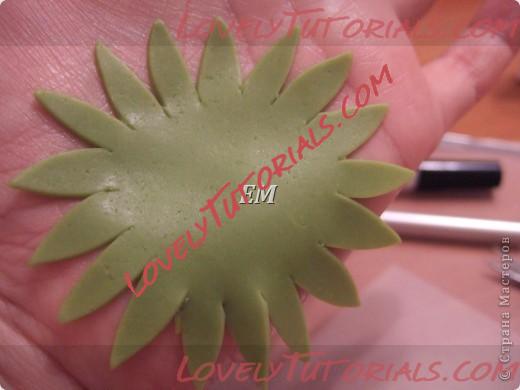
Придаём форму...
ХФ не очень удачный получился, поэтому волнистые супер изогнутые листочки не получились(((

смазываем клеем и лепим)
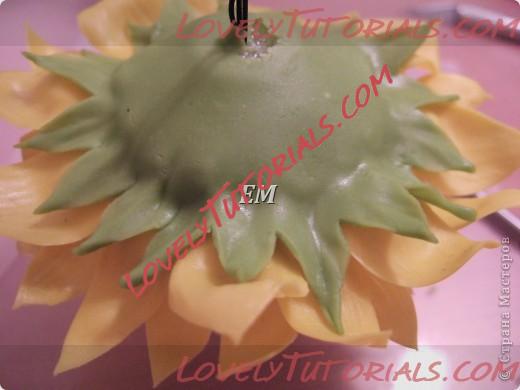
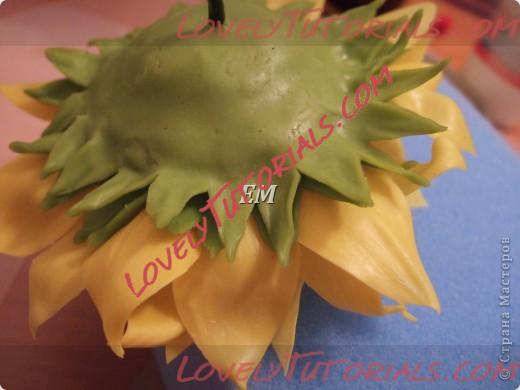
а потом ещё один такой же делаем и лепим сверху предыдущего)
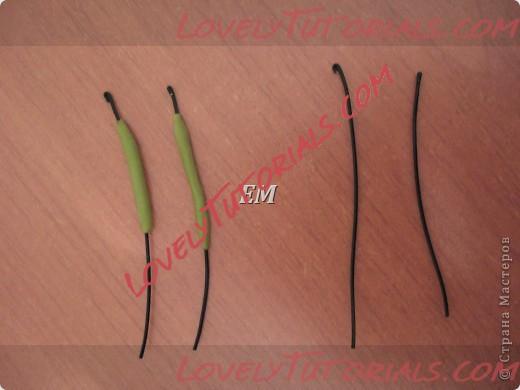
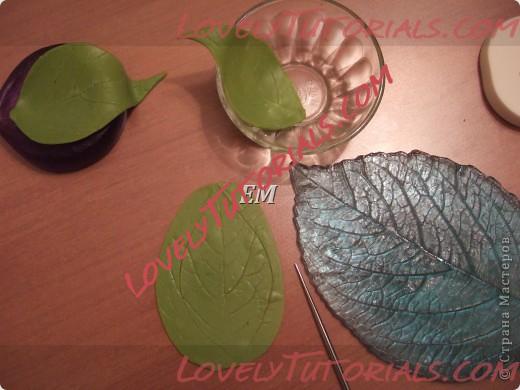
перехожу к листьям...заготавливаю веточки..
раскатываю ХФ, отпечатываю на молде, вырезаю по форме, подсушиваю...
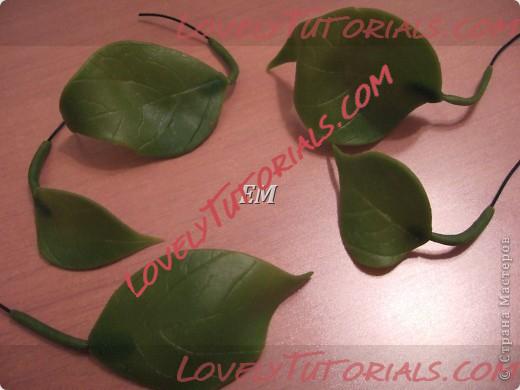
соединяю подсушеные листья с веточками...
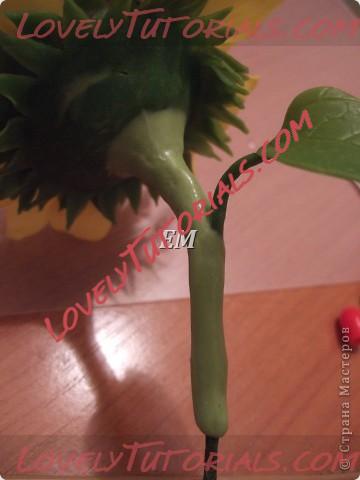
и....объединяю листья с цветком, делая стебель.
ВСЁ!
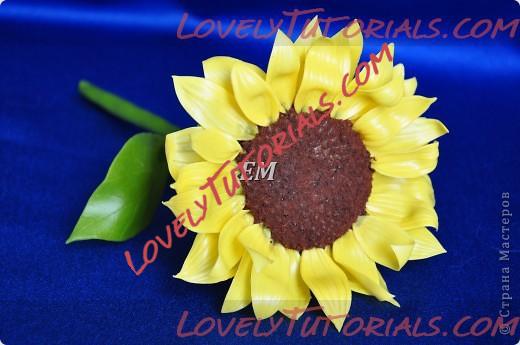
|

22.05.2012, 02:50
|
 |
Новичок
|
|
Регистрация: 20.05.2012
Сообщений: 1
|
|
 Подсолнух
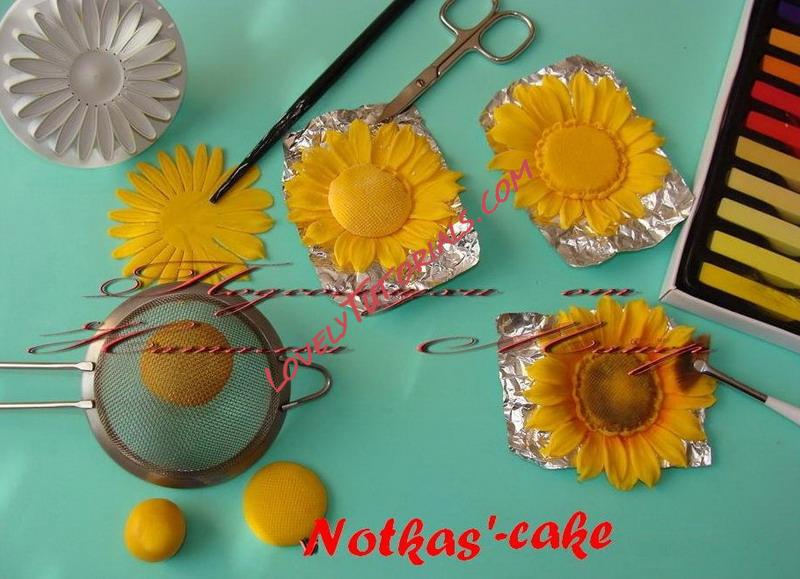
Упрощённый вариант цветка подсолнух можно сделать при помощи не хитрых приспособлений:
Плунжерная форма самого цветка.
Палочка для оттиска( я её специально крахмалом присыпала чтобы было видно рисунок на ней), если нет можно заменить зубочисткой деревянной.
Маникюрные ножнички.
Сито или спец. форма для сердцевин цветка.
Мелки или сухие краски.
Веерная или обычная кисточка.
Мастика желтого цвета.
Шоколад или клей, для склеивания лепестков и серединки цветка.
|

25.05.2012, 19:27
|
|
Администратор
|
|
Регистрация: 07.09.2010
Сообщений: 7,669
|
|
|

31.07.2012, 07:22
|
|
Администратор
|
|
Регистрация: 07.09.2010
Сообщений: 7,669
|
|
|

02.08.2012, 19:34
|
|
Администратор
|
|
Регистрация: 07.09.2010
Сообщений: 7,669
|
|
Огромная благодарность Автору saranxelana за Мастер-класс

|

26.08.2012, 21:22
|
|
Администратор
|
|
Регистрация: 07.09.2010
Сообщений: 7,669
|
|

Огромная благодарность Автору RoyalBakery за Мастер-класс
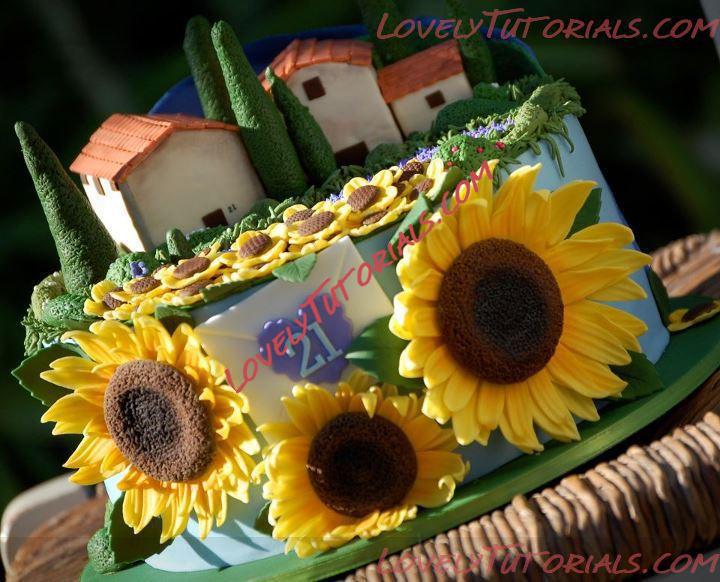
This is a tutorial for making sunflowers without having to shell out for cutters. I’m a total cheapskate and I was worried the cutters wouldn’t arrive in time in any case, so decided to try doing them freehand.
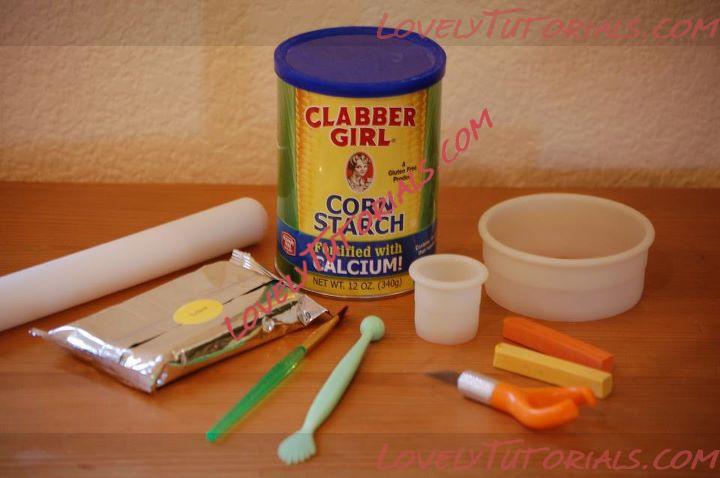
You will need:
- Yellow fondant or gumpaste (I use Wilton fondant because it’s cheap, it’s pliable and it dries quickly)
- Circle cutters (the size is up to you, I’ll talk more about this later)
- Rolling pin
- Exacto or sharp knife
- Yellow, orange and black petal dust or non-toxic pastel chalks
- That shell/scalloped tool thing
- Thin sponge (not pictured)
- Paint brush
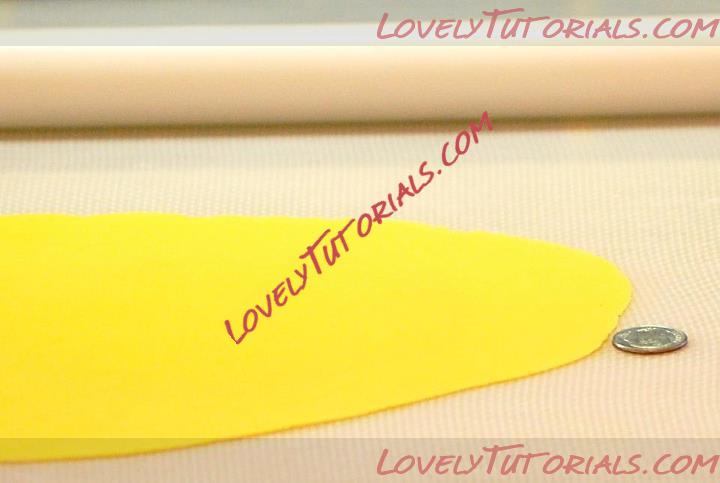
1. Begin by rolling your fondant very thin. Mine was way thinner than a dime.
2. Choose a cutter that is bigger than the size you want your finished sunflower to be. For the cake, I made mine in different sizes, with the largest being 4” in diameter. For this tutorial, however, I used a 3.5” cutter. If you don’t have cutters this size, you can use anything circular as you don’t need to actually cut with it. You can use the lid from your cornstarch, for example, of anything similar. (I’m a cheapskate, remember?)
3. Now choose a cutter that is less than half the size of your first cutter. Mine was 1.5”.
4. Press your largest cutter into your rolled fondant three times (as there are three layers of petals). You don’t need to cut all the way through, you’re just making an indentation.
5. Use the smaller cutter to press VERY GENTLY in the middle of the three larger circles. If you press too hard, your petals will break off when the flower dries. All you need is a guide for cutting your petals. In the photo below I actually pressed too hard into the circle at the bottom.
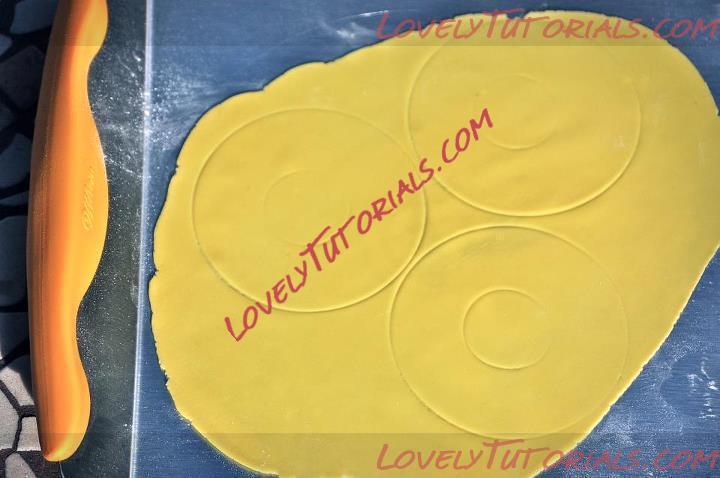
6. Take your scalpel or sharp knife and, using the inner and outer circles as a guide, begin cutting your petals. Start at the inner circle and cut a curve out to, and beyond, the outer circle. Repeat on the other side to meet your first cut at the outer circle until you have one petal cut. Repeat all the way around your circle and remove the flower shape from the fondant. Pop it under a piece of plastic while you cut the rest.
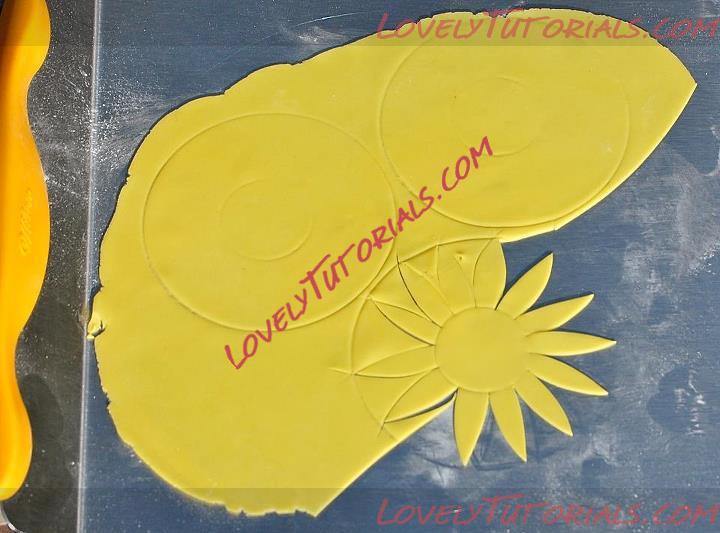
Don’t worry if all your petals aren’t even – mine certainly weren’t – but do be careful not to cut them too thin otherwise they’re more likely to break off later. I tried to make mine between 1/4 and 1/2” wide.
7. Continue until all three sets of petals are cut.
8. Now put one set of petals on to your thin foam and use the scallopy shell tool thing to vein and curl your petals. (I really should find out what that tool is called.)
9. Start with the tool halfway off the end of the petal and press pretty firmly up the length of the petal into the centre. The petal should curl up slightly at the end and have a nice ridged texture. Here’s a useless photo. I have to stand so far back with my camera, I couldn’t reach the tool!
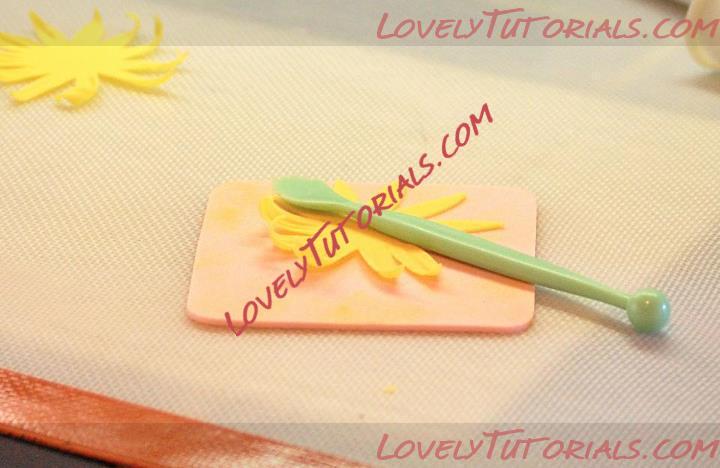
10. Repeat for all three sets of petals and then layer one on top of each other using a dab of water in the centre to secure. Try to overlap the petals so that each one falls between two petals underneath.
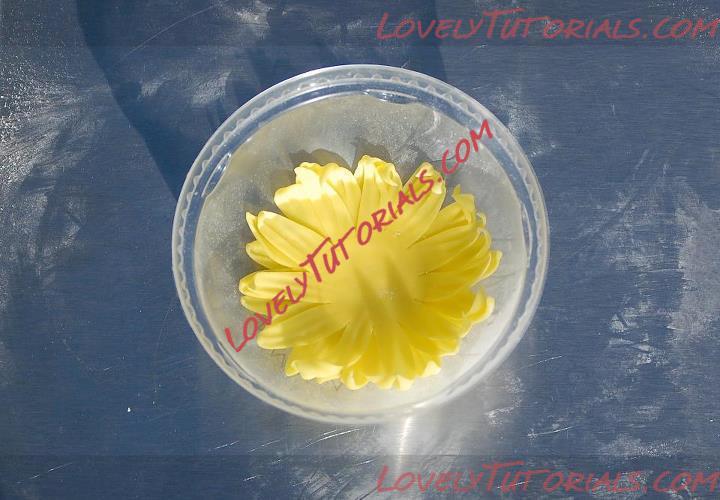
11. Now put the sunflower somewhere ingenious to help you keep the edges of the petals curled up. I used the lid of a Starbucks Frapuccino (did I mention cheapskate?) and then transferred into a cutter of a slightly smaller size so that just the edges of the petals were kept from drooping.
12. For the centre of the sunflower, take a ball of brown fondant – I used Satin Ice Dark Chocolate – and squash it flat. It needs to be a little larger than the diameter of the cutter you used to mark the centre of your petals.
13. Create a round indentation in the middle of the brown disc by rubbing your finger in a circular motion inside the edge. You want the very centre to be raised up, then an indentation, and then the edges to be raised up again. This part isn’t critical, but it does seem to be the shape of the real sunflower centres I looked at.
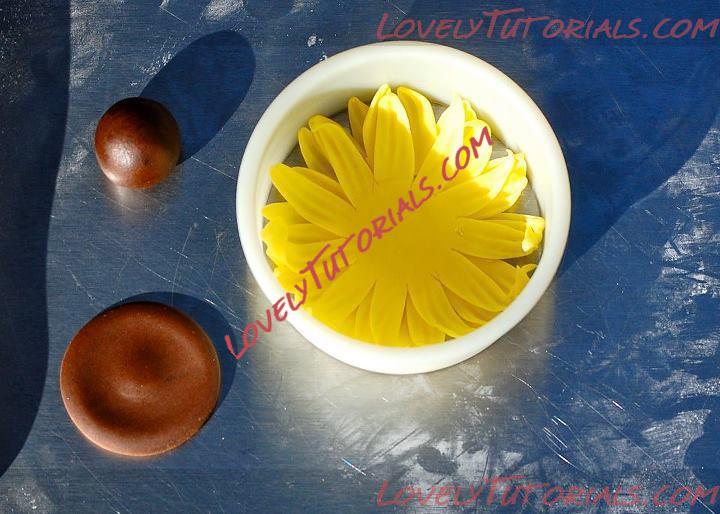
14. Using piping tips, start poking the brown disc all over. I actually used one inside another to make the process a bit quicker. Don’t worry if the fondant starts lifting up slightly – you’re looking for texture, not holes. Keep going all over the disc poking around the edges too if it starts to get misshapen. Try to retain the indentation.
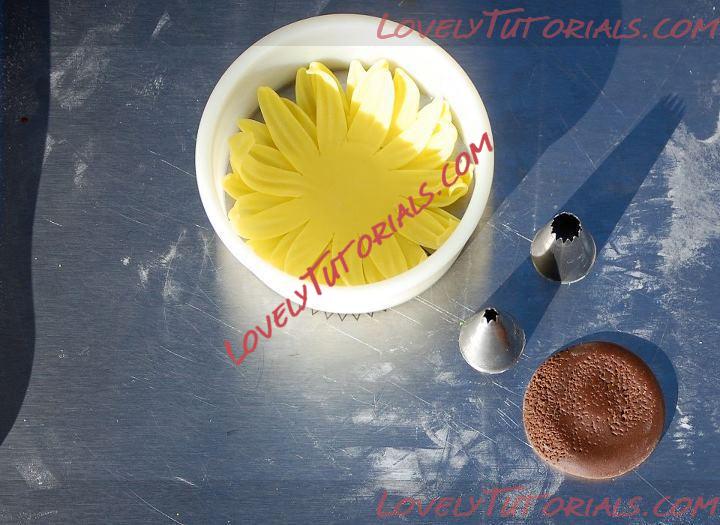
Being a cheapskate – did I mention that? – I didn’t want to buy three colours of petal dust just to make a flower I’m unlikely to make again in years. I’d seen a thread on Cake Central about using non-toxic chalks and thought I’d do some more research. Even Wilton suggests using them on its website. I had a new, unopened box of pastel chalks my son never used (he’s not the arty type) so I used these in place of petal dust.
15. If you are using petal dust, brush a little black or very dark brown into the centre of the brown disc. If you are using chalks, you’ll need to create a powder first. There are a few suggestions I’ve read – grind a small piece in a pestle and mortar or rub the chalk through a sieve or tea strainer. I just scraped my chalks with my Exacto knife until I had a little pile of powder.
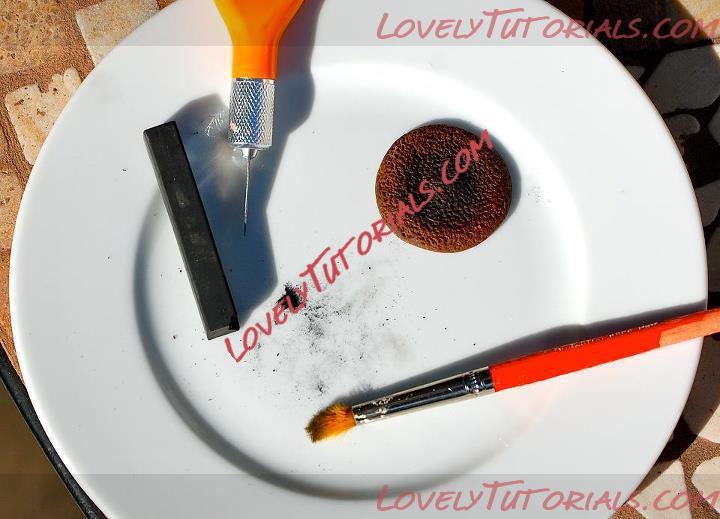
16. When your sunflower petals are dry, brush the length of the petals with egg yolk yellow petal dust or chalk dust. I started in the centre and brushed outwards towards the tips of the petals. I didn’t brush the underneath petals, but I guess you could do that to each layer before sticking them together. I didn’t think it was necessary.
In the photo below I have brushed just the right hand half of the flowr. It’s a subtle difference.
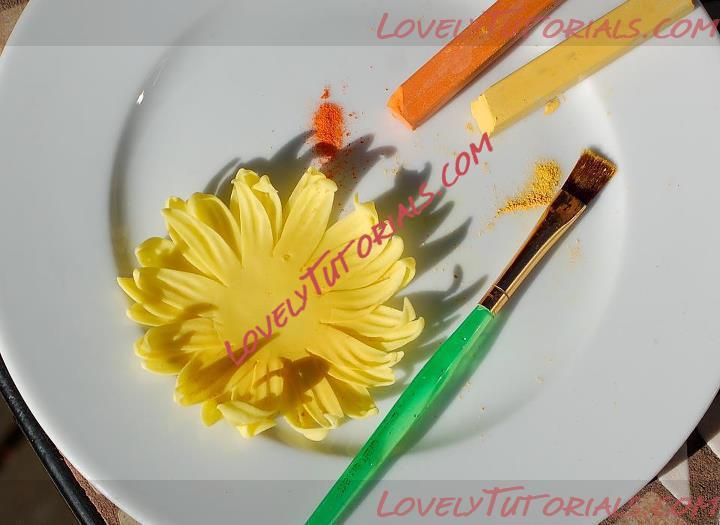
17. Now brush just half of each petal with orange, or orange mixed with the yellow. You don’t want it to be too dramatic – it should just be shading that emerges from under the sunflower centre once it’s attached.
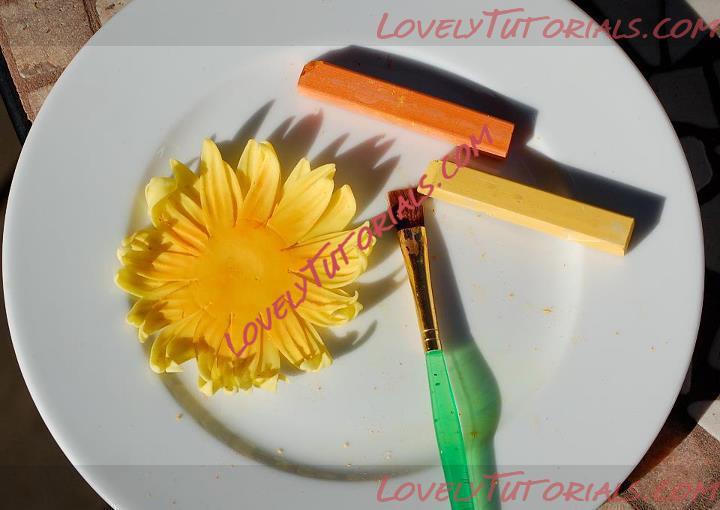
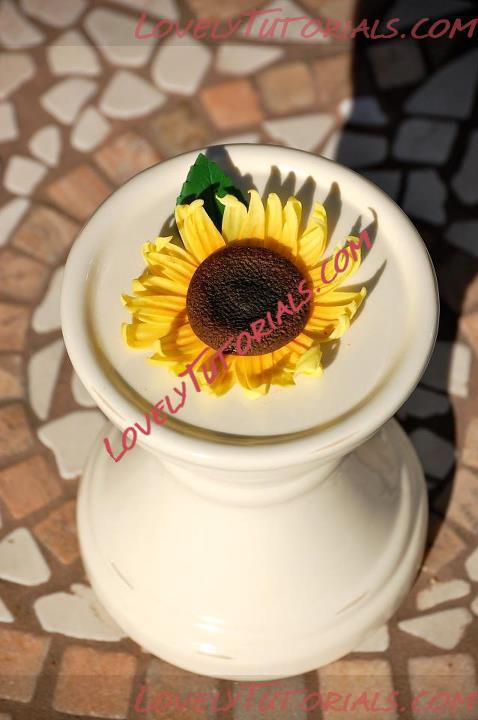
18. Finally, adhere the centre to the petals. Et voila!
I’ve found the PME leaf cutters are pretty much the right shape for sunflowers, so I added a bunch of them to the cake, brushed with a little green petal dust.
|
 |
|
|
Метки
|
anlegget, anläggning, armado de los ramos, arranjo, artesanatos passo a passo, augalas, auringonkukat, ayçiçeği, baking, biljka, bitki, blad, blade, blader, bladeren, blatt, bloem, bloemen, blomma, blommor, blomst, blomster, blume, blumen, blüten, blütenpaste, blätter, boeket, bouquet, buchet, buket, bukett, bukiet, buquê, cake decorating, cake decorating techniques, cerâmica plástica, chiodi di garofano, clavo de olor, clous de girofle, cloves, cold porcelain, cold porcelain figurines, cold porcelain flowers, confeitando bolos, csokor, cukrinių gėlių, curso completo de flores, curso de modelado, cvijet, cvijeće, decoracion de pasteles, decoración de tortas, decorare le torte, decorazioni, deko fondant, dekorace na dort, dekoracija, dekoracije, dekorasyon, dekorácie, el abc del armado de ramos, feuille, feuilles, fimo, fimo flowers, fiore, fiori, fleurs, floare, floarea-soarelui, flogistica, flor, floral inspirations, flores, flores azucar, flores e folhas, flori, floristics, floristik, floristikk, floristique, florística, flower, flower paste, flowering plants, flowers, flowers on a wire, foglia, foglie, folha, folhas, folhas pintadas, fondan, fondant, fondente, fotopostup, frunze, girasoles, girasoli, girassóis, gum pasta, gum paste, gum paste flowers, gumpaste, gumpaste flowers class, gėlė, gėlės, hand painting, handmade, handmodelliert, hideg porcelán, hladno porculan, hoja, hojas, how to, how to make sunflower, how tцветы на проволоке, how-to's, hřebíček, impianto, jak na, kage dekoration, kagedekoration, kakebaking, kaldt porselen, kallt porslin, kalt porzellan, kasvi, kolde porcelæn, koud porselein, krok za krokem, kukka, kukkakimppu, kukkia, kvetina, kvety, květina, květiny, kwiat, kwiaty, kylmä posliini, kytica, la modélisation, lapai, lapas, leaf, leaves, lehdet, lehti, levelek, levél, list, listí, lišće, liście, liść, lístia, lístky na drátku, making sugar flowers, marshmallow, masa flexible, mazzo, modelado, modelagem, modelare, modeling, modeling paste, modeliranje, modellazione, modelleme, modellering, modellieren, modellierpaste, modelləşdirmə, modelovanie, modelování, modelowanie, montando, motivtorten, napraforgós, nelken, návody a postupy, návody na květy a lístky, növény, oasis o esponja de floristeria, pap, paso a paso, passo a passo, passo-a-passo, pasta flexible, pflanze, plant, planta, plante, plantes, plantă, pocelana fria, polymer clay, polymer clay flowers tutorial, porcelaine froide, porcelana fria, porcelana fría, porcellana fredda, postup klinček, postupak za ukrasavanje, puokštė, ramo, rastlina, rece porţelan, rododendron, rostlina, roślina, saulėgrąžomis, schritt für schritt anleitung, schritt-für-schritt, sculpey flowers, sculpting, simple, slnečnica, slunečnice, solrosor, solsikker, sonnenblumen, soğuk porselen, stamens, steg for steg, step by step, step-by-step, strauß, studený porcelán, styrofoam, sugar cane flowers, sugar cloves, sugar flower, sugar flowers, sugar flowers for cake decorating, sugar paste flowers, sugarcraft, sugarpaste, sukker art, suncokreti, sunflowers, słoneczniki, technique utilisée fleurs en sucre cru, tecnicas de decoracion, tecniche, thai flowers, torte, torte decorate, torten dekorieren, torti, tournesols, trin for trin, trin-for-trin, trinn for trinn, tutorial, tutorijal, ukrašavanje torti, uputstvo za dekoraciju, virág, virágok, wedding cake, wedding cakes, wire, yaprak, yapraklar, zimno porcelany, zonnebloemen, zuckerblumen, ดอกไม้, सजा केक, मॉडलिंग, モデル, çiçek, çiçek modelleme, šalto porceliano, 建模, 裝飾蛋糕, 진달�?, κρύα πορσελάνη, μπουκέτο, αζαλέα, ηλιοτρόπια, λουλούδι, λουλούδια, τα φύλλα, φύλλα, φυτό, кветка, кветкі, квіти, квітка, керамическая флористика, куст, гвоздика, подсолнух на проволоке, подсолнухи, полимерная глина, полевые цветы, пошагово, природа, мк, моделиране, майстер-класи, маршмеллоу, мастика, мастер-класс, мастер-класс по лепке, азалия, азалія, букет, завод, листа, листья, листя, лепим цветы, лепка, лепка из глины, лепка из пластики, лепка цветов, ліплення, лісце, рослина, растение, растения, украшение тортов, украшение торта, соняшники, свадебный торт, сахарная мастика, сахарный клей, сланечнікі, слънчогледи, уроки прикрашання, студен порцелан, торт, фимо, флористика, флора, холодного порцеляни, холодного фарфора, холодный фарфор, халоднага фарфору, цветок, цветочная паста, цвете, цветя, цветы, цветы из полимерной глины, цветы из холодного фарфора, цветы на торт, цветы ручной работы, шаг за шагом  |
|

