|
|
 |
|

02.01.2013, 20:13
|
|
–Р–і–Љ–Є–љ–Є—Б—В—А–∞—В–Њ—А
|
|
–†–µ–≥–Є—Б—В—А–∞—Ж–Є—П: 07.09.2010
–°–Њ–Њ–±—Й–µ–љ–Є–є: 7,940
|
|

–Ю–≥—А–Њ–Љ–љ–∞—П –±–ї–∞–≥–Њ–і–∞—А–љ–Њ—Б—В—М –Р–≤—В–Њ—А—Г Miso –Ј–∞ –Ь–∞—Б—В–µ—А-–Ї–ї–∞—Б—Б

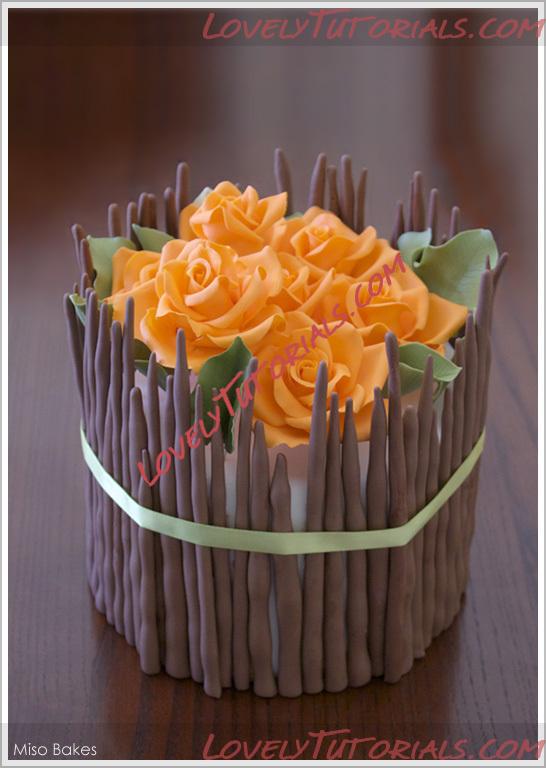
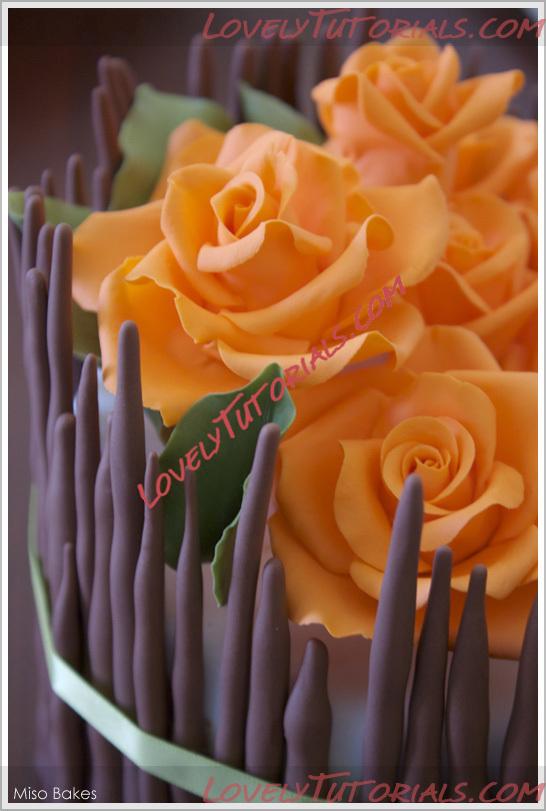
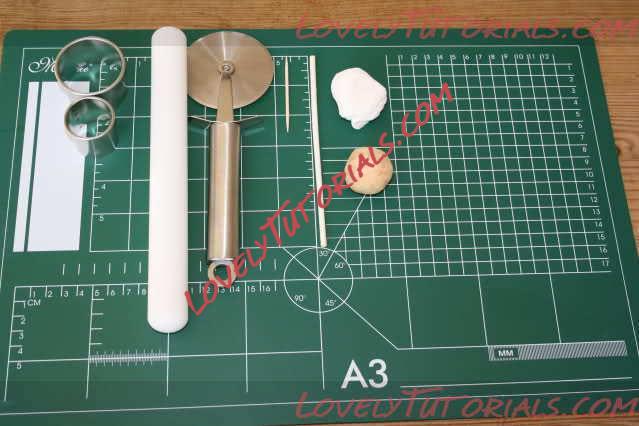
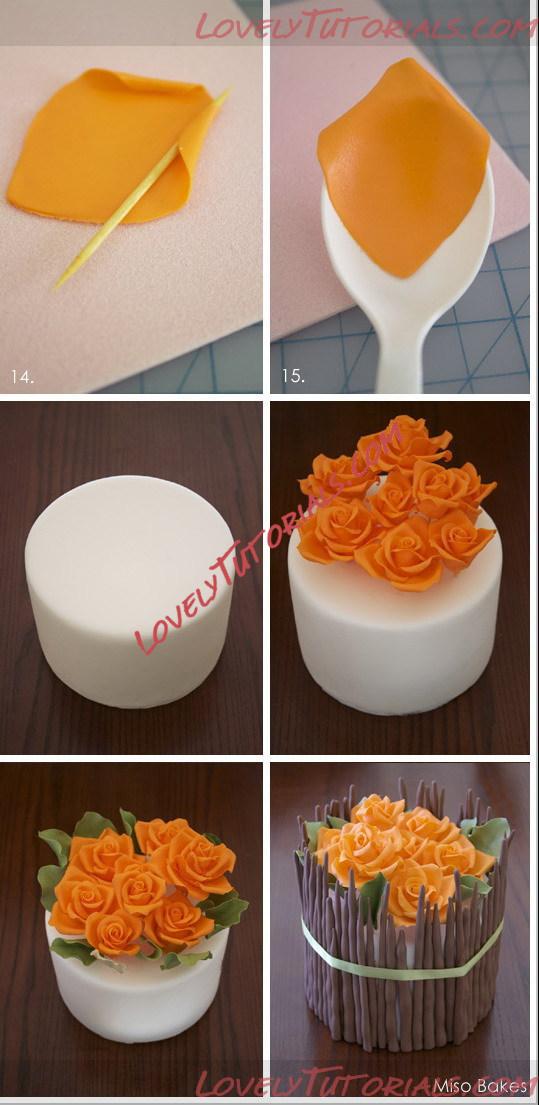 Supplies
- Cake вАФ baked, iced, and covered in fondant. (I used a dense 6вА≥ cake)
- Gumpaste in orange, brown and green
- Skewers or toothpicks or floral wire
- Floral tape (only if using floral wire)
- Water
- Block of styrofoam or cup of rice
- Balling tool or spoon
- Take out spoons or regular spoons for roses
TO MAKE THE ROSES
- A few days in advance, make the cores so they have enough time to dry completely.
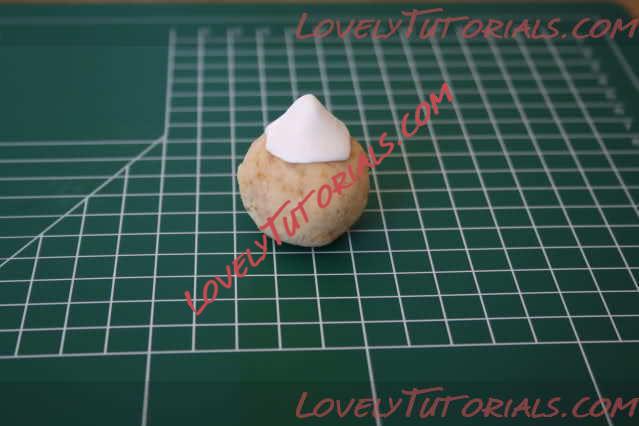
- To do this, roll a bit of gumpaste (about the size of a small gum ball**) into a ball and then taper one edge so it become a teardrop shape.
- Dip skewer/toothpick/floral wire into water and insert into the non-tapered end of the teardrop.
- Seal the opening and let dry standing up in a block of styrofoam or cup of rice.
** Size of the core depends on the size of the flowers you wish to create.
BUILDING THE ROSE
Layer One
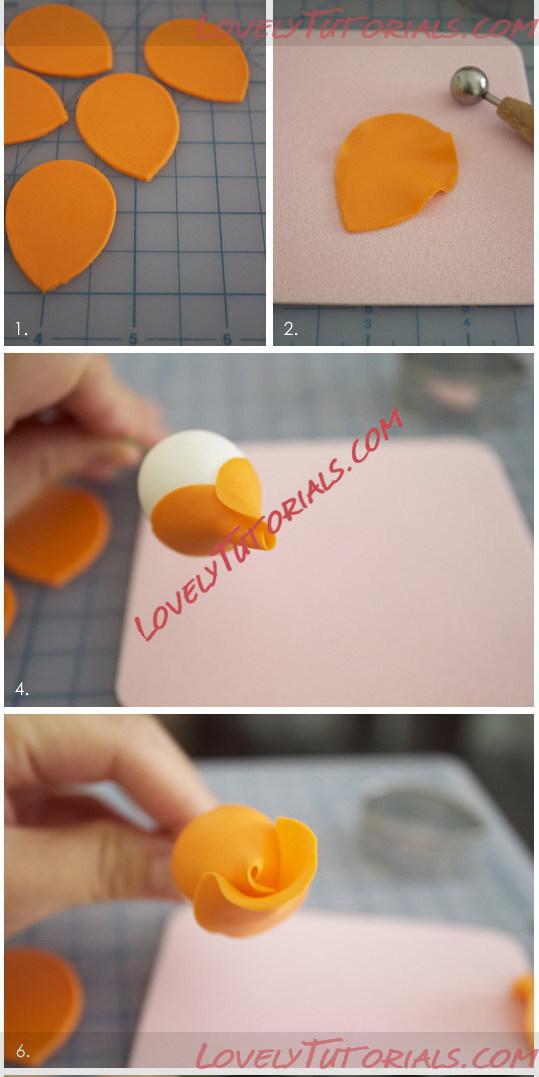
STEP 1: Everyone has a different way of creating roses, but I like to build the first three layers by using the same sized cutterвАУ cut 6 petals.
STEP 2: Take one petal and using a balling tool (or spoon), thin out the top half of the petal. It is important that only the edges are thinned out.
STEP 3: Put a little dab of water on the center of the petal and glue onto the coreвАУ make sure the core is centered on the petal.
STEP 4: Put a little dab of water on each corner of the petal, and fold down, overlapping the edges. You may gently curl the edges back.
Layer Two
STEP 5: Thin out two more petals for the second layer.
STEP 6: Dab a little water on one-half of a petal and wrap it around the first layer. Make sure the center of the petal and the seam of the first layer align.
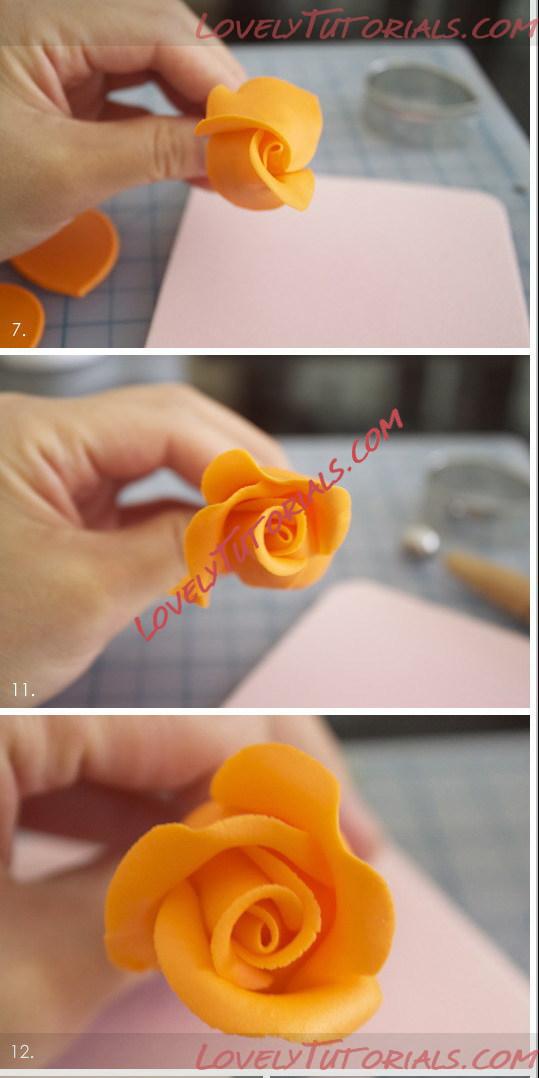
STEP 7: Tuck one edge of the second petal under the first petal, and the other edge over the first petal. Simply put, create a spiral.
STEP 8: Glue all edges down.
Layer Three
STEP 9: Thin out the last three petals.
STEP 10: Like the second layer, you want to center the first petal of the 3rd layer with a seam of the second layer. Glue only half down, as you want to tuck the last petal into it.
STEP 11: Overlapping the first petal, glue down the second.
STEP 12: Tuck the last petal into the first.
STEP 13: You may continue building your rose. For the next layer, use a bigger petal cutter.
STEP 14: For the outer petals, you can roll the edges of the rose back with a toothpick.
STEP 15: You may also dry out the roses on take-out spoons for more depth and curvature.
NOTE: Be sure to keep your petals covered with plastic (or gently place them in a ziploc bag laying flat) so they donвАЩt dry out.
TO MAKE THE LEAVES
- Roll out green gumpasteвАУ thick enough to insert wire. If using veiner, leave imprints. Using petal cutter, cut out leaves. Insert wire. Thin edges. Dry. Wrap in floral tape and insert into coffee stirrers before inserting in cake.
TO MAKE THE TWIGS
- Roll out gumpaste into a long, thin snake. Taper one edge. Let dry completely (or partially). Adhere to cake with water.
ASSEMBLING THE CAKE
- Bake, ice, cover cake in fondant.
- Arrange roses on top of the cake.
- Arrange leaves. Make sure they donвАЩt stick out too much and get in the way of the twigs.
- Glue twigs onto cake with water.
- Tie a ribbon around the cake. If you have extra time, you may make a ribbon out of fondant!
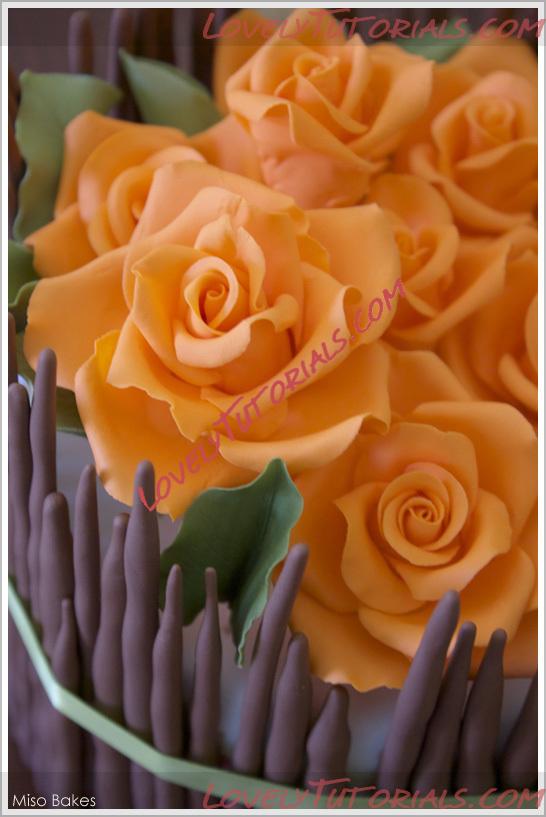
|

10.01.2013, 12:49
|
|
–Р–і–Љ–Є–љ–Є—Б—В—А–∞—В–Њ—А
|
|
–†–µ–≥–Є—Б—В—А–∞—Ж–Є—П: 07.09.2010
–°–Њ–Њ–±—Й–µ–љ–Є–є: 7,940
|
|
|

13.01.2013, 11:36
|
|
–Р–і–Љ–Є–љ–Є—Б—В—А–∞—В–Њ—А
|
|
–†–µ–≥–Є—Б—В—А–∞—Ж–Є—П: 07.09.2010
–°–Њ–Њ–±—Й–µ–љ–Є–є: 7,940
|
|
–Ю–≥—А–Њ–Љ–љ–∞—П –±–ї–∞–≥–Њ–і–∞—А–љ–Њ—Б—В—М –Р–≤—В–Њ—А—Г Groetjes Leonie –Ј–∞ –Ь–∞—Б—В–µ—А-–Ї–ї–∞—Б—Б


|

13.01.2013, 17:57
|
|
–Р–і–Љ–Є–љ–Є—Б—В—А–∞—В–Њ—А
|
|
–†–µ–≥–Є—Б—В—А–∞—Ж–Є—П: 07.09.2010
–°–Њ–Њ–±—Й–µ–љ–Є–є: 7,940
|
|

–Ю–≥—А–Њ–Љ–љ–∞—П –±–ї–∞–≥–Њ–і–∞—А–љ–Њ—Б—В—М –Р–≤—В–Њ—А—Г Lisa –Ј–∞ –Ь–∞—Б—В–µ—А-–Ї–ї–∞—Б—Б
Ingredients
Pettinice with added CMC
Sugar Glue
Tools
Plastic Bag
Spoons
(Plus anything you might find around the house to support outer petals)
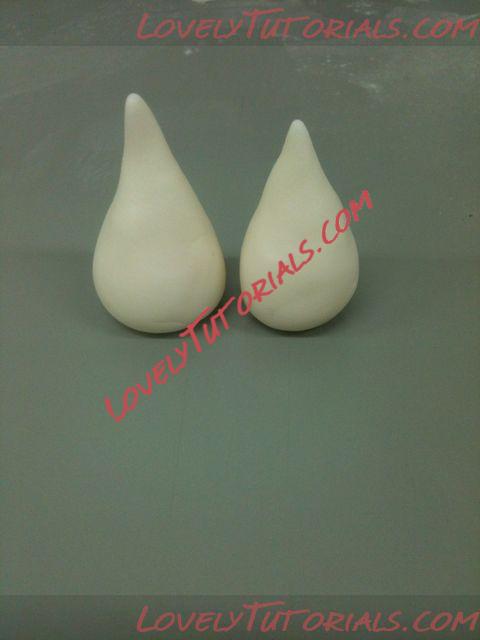
Make cone shapes, the size depends on how big you want your rose and how much icing you have to use.
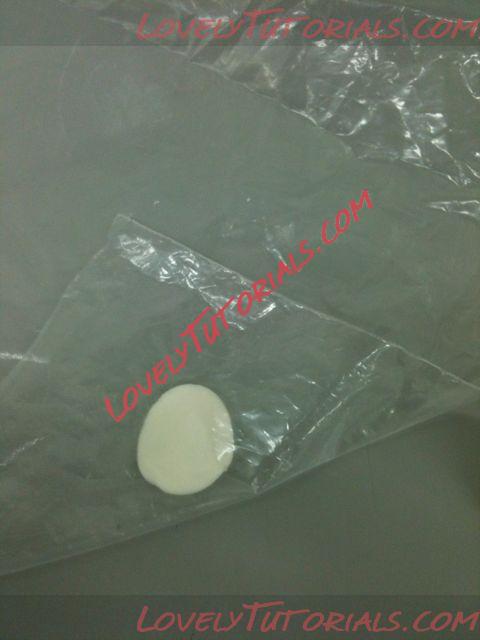
Make a wee ball of icing and push it out between a sheet of plastic. Make it slightly Longer than your cone.
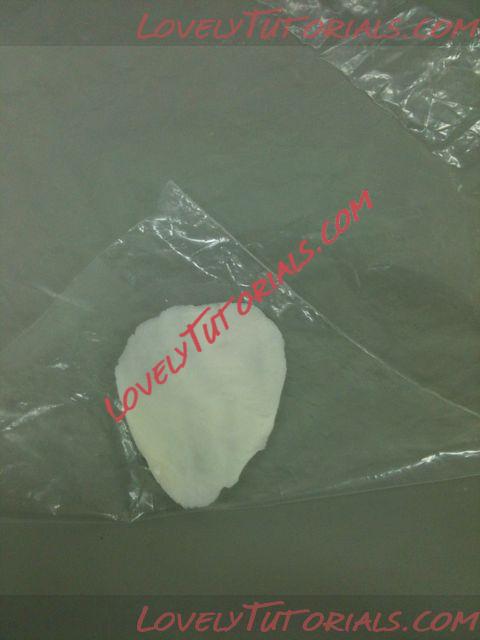
Make it slightly Longer than your cone
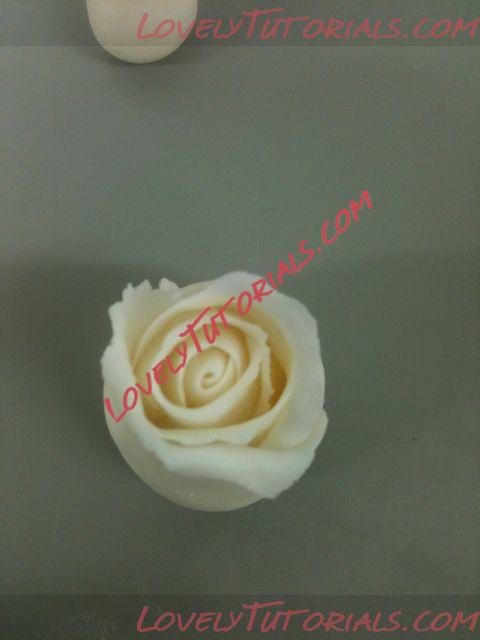
Wrap the petals around the cone using sugar glue to adhere it. Make sure the first petal is wrapped nicely around to form the center.
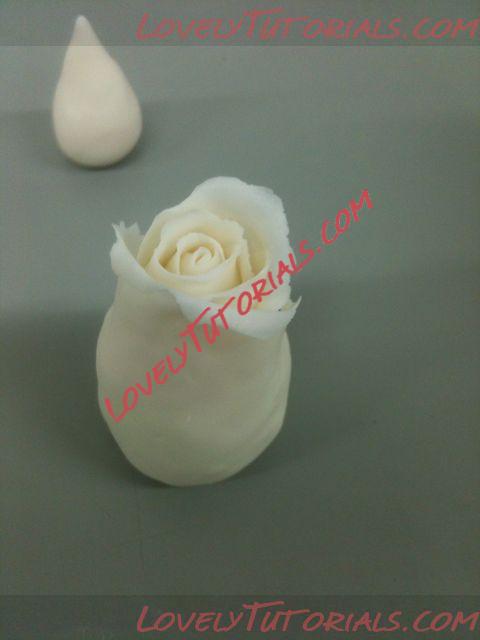
Wrap the petals around the cone using sugar glue to adhere it. Make sure the first petal is wrapped nicely around to form the center Once you get to the fourth or fifth petal bend it out a little.
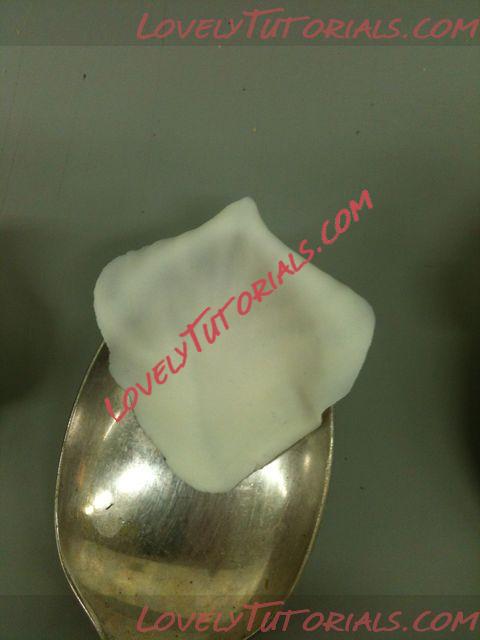
Next pop your next petals on to some spoons. Make these slightly larger. And remember you can use cutters! You donвАЩt have to use a plastic bag
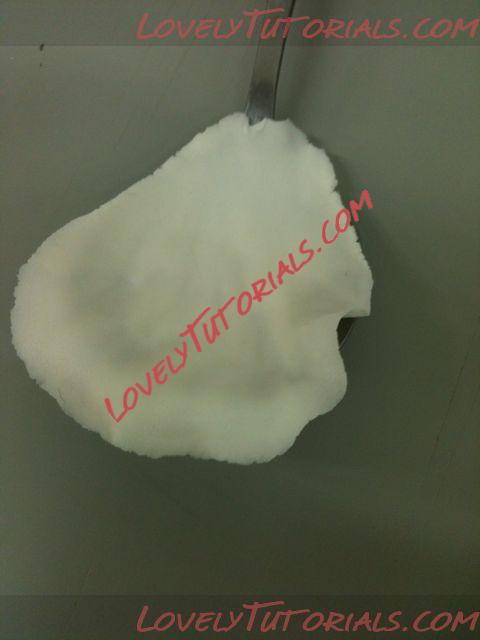
And remember you can use cutters! You donвАЩt have to use a plastic bag
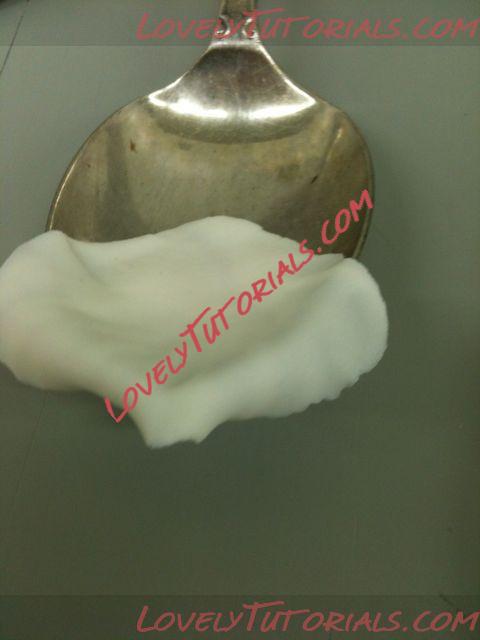
Remember the bigger you make the rose the larger the next set of petals need to be
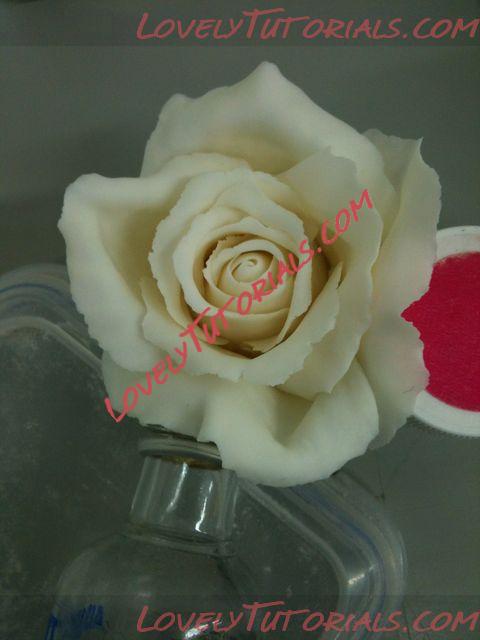
Add these with sugar glue. You will need to use something to support these petals. Here I am using some tupperware a wee bottle and some food colouring containers anything will do! Lol
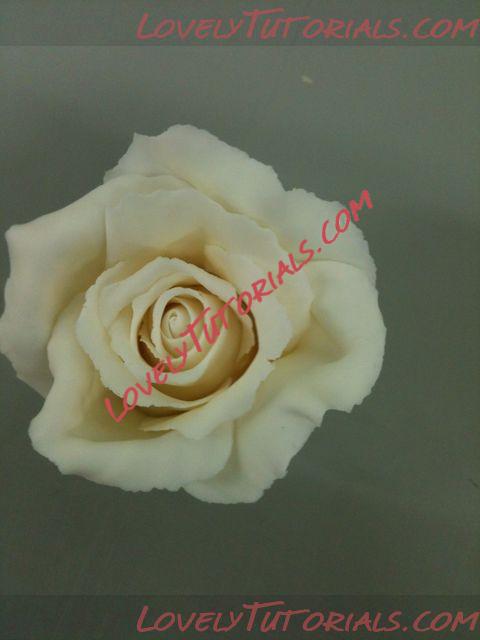
You can stop here or before depending on how big you want your rose!
Or make some more Petals! Make some more slightly larger , (again) petals and place on your spoons or for Really big roses you can use an apple box inner!
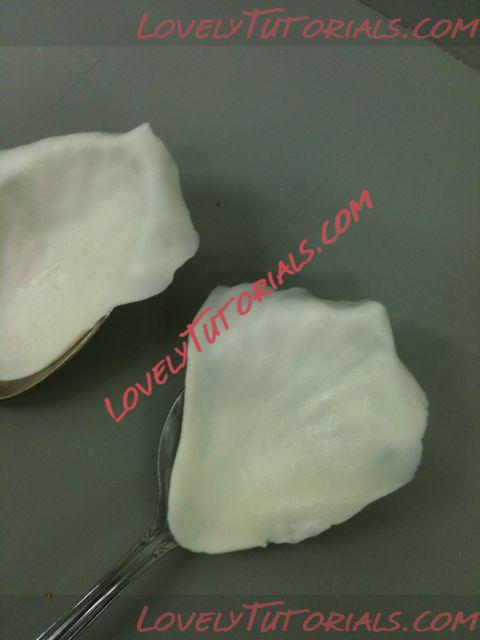
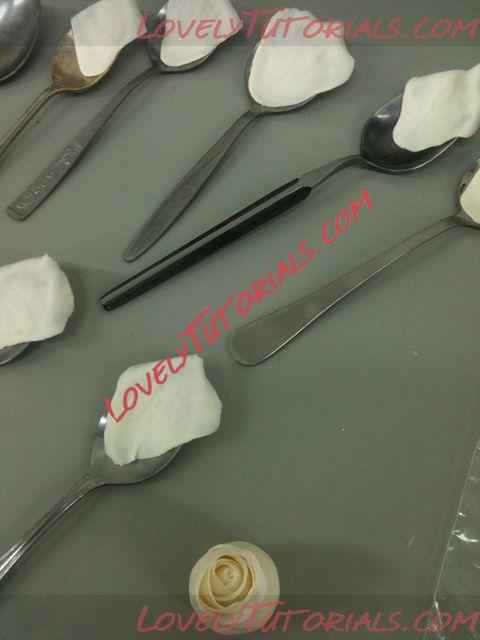
Attach these using sugar glue and again support and shape your petals
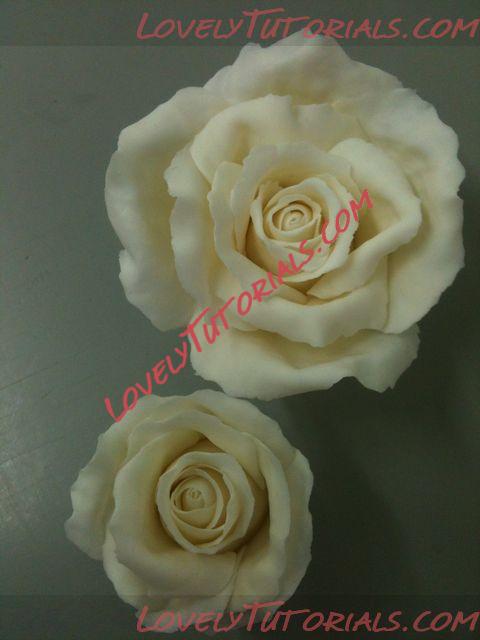
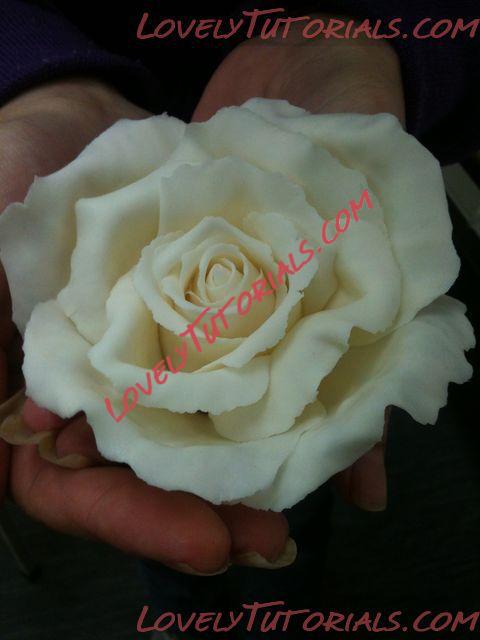
Walla finished! Make them with fewer petals for buds and increase for a lovely large open rose!
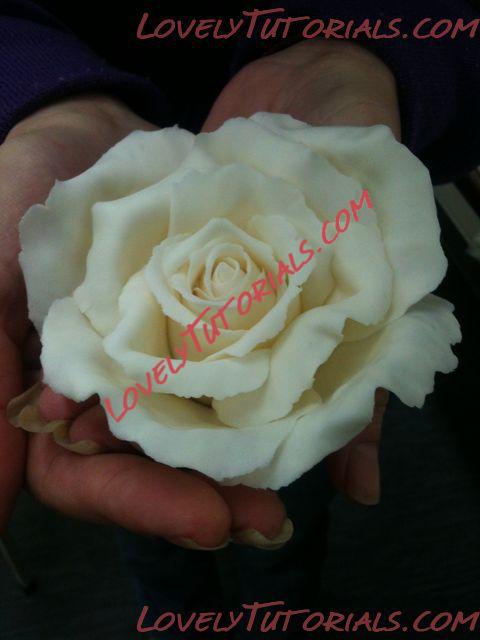
(Leave to dry fully supported! Other wise your petals will droop or crack and fracture!)
|

13.01.2013, 19:31
|
|
–Р–і–Љ–Є–љ–Є—Б—В—А–∞—В–Њ—А
|
|
–†–µ–≥–Є—Б—В—А–∞—Ж–Є—П: 07.09.2010
–°–Њ–Њ–±—Й–µ–љ–Є–є: 7,940
|
|

–Ю–≥—А–Њ–Љ–љ–∞—П –±–ї–∞–≥–Њ–і–∞—А–љ–Њ—Б—В—М –Р–≤—В–Њ—А—Г –Р–љ–љ–µ –Ј–∞ –Ь–∞—Б—В–µ—А-–Ї–ї–∞—Б—Б
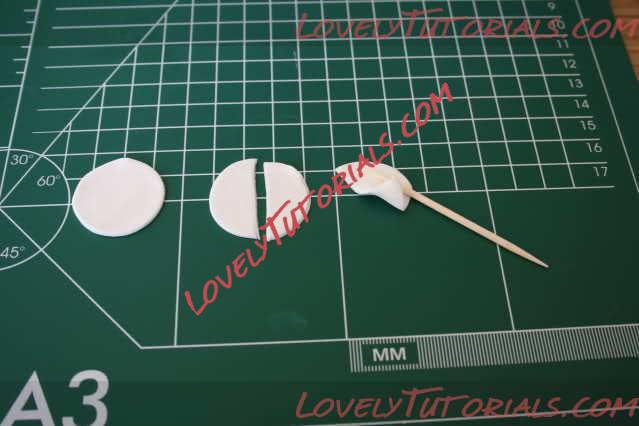
–Ф–ї—П —А–Њ–Ј–Њ—З–µ–Ї —А–∞—Б–Ї–∞—В—Л–≤–∞–µ–Љ –Љ–∞—Б—В–Є–Ї—Г (—Г –Љ–µ–љ—П –Є–Ј –Љ–∞—А—И–Љ–∞–ї–ї–Њ—Г) –њ–Њ—В–Њ–љ—М—И–µ (–њ—А–Є–Љ–µ—А–љ–Њ 1 –Љ–Љ). –Ь–љ–µ –љ—Г–ґ–љ—Л –±—Л–ї–Є —Б–Њ–≤—Б–µ–Љ –Љ–∞–ї–µ–љ—М–Ї–Є–µ —Ж–≤–µ—В–Њ—З–Ї–Є, –њ–Њ—Н—В–Њ–Љ—Г –≤ –Ї–∞—З–µ—Б—В–≤–µ –≤—Л—А—Г–±–Ї–Є —П –Є—Б–њ–Њ–ї—М–Ј–Њ–≤–∞–ї–∞ –љ–∞—Б–∞–і–Ї—Г –Љ–µ—В–∞–ї–ї–Є—З–µ—Б–Ї—Г—О –і–ї—П —А–∞–±–Њ—В—Л —Б –Ї—А–µ–Љ–Њ–Љ (–і–Є–∞–Љ–µ—В—А –Њ—В–≤–µ—А—Б—В–Є—П 2—Б–Љ 3–Љ–Љ). –Ф–ї—П –Ї–∞–ґ–і–Њ–≥–Њ —Ж–≤–µ—В–Ї–∞ –њ–Њ–љ–∞–і–Њ–±–Є—В—Б—П 4 –Ї—А—Г–ґ–Њ—З–Ї–∞. –Ы—Г—З—И–µ —Б—А–∞–Ј—Г –љ–∞—А–µ–Ј–∞—В—М –њ–Њ–±–Њ–ї—М—И–µ (–Є –љ–∞–Ї—А—Л—В—М –≤—Б—С —Ж–µ–ї–Њ—Д–∞–љ–Њ–Љ, —З—В–Њ–±—Л –љ–µ —Б–Њ—Е–ї–Њ). 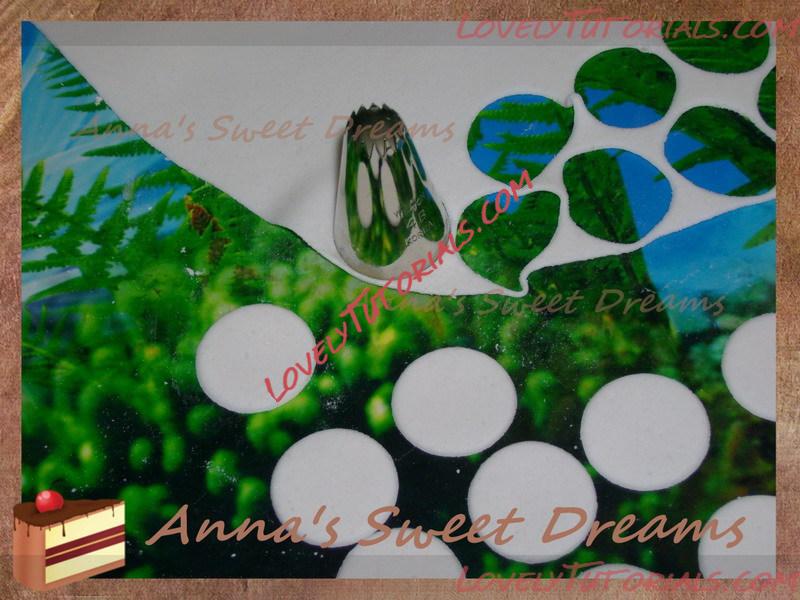
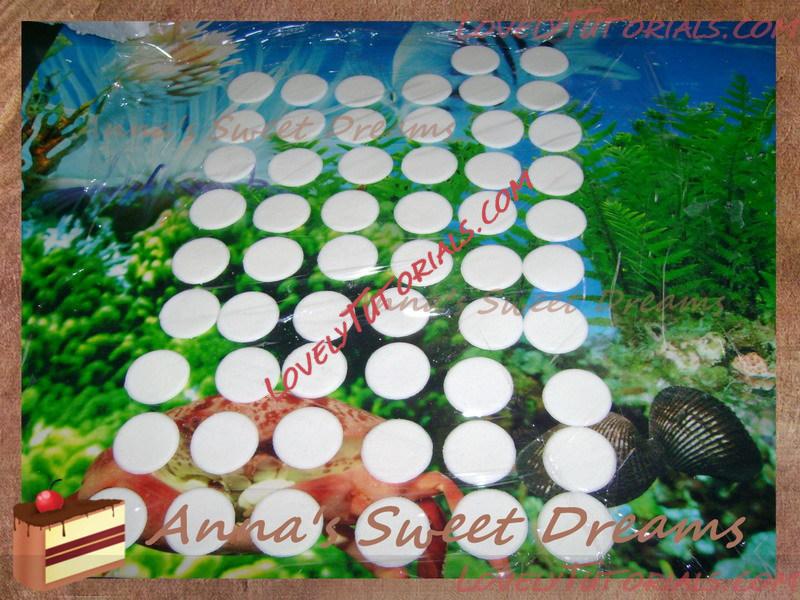 –Ъ—А–∞—П –Ї—А—Г–ґ–Њ—З–Ї–Њ–≤ –њ—А–Є –њ–Њ–Љ–Њ—Й–Є –љ–∞–ґ–∞—В–Є—П –Ї–Њ–љ—З–Є–Ї–∞–Љ–Є –њ–∞–ї—М—Ж–µ–≤ –Љ–∞–Ї—Б–Є–Љ–∞–ї—М–љ–Њ —Г—В–Њ–љ—М—И–∞–µ–Љ, –Њ—Б—В–∞–≤–ї—П—П –љ–µ—В—А–Њ–љ—Г—В–Њ–є –њ—А–Є–Љ–µ—А–љ–Њ 1\4 –Њ–Ї—А—Г–ґ–љ–Њ—Б—В–Є (—Н—В–Њ –±—Г–і–µ—В –љ–Є–Ј –ї–µ–њ–µ—Б—В–Ї–∞).
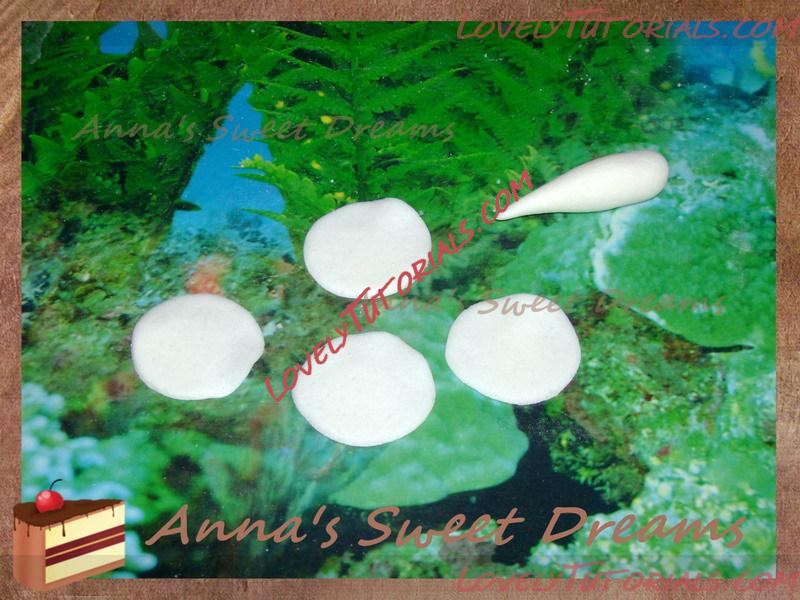 –Ш–Ј –Ї—Г—Б–Њ—З–Ї–∞ –Љ–∞—Б—В–Є–Ї–Є —Д–Њ—А–Љ–Є—А—Г–µ–Љ –Ї–Њ–љ—Г—Б (—Г–і–Њ–±–љ–µ–µ –Є—Б–њ–Њ–ї—М–Ј–Њ–≤–∞—В—М –Ї—Г—Б–Њ—З–µ–Ї –њ–Њ–±–Њ–ї—М—И–µ, –љ–∞ –љ–µ–Љ –Љ–Њ–ґ–љ–Њ —Б–і–µ–ї–∞—В—М —Б—А–∞–Ј—Г –љ–µ—Б–Ї–Њ–ї—М–Ї–Њ —А–Њ–Ј–Њ—З–µ–Ї, –љ–µ –Ї–∞—В–∞—П –Ї–∞–ґ–і—Л–є —А–∞–Ј –љ–Њ–≤—Л–є).
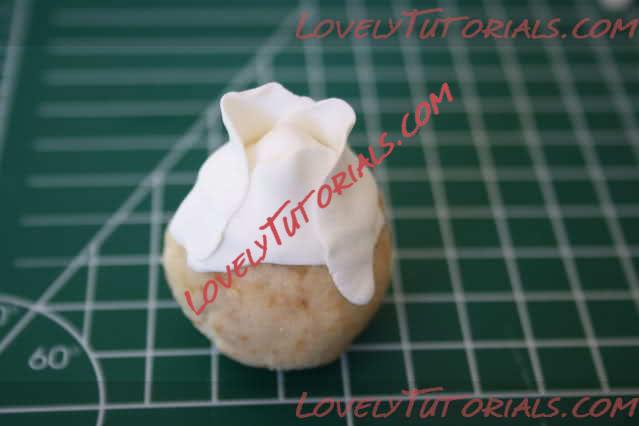
 –£–≤–ї–∞–ґ–љ—П–µ–Љ –Ї–Њ–љ—Г—Б –Ї–Є—Б—В–Њ—З–Ї–Њ–є, —Б–Љ–Њ—З–µ–љ–љ–Њ–є –≤ –≤–Њ–і–µ, –Є –њ–µ—А–≤—Л–Љ –ї–µ–њ–µ—Б—В–Ї–Њ–Љ –Ї–∞–Ї–±—Л –Њ–±–Њ—А–∞—З–Є–≤–∞–µ–Љ –Ї–Њ–љ—З–Є–Ї –Ї–Њ–љ—Г—Б–∞ –Њ—З. —В—Й–∞—В–µ–ї—М–љ–Њ, —З—В–Њ–±—Л —Б–∞–Љ–Њ–≥–Њ –Ї–Њ–љ—Г—Б–∞ –љ–µ –±—Л–ї–Њ –≤–Є–і–љ–Њ (–љ—Г –Є–ї–Є —Е–Њ—В—П –±—Л –њ–Њ—З—В–Є –љ–µ –±—Л–ї–Њ –≤–Є–і–љ–Њ))).

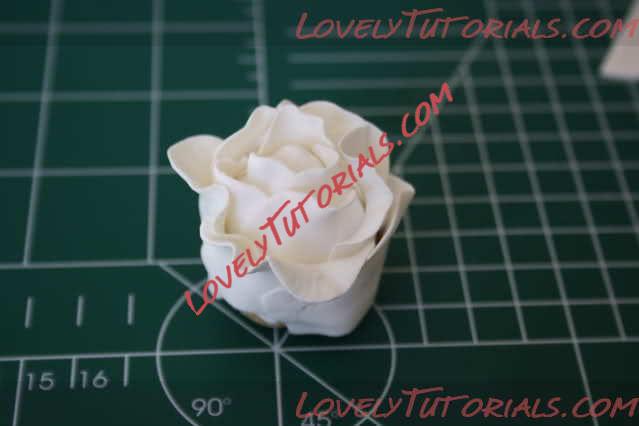
 –Э–∞—З–Є–љ–∞–µ–Љ –љ–∞–Ї–ї–∞–і—Л–≤–∞—В—М –Њ—Б—В–∞–ї—М–љ—Л–µ 3 –ї–µ–њ–µ—Б—В–Ї–∞ - –Ї–∞–ґ–і—Л–є —Б–ї–µ–і—Г—О—Й–Є–є –њ–Њ–і–Ї–ї–∞–і—Л–≤–∞–µ—В—Б—П –њ–Њ–і —Б–µ—А–µ–і–Є–љ—Г –њ—А–µ–і—Л–і—Г—Й–µ–≥–Њ (–Ї—А–∞–µ—И–Ї–Є —П —Г–≤–ї–∞–ґ–љ—П—О –Ї–Є—Б—В–Њ—З–Ї–Њ–є, —З—В–Њ–±—Л –ї—Г—З—И–µ —Б–Ї–ї–µ–Є–≤–∞–ї–Њ—Б—М –≤—Б—С).



–•–Њ—А–Њ—И–µ–љ—М–Ї–Њ –њ–Њ–њ—А–∞–≤–ї—П–µ–Љ –≤—Б–µ –ї–µ–њ–µ—Б—В–Ї–Є (—З—В–Њ–±—Л —Б–≤–µ—А—Е—Г —Б–Є–ї—М–љ–Њ –љ–µ —В–Њ—А—З–∞–ї–Є, –љ–µ–Љ–љ–Њ–≥–Њ –Њ—В—В—П–≥–Є–≤–∞–µ–Љ –Є—Е –≤–љ–Є–Ј, –Њ—В–Ї–ї–µ–Є–≤–∞—П –Њ—В –Њ—Б–љ–Њ–≤–∞–љ–Є—П).
–Я–∞–ї—М—Ж–∞–Љ–Є —Д–Њ—А–Љ–Є—А—Г–µ–Љ –Њ–Ї—А—Г–≥–ї—Г—О –љ–Є–ґ–љ—О—О —З–∞—Б—В—М –±—Г—В–Њ–љ—З–Є–Ї–∞, –ї–Є—И–љ–µ–µ –Њ–±—А–µ–Ј–∞–µ–Љ.

–°–Љ–Њ—З–Є–≤ –Ї–Њ–љ—З–Є–Ї –Ј—Г–±–Њ—З–Є—Б—В–Ї–Є –≤ –≤–Њ–і–µ, –≤—Б—В–∞–≤–ї—П–µ–Љ –µ–µ –≤ –Њ—Б–љ–Њ–≤–∞–љ–Є–µ —Ж–≤–µ—В–Њ—З–Ї–∞.

–†–∞—Б–њ—А–∞–≤–ї—П–µ–Љ –ї–µ–њ–µ—Б—В–Ї–Є –Є –Њ—Б—В–∞–≤–ї—П–µ–Љ —Б—Г—И–Є—В—М—Б—П.
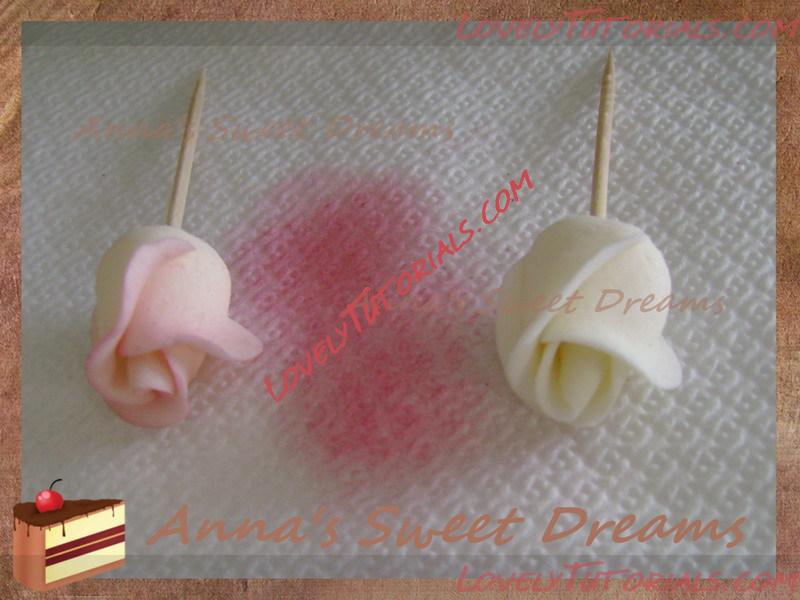
–Ъ–Њ–≥–і–∞ –ї–µ–њ–µ—Б—В–Ї–Є —Е–Њ—А–Њ—И–Њ –њ–Њ–і—Б–Њ—Е–ї–Є –Є —Г–≤–µ—А–µ–љ–љ–Њ –і–µ—А–ґ–∞—В —Д–Њ—А–Љ—Г, –њ—А–Є –њ–Њ–Љ–Њ—Й–Є –Љ—П–≥–Ї–Њ–є –Ї–Є—Б—В–Њ—З–Ї–Є –Є —Б—Г—Е–Њ–≥–Њ –Ї—А–∞—Б–Є—В–µ–ї—П –Њ–Ї—А–∞—И–Є–≤–∞–µ–Љ —Ж–≤–µ—В–Њ—З–Ї–Є (–Ї—А–∞—Б–Є—В–µ–ї—М –ї—Г—З—И–µ —Б–љ–∞—З–∞–ї–∞ —А–∞—Б—В—Г—И–µ–≤–∞—В—М –љ–∞ –Ї–∞–Ї–Њ–є-–ї–Є–±–Њ –њ–Њ–≤–µ—А—Е–љ–Њ—Б—В–Є, —З—В–Њ–±—Л –љ–µ –њ–Њ–ї—Г—З–Є–ї–Њ—Б—М –њ—П—В–µ–љ –љ–∞ —Ж–≤–µ—В–Ї–µ) - —П –Њ–Ї—А–∞—Б–Є–ї–∞ —В–Њ–ї—М–Ї–Њ —Б–∞–Љ—Л–µ –Ї—А–∞–µ—И–Ї–Є –ї–µ–њ–µ—Б—В–Ї–Њ–≤, –∞ –Ї –Њ—Б–љ–Њ–≤–∞–љ–Є—О —Б–Є–ї—М–љ–Њ —А–∞—Б—В—Г—И–µ–≤–∞–ї–∞.
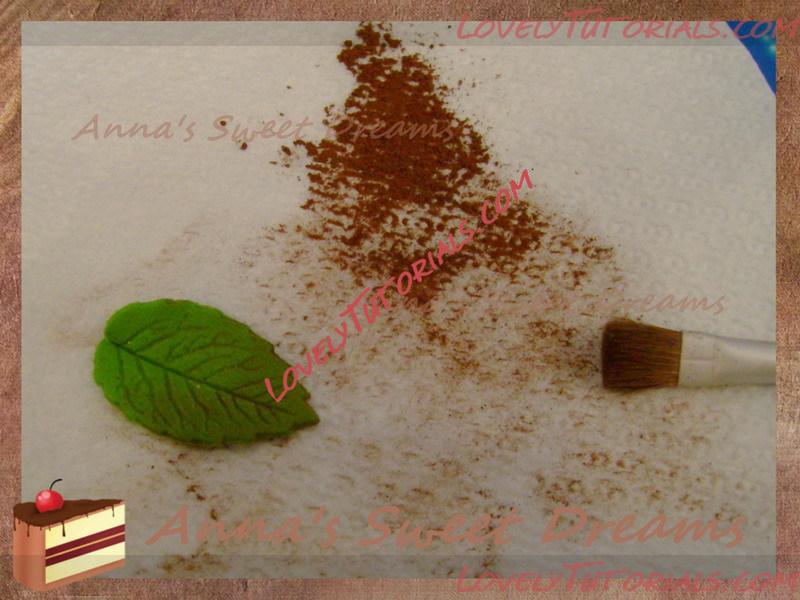
–Ш–Ј –Љ–∞—Б—В–Є–Ї–Є –Ј–µ–ї–µ–љ–Њ–≥–Њ —Ж–≤–µ—В–∞ (–і–ї—П –±–Њ–ї–µ–µ –љ–∞—Б—Л—Й–µ–љ–љ–Њ–≥–Њ —Ж–≤–µ—В–∞ —П –і–Њ–±–∞–≤–ї—П—О —З—Г—В—М-—З—Г—В—М —И–Њ–Ї–Њ–ї–∞–і–∞ —В–µ–Љ–љ–Њ–≥–Њ) –≤—Л—А–µ–Ј–∞–µ–Љ –ї–Є—Б—В–Њ—З–Ї–Є –Є –Љ–Њ–ґ–љ–Њ –Є—Е —Б–ї–µ–≥–Ї–∞ –њ–Њ–і–Ї—А–∞—Б–Є—В—М –Ї–Њ—А–Є—З–љ–µ–≤—Л–Љ –Ї—А–∞—Б–Є—В–µ–ї–µ–Љ —Б—Г—Е–Є–Љ (—Г –Љ–µ–љ—П —В–∞–Ї–Њ–≤–Њ–≥–Њ –љ–µ—В, —П –њ–Њ–ї—М–Ј—Г—О—Б—М –Њ–±—Л—З–љ—Л–Љ –Ї–∞–Ї–∞–Њ –њ–Њ—А–Њ—И–Ї–Њ–Љ)))
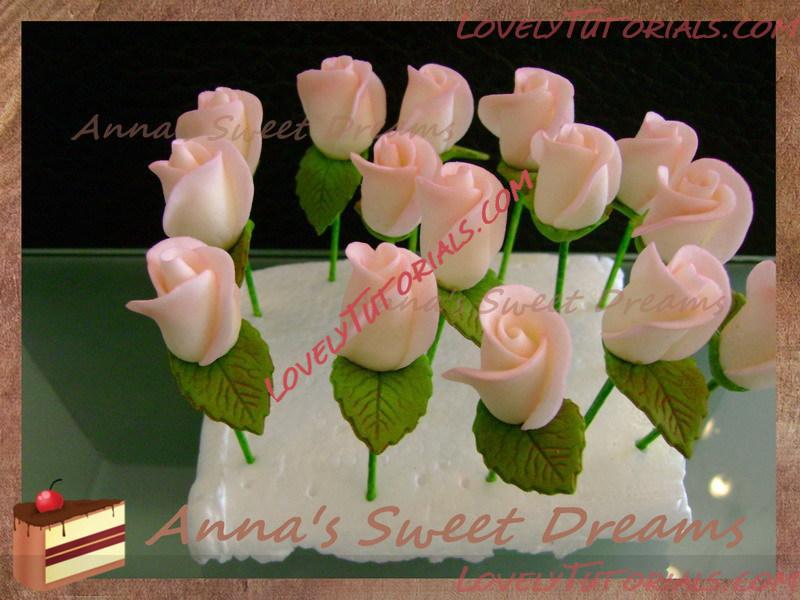
–Э–∞—Б–∞–ґ–Є–≤–∞–µ–Љ –ї–Є—Б—В–Њ—З–µ–Ї –љ–∞ –Ј—Г–±–Њ—З–Є—Б—В–Ї—Г –Є –њ—А–Є–Ї–ї–µ–Є–≤–∞–µ–Љ –Ї –Њ—Б–љ–Њ–≤–∞–љ–Є—О —А–Њ–Ј–Њ—З–Ї–Є, —Б–∞–Љ—Г –Ј—Г–±–Њ—З–Є—Б—В–Ї—Г –Љ–Њ–ґ–љ–Њ –Њ–Ї—А–∞—Б–Є—В—М –≤ –Ј–µ–ї–µ–љ—Л–є —Ж–≤–µ—В.

–¶–≤–µ—В–Њ—З–Ї–Є –≥–Њ—В–Њ–≤—Л.
|

03.02.2013, 19:29
|
|
–Р–і–Љ–Є–љ–Є—Б—В—А–∞—В–Њ—А
|
|
–†–µ–≥–Є—Б—В—А–∞—Ж–Є—П: 07.09.2010
–°–Њ–Њ–±—Й–µ–љ–Є–є: 7,940
|
|
|
 |
|
|
–Ь–µ—В–Ї–Є
|
anlegget, anl√§ggning, armado de los ramos, arranjo, artesanatos passo a passo, augalas, baking, biljka, bitki, blad, blade, blader, bladeren, blatt, bloem, bloemen, blomma, blommor, blomst, blomster, blume, blumen, bl√Љten, bl√Љtenpaste, bl√§tter, boeket, bouquet, buchet, buket, bukett, bukiet, buqu√™, cake decorating, cake decorating techniques, cer√Ґmica pl√°stica, chiodi di garofano, clavo de olor, clous de girofle, cloves, cold porcelain, cold porcelain figurines, cold porcelain flowers, confeitando bolos, csokor, cukrini≈≥ gƒЧli≈≥, curso completo de flores, curso de modelado, cvijet, cvijeƒЗe, decoracion de pasteles, decoraci√≥n de tortas, decorare le torte, decorazioni, deko fondant, dekorace na dort, dekoracija, dekoracije, dekorasyon, dekor√°cie, el abc del armado de ramos, feuille, feuilles, fimo, fimo flowers, fiore, fiori, fleurs, floare, flogistica, flor, floral inspirations, flores, flores azucar, flores e folhas, flori, floristics, floristik, floristikk, floristique, flor√≠stica, flower, flower paste, flowering plants, flowers, flowers on a wire, foglia, foglie, folha, folhas, folhas pintadas, fondan, fondant, fondente, fotopostup, frunze, gum pasta, gum paste, gum paste flowers, gumpaste, gumpaste flowers class, g√Љl, g√Љller, gƒЧlƒЧ, gƒЧlƒЧs, hand painting, handmodelliert, hideg porcel√°n, hladno porculan, hoja, hojas, how to, how t—Ж–≤–µ—В—Л –љ–∞ –њ—А–Њ–≤–Њ–ї–Њ–Ї–µ, how-to's, h≈Щeb√≠ƒНek, impianto, jak na, kage dekoration, kagedekoration, kakebaking, kaldt porselen, kallt porslin, kalt porzellan, kasvi, kolde porcel√¶n, koud porselein, krok za krokem, kukka, kukkakimppu, kukkia, kvetina, kvety, kvƒЫtina, kvƒЫtiny, kwiat, kwiaty, kylm√§ posliini, kytica, la mod√©lisation, lapai, lapas, leaf, leaves, lehdet, lehti, levelek, lev√©l, list, list√≠, li≈°ƒЗe, li≈Ыcie, li≈ЫƒЗ, l√≠stia, l√≠stky na dr√°tku, making sugar flowers, making the rosebud, marshmallow, masa flexible, mazzo, modelado, modelagem, modelare, modeling, modeling paste, modeliranje, modellazione, modelleme, modellering, modellieren, modellierpaste, modell…Щ≈Яdirm…Щ, modelovanie, modelov√°n√≠, modelowanie, montando, motivtorten, nelken, n√°vody a postupy, n√°vody na kvƒЫty a l√≠stky, n√ґv√©ny, oasis o esponja de floristeria, pap, paso a paso, passo a passo, passo-a-passo, pasta flexible, pflanze, plant, planta, plante, plantes, plantƒГ, pocelana fria, polymer clay, polymer clay flowers tutorial, porcelaine froide, porcelana fria, porcelana fr√≠a, porcellana fredda, postup klinƒНek, postupak za ukrasavanje, puok≈°tƒЧ, ramo, rastlina, rece por≈£elan, rododendron, roos, rosa, rosas, rose, rosen, roser, roses, rosor, rostlina, rozen, ro≈ЊƒЧ, ro≈ЊƒЧs, ro≈Ыlina, ruusu, ruusut, ru≈Њa, ru≈Њe, r√≥zsa, r√≥≈Љa, r√≥≈Љe, r≈ѓ≈Њe, schritt f√Љr schritt anleitung, schritt-f√Љr-schritt, sculpey flowers, sculpting, simple, soƒЯuk porselen, stamens, steg, steg for steg, step by step, step-by-step, strau√Я, studen√љ porcel√°n, styrofoam, sugar cane flowers, sugar cloves, sugar flower, sugar flowers, sugar flowers for cake decorating, sugar paste flowers, sugar rose, sugarcraft, sugarpaste, sukker art, technique utilis√©e fleurs en sucre cru, tecnicas de decoracion, tecniche, thai flowers, torte, torte decorate, torten dekorieren, torti, trandafir, trandafiri, trin for trin, trin-for-trin, trinn for trinn, tutorial, tutorijal, ukra≈°avanje torti, uputstvo za dekoraciju, vir√°g, vir√°gok, wedding cake, wedding cakes, wire, yaprak, yapraklar, zimno porcelany, zuckerblumen, аЄФаЄ≠аЄБаєДаЄ°аєЙ, а§Єа§Ьа§Њ а§Ха•За§Х, а§Ѓа•Йа§°а§≤а§ња§Ва§Ч, гГҐгГЗгГЂ, √Іi√Іek, √Іi√Іek modelleme, √ґkade, ≈°alto porceliano, еїЇж®°, и£Эй£ЊиЫЛз≥Х, мІДлЛђлЮ?, ќЇѕБѕНќ± ѕАќњѕБѕГќµќїќђќљќЈ, ќЉѕАќњѕЕќЇќ≠ѕДќњ, ќ±ќґќ±ќїќ≠ќ±, ќїќњѕЕќїќњѕНќіќє, ќїќњѕЕќїќњѕНќіќєќ±, ѕДќ± ѕЖѕНќїќїќ±, ѕДѕБќєќ±ќљѕДќђѕЖѕЕќїќїќњ, ѕДѕБќєќ±ќљѕДќђѕЖѕЕќїќїќ±, ѕЖѕНќїќїќ±, ѕЖѕЕѕДѕМ, –Ї–≤–µ—В–Ї–∞, –Ї–≤–µ—В–Ї—Ц, –Ї–≤—Ц—В–Є, –Ї–≤—Ц—В–Ї–∞, –Ї–∞–Ї —Б–ї–µ–њ–Є—В—М —А–Њ–Ј—Г, –Ї–µ—А–∞–Љ–Є—З–µ—Б–Ї–∞—П —Д–ї–Њ—А–Є—Б—В–Є–Ї–∞, –Ї—Г—Б—В, –≥–≤–Њ–Ј–і–Є–Ї–∞, –њ–Њ–ї–Є–Љ–µ—А–љ–∞—П –≥–ї–Є–љ–∞, –њ–Њ–ї–µ–≤—Л–µ —Ж–≤–µ—В—Л, –њ–Њ—И–∞–≥–Њ–≤–Њ, –њ—А–Є—А–Њ–і–∞, –Љ–Ї, –Љ–Њ–і–µ–ї–Є—А–∞–љ–µ, –Љ–∞–є—Б—В–µ—А-–Ї–ї–∞—Б–Є, –Љ–∞—А—И–Љ–µ–ї–ї–Њ—Г, –Љ–∞—Б—В–Є–Ї–∞, –Љ–∞—Б—В–µ—А-–Ї–ї–∞—Б—Б, –Љ–∞—Б—В–µ—А-–Ї–ї–∞—Б—Б –њ–Њ –ї–µ–њ–Ї–µ, –∞–Ј–∞–ї–Є—П, –∞–Ј–∞–ї—Ц—П, –±—Г–Ї–µ—В, –Ј–∞–≤–Њ–і, –ї–Є—Б—В–∞, –ї–Є—Б—В—М—П, –ї–Є—Б—В—П, –ї–µ–њ–Є–Љ —Ж–≤–µ—В—Л, –ї–µ–њ–Ї–∞, –ї–µ–њ–Ї–∞ –Є–Ј –≥–ї–Є–љ—Л, –ї–µ–њ–Ї–∞ –Є–Ј –њ–ї–∞—Б—В–Є–Ї–Є, –ї–µ–њ–Ї–∞ —А–Њ–Ј—Л –±–µ–Ј –њ—А–Њ–≤–Њ–ї–Ї–Є, –ї–µ–њ–Ї–∞ —Ж–≤–µ—В–Њ–≤, –ї—Ц–њ–ї–µ–љ–љ—П, –ї—Ц—Б—Ж–µ, —А–Њ–Ј–Є, —А–Њ–Ј–∞, —А–Њ–Ј—Л, —А–Њ—Б–ї–Є–љ–∞, —А–∞—Б—В–µ–љ–Є–µ, —А–∞—Б—В–µ–љ–Є—П, —А—Г–ґ–∞, —А—Г–ґ—Л, —Г–Ї—А–∞—И–µ–љ–Є–µ —В–Њ—А—В–Њ–≤, —Г–Ї—А–∞—И–µ–љ–Є–µ —В–Њ—А—В–∞, —Б–≤–∞–і–µ–±–љ—Л–є —В–Њ—А—В, —Б–∞—Е–∞—А–љ–∞—П –Љ–∞—Б—В–Є–Ї–∞, —Б–∞—Е–∞—А–љ—Л–є –Ї–ї–µ–є, —Г—А–Њ–Ї–Є –њ—А–Є–Ї—А–∞—И–∞–љ–љ—П, —Б—В—Г–і–µ–љ –њ–Њ—А—Ж–µ–ї–∞–љ, —В–Њ—А—В, —В—А–Њ—П–љ–і–Є, —В—А–Њ—П–љ–і–∞, —Д–Є–Љ–Њ, —Д–ї–Њ—А–Є—Б—В–Є–Ї–∞, —Д–ї–Њ—А–∞, —Е–Њ–ї–Њ–і–љ–Њ–≥–Њ –њ–Њ—А—Ж–µ–ї—П–љ–Є, —Е–Њ–ї–Њ–і–љ–Њ–≥–Њ —Д–∞—А—Д–Њ—А–∞, —Е–Њ–ї–Њ–і–љ—Л–є —Д–∞—А—Д–Њ—А, —Е–∞–ї–Њ–і–љ–∞–≥–∞ —Д–∞—А—Д–Њ—А—Г, —Ж–≤–µ—В–Њ–Ї, —Ж–≤–µ—В–Њ—З–љ–∞—П –њ–∞—Б—В–∞, —Ж–≤–µ—В–µ, —Ж–≤–µ—В—П, —Ж–≤–µ—В—Л, —Ж–≤–µ—В—Л –Є–Ј –њ–Њ–ї–Є–Љ–µ—А–љ–Њ–є –≥–ї–Є–љ—Л, —Ж–≤–µ—В—Л –Є–Ј —Е–Њ–ї–Њ–і–љ–Њ–≥–Њ —Д–∞—А—Д–Њ—А–∞, —Ж–≤–µ—В—Л –љ–∞ —В–Њ—А—В, —Ж–≤–µ—В—Л —А—Г—З–љ–Њ–є —А–∞–±–Њ—В—Л, —И–∞–≥ –Ј–∞ —И–∞–≥–Њ–Љ  |
|

