|
|
―²―é–Μ―¨–Ω–Α–Ϋ,tulip, tulipΟΓn, tulipe,Tulpe, tulipano,tulipΟΓn
|

26.09.2011, 13:55
|
|
–ê–¥–Φ–Η–Ϋ–Η―¹―²―Ä–Α―²–Ψ―Ä
|
|
–†–Β–≥–Η―¹―²―Ä–Α―Ü–Η―è: 07.09.2010
–Γ–Ψ–Ψ–±―â–Β–Ϋ–Η–Ι: 7,940
|
|
|

03.03.2012, 10:59
|
|
–ê–¥–Φ–Η–Ϋ–Η―¹―²―Ä–Α―²–Ψ―Ä
|
|
–†–Β–≥–Η―¹―²―Ä–Α―Ü–Η―è: 07.09.2010
–Γ–Ψ–Ψ–±―â–Β–Ϋ–Η–Ι: 7,940
|
|

–€–ö –≤–Ζ―è―² ―¹ ―¹–Α–Ι―²–Α acaketorememberva.blogspot.com
–û–≥―Ä–Ψ–Φ–Ϋ–Α―è –±–Μ–Α–≥–Ψ–¥–Α―Ä–Ϋ–Ψ―¹―²―¨ –ê–≤―²–Ψ―Ä―É-Kara Buntin –Ζ–Α –€–ö
Making Unwired Gumpaste Tulips
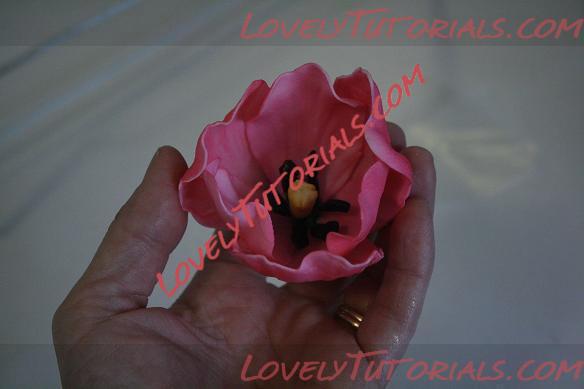
Here's a quick method to glue unwired tulip petals together using melted chocolate. The centers on these are wired, but it saves time when you don't have to do wires in each individual petal.
Remember that the petals on these flowers can't be adjusted once the chocolate dries, so make sure that they're in the position that you want them to be in while they're still wet!
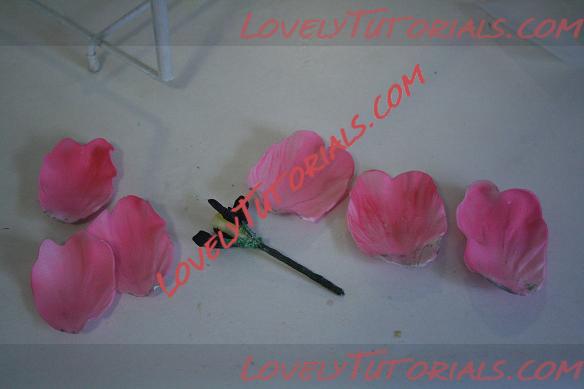
First, make the center stamens on a wire. (You can do these without the wires, to tell the truth, so I'll do another tutorial on that method later.) You'll need to have three larger tulip petals and three smaller ones that have been shaped and dried.
Next, take the center and put it through a piece of waxed paper that's about 3" square.
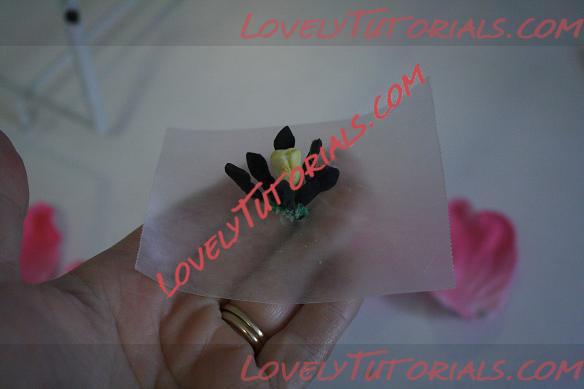
Take some melted chocolate and pipe it around the base of the center. You can use the same color as the tulip petals, or make it green as a contract. Since the stem is green any color that peeks through when the flower is done won't seem out of place.
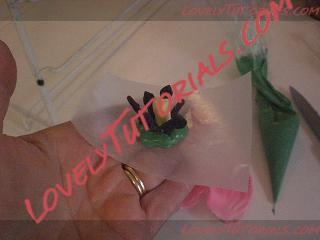
Using the three larger petals, place them around the center with the ends stuck into the chocolate.
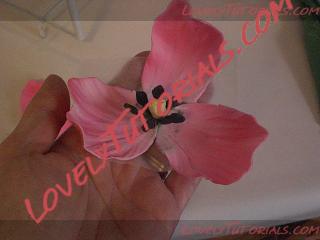
Pipe some more chocolate dots on the three parts where the petals meet, right up against the center wire.
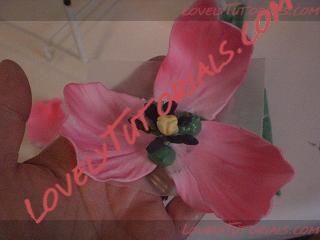
Take the smaller petals and place them on the chocolate dots, overlapping the areas where the three larger petals connect.
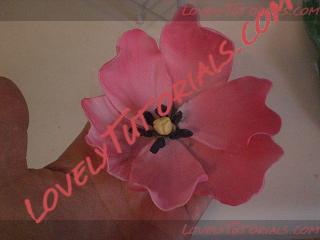
Take the tulip and carefully put it in an egg carton or another curved former that will hold the petals upright while the chocolate cools off. The shape that it dries in will be that shape when it's done so make sure you arrange the petals more open or more closed depending on what you want them to look like.
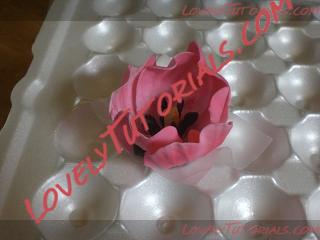
The final flower looks like this. Very nice, and it avoids the time involved with wiring all the individual petals.
|

01.05.2012, 07:10
|
|
–ê–¥–Φ–Η–Ϋ–Η―¹―²―Ä–Α―²–Ψ―Ä
|
|
–†–Β–≥–Η―¹―²―Ä–Α―Ü–Η―è: 07.09.2010
–Γ–Ψ–Ψ–±―â–Β–Ϋ–Η–Ι: 7,940
|
|
 Gumpaste Tulip Tutorial
–û–≥―Ä–Ψ–Φ–Ϋ–Α―è –±–Μ–Α–≥–Ψ–¥–Α―Ä–Ϋ–Ψ―¹―²―¨ Tea Party Cakes –Ζ–Α –€–Α―¹―²–Β―Ä-–Κ–Μ–Α―¹―¹
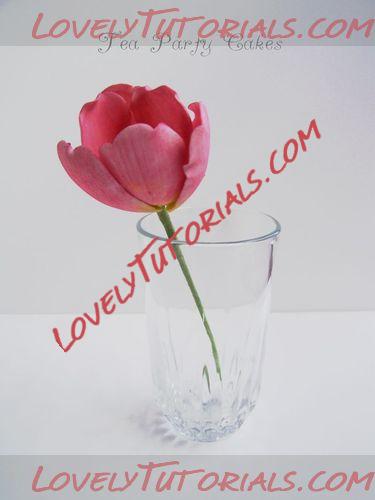
Here is a tutorial on how to make a gumpaste tulip
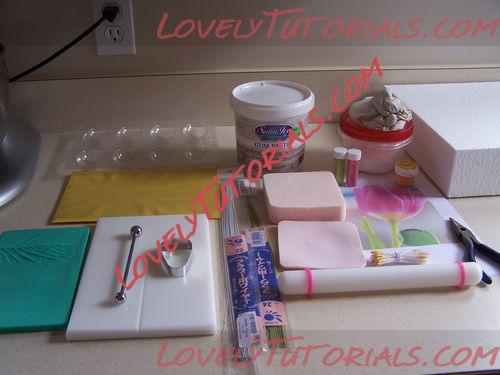
Supplies you will need:
- gumpaste
- tulip cutter
- floral wire (22 guage and 26 guage)
- wire cutters
- grooved cel board
- veining mat/tool
- thin foam
- rolling pin
- chocolate egg mold (for drying the petals)
- lily stamens (I used Wilton)
- tweezers
- petal dusts in desired colours
- vegetable shortening
- cornstarch
- styrofoam block (to hold stamens for drying)See more
Using your wire cutters, cut enough wire for 1 pistil and 6 petals. I used 22 guage for the pistil and I cut all my wires approximately 7 inch long because I wanted to display my tulip in a glass. If you are using your tulip in arrangement on a cake cut your wires shorter (approx. 4 inch). For my 6 petals I used 26 guage white wire.
Make your pistil first. Using a small amount of white gumpaste roll out a sausage leaving one end slightly thicker.
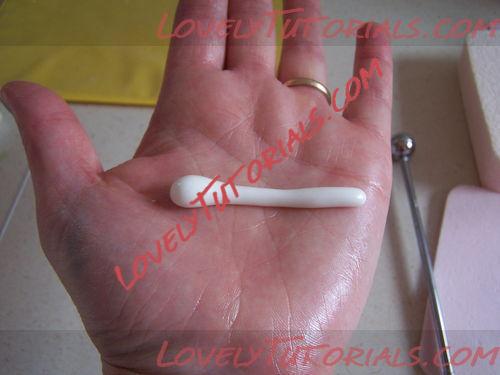
Insert your 22 guage wire. Your pistil should be about half the length of your petals. Trim off any excess paste to make in the right size.
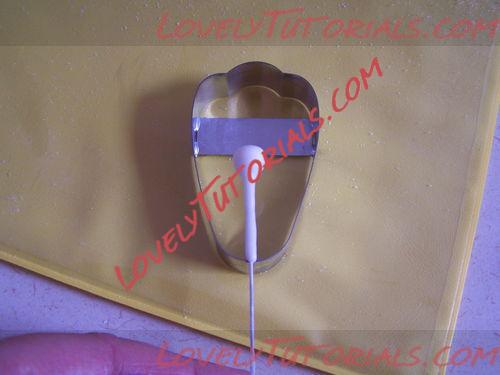
Using a pair of tweezers pinch the round end of the pistil into three sections.
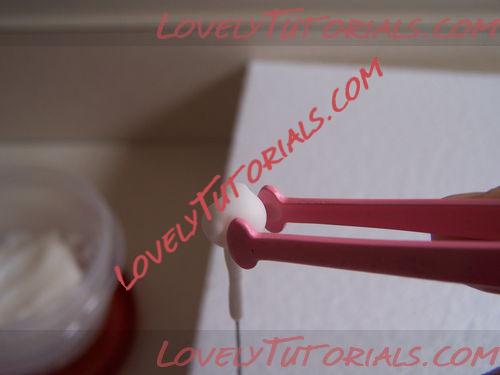
Your pistil should look like this. Place the wire in a styrofoam block to dry overnight.
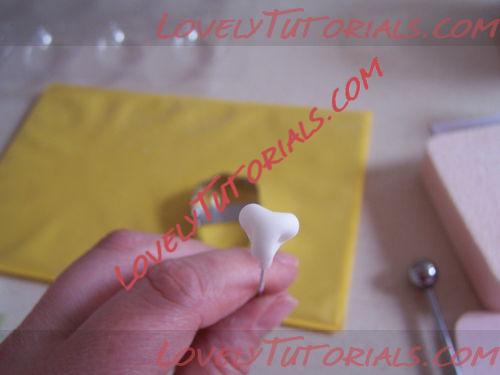
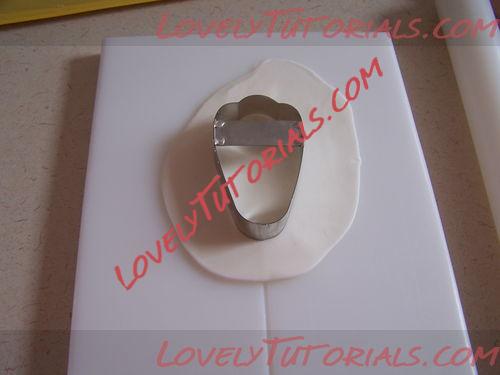
Roll out your gumpaste on the grooved cell board to approximately 1/16 inch (1-2 mm) thick. Cut out the tulip petal making sure to center the groove on the petal.
Using 26 guage wire, insert the wire into the petal. Then place on the veining mat. If you have a proper tulip veiner use that.
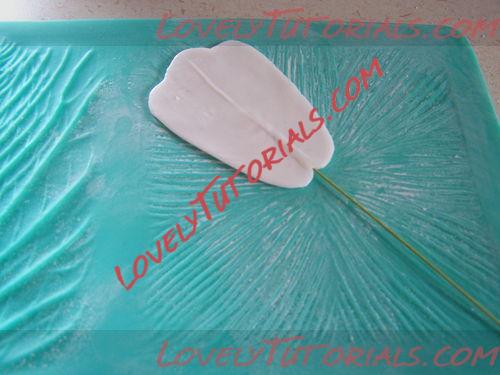
Use a thin foam to gentle impress the veins. Flip the petal over and repeat.
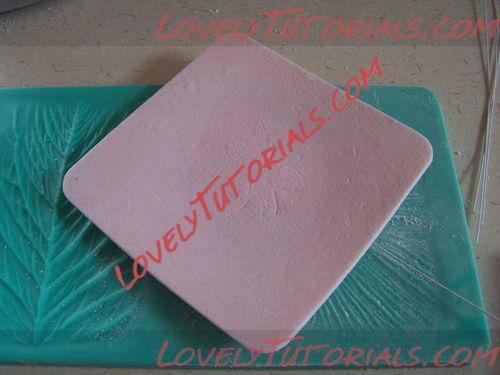
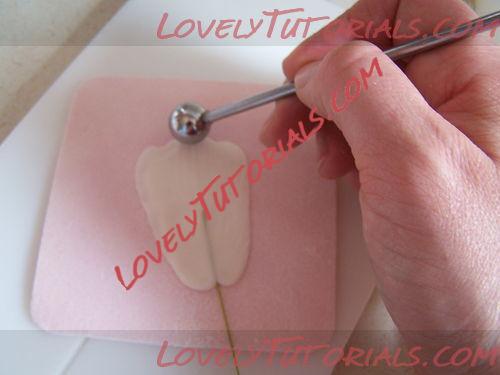
Using your ball tool, thin the edges of the petal. The more you thin the more ruffled your petal will be.
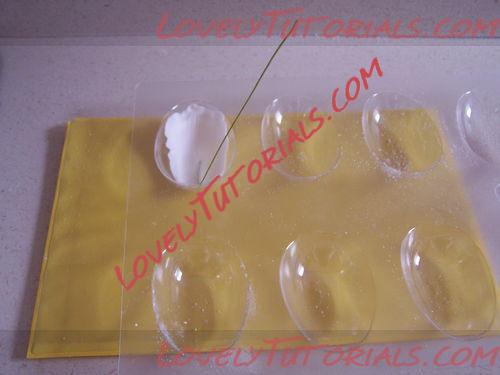
Place the petal in a chocolate egg mold that has been lightly dusted with cornstarch to dry overnight.
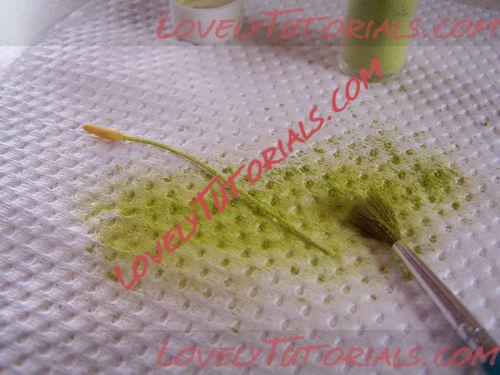
Using light green petal dust, dust the stamens stems.
Brush the tops of the stamens with gum glue or piping gel and then roll them in yellow petal dust. This will make them look powdery with pollen.
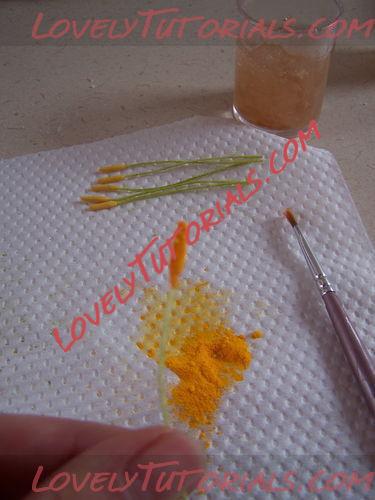
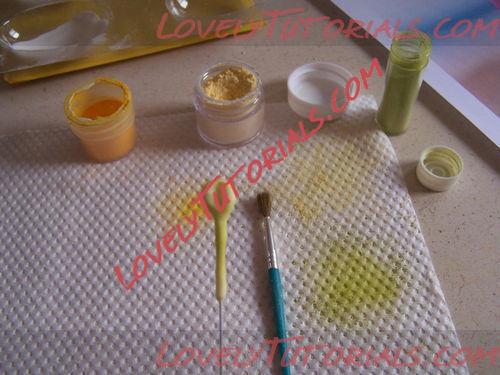
When your pistil is dry, dust it with a combination of cream and yellow petal dust on the top, and light green on the bottom.
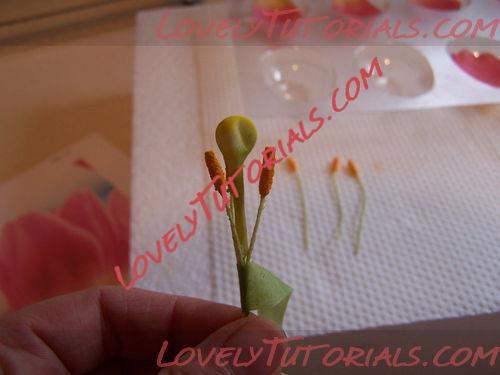
Using floral tape, attach the stamens to the pistil. The stamens should be slightly lower than the pistil.
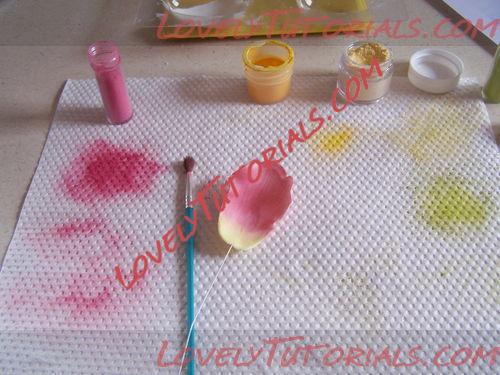
Dust the dried petals with a combination of cream and yellow petal dust on the bottom portion of the petal closest to the wire. Add just a touch of light green to the bottom edge.
Note: If you make your petals out of coloured gumpaste you donβÄôt necessarily have to use petal dusts.
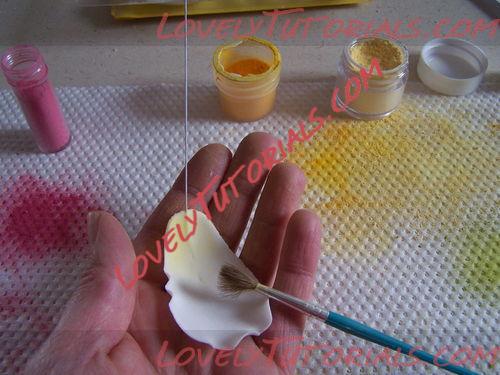
Using a separate brush and some pink petal dust, colour the rest of the petal (on both sides).
Using floral tape attach 3 petals around the tulip center.
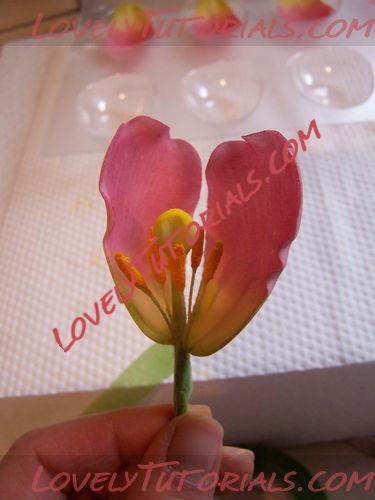
Then attach the next 3 petals in the spaces between the first three petals.
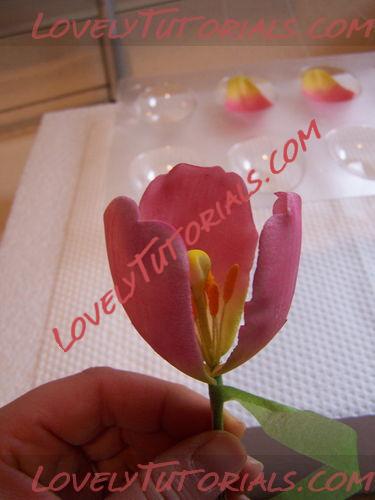
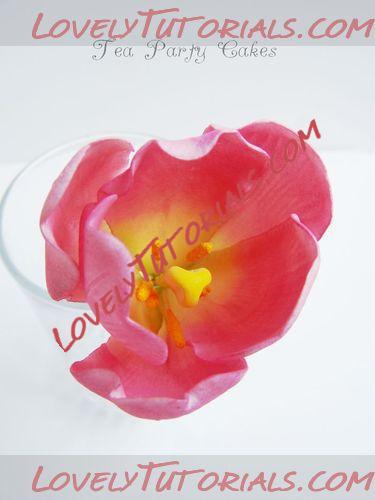
Your finished tulip should look like this. I hope you all give this a try!
|

02.05.2012, 12:37
|
|
–ê–¥–Φ–Η–Ϋ–Η―¹―²―Ä–Α―²–Ψ―Ä
|
|
–†–Β–≥–Η―¹―²―Ä–Α―Ü–Η―è: 07.09.2010
–Γ–Ψ–Ψ–±―â–Β–Ϋ–Η–Ι: 7,940
|
|
|

10.05.2012, 06:51
|
|
–ê–¥–Φ–Η–Ϋ–Η―¹―²―Ä–Α―²–Ψ―Ä
|
|
–†–Β–≥–Η―¹―²―Ä–Α―Ü–Η―è: 07.09.2010
–Γ–Ψ–Ψ–±―â–Β–Ϋ–Η–Ι: 7,940
|
|
|
 |
|
|
–€–Β―²–Κ–Η
|
anlegget, anlΟΛggning, armado de los ramos, arranjo, artesanatos passo a passo, augalas, baking, biljka, bitki, blad, blade, blader, bladeren, blatt, bloem, bloemen, blomma, blommor, blomst, blomster, blume, blumen, blΟΦten, blΟΦtenpaste, blΟΛtter, boeket, bouquet, buchet, buket, bukett, bukiet, buquΟΣ, cake decorating, cake decorating techniques, cerΟΔmica plΟΓstica, chiodi di garofano, clavo de olor, clous de girofle, cloves, cold porcelain, cold porcelain figurines, cold porcelain flowers, confeitando bolos, csokor, cukrini≈≥ gΡ½li≈≥, curso completo de flores, curso de modelado, cvijet, cvijeΡ΅e, decoracion de pasteles, decoraciΟ≥n de tortas, decorare le torte, decorazioni, deko fondant, dekorace na dort, dekoracija, dekoracije, dekorasyon, dekorΟΓcie, el abc del armado de ramos, feuille, feuilles, fimo, fimo flowers, fiore, fiori, fleurs, floare, flogistica, flor, floral inspirations, flores, flores azucar, flores e folhas, flori, floristics, floristik, floristikk, floristique, florΟ≠stica, flower, flower paste, flowering plants, flowers, flowers on a wire, foglia, foglie, folha, folhas, folhas pintadas, fondan, fondant, fondente, fotopostup, frunze, gum pasta, gum paste, gum paste flowers, gumpaste, gumpaste flowers class, gΡ½lΡ½, gΡ½lΡ½s, hand painting, handmade, handmodelliert, hideg porcelΟΓn, hladno porculan, hoja, hojas, how to, how t―Ü–≤–Β―²―΄ –Ϋ–Α –Ω―Ä–Ψ–≤–Ψ–Μ–Ψ–Κ–Β, how-to's, h≈ôebΟ≠Ρçek, impianto, jak na, kage dekoration, kagedekoration, kakebaking, kaldt porselen, kallt porslin, kalt porzellan, kasvi, kolde porcelΟΠn, koud porselein, krok za krokem, kukka, kukkakimppu, kukkia, kvetina, kvety, kvΡ¦tina, kvΡ¦tiny, kwiat, kwiaty, kylmΟΛ posliini, kytica, la modΟ©lisation, lala, lale, lalea, lalele, lapai, lapas, leaf, leaves, lehdet, lehti, levelek, levΟ©l, list, listΟ≠, li≈ΓΡ΅e, li≈¦cie, li≈¦Ρ΅, lΟΔle, lΟ≠stia, lΟ≠stky na drΟΓtku, making sugar flowers, marshmallow, masa flexible, mazzo, modelado, modelagem, modelare, modeling, modeling paste, modeliranje, modellazione, modelleme, modellering, modellieren, modellierpaste, modell…ô≈üdirm…ô, modelovanie, modelovΟΓnΟ≠, modelowanie, montando, motivtorten, nelken, nΟΓvody a postupy, nΟΓvody na kvΡ¦ty a lΟ≠stky, nΟΕvΟ©ny, oasis o esponja de floristeria, pap, paso a paso, passo a passo, passo-a-passo, pasta flexible, pflanze, plant, planta, plante, plantes, plantΡÉ, pocelana fria, polymer clay, polymer clay flowers tutorial, porcelaine froide, porcelana fria, porcelana frΟ≠a, porcellana fredda, postup klinΡçek, postupak za ukrasavanje, puok≈ΓtΡ½, ramo, rastlina, rece por≈Θelan, rododendron, rostlina, ro≈¦lina, schritt fΟΦr schritt anleitung, schritt-fΟΦr-schritt, sculpey flowers, sculpting, simple, soΡüuk porselen, stamens, steg for steg, step by step, step-by-step, strauΟü, studenΟΫ porcelΟΓn, styrofoam, sugar cane flowers, sugar cloves, sugar flower, sugar flowers, sugar flowers for cake decorating, sugar paste flowers, sugarcraft, sugarpaste, sukker art, technique utilisΟ©e fleurs en sucre cru, tecnicas de decoracion, tecniche, thai flowers, torte, torte decorate, torten dekorieren, torti, trin for trin, trin-for-trin, trinn for trinn, tulip, tulipa, tulipan, tulipaner, tulipanes, tulipani, tulipano, tulipany, tulipas, tulipe, tulipes, tulipΟΓn, tulipΟΓny, tulp, tulpan, tulpaner, tulpe, tulpen, tulppaani, tulppaanit, tulpΡ½, tulpΡ½s, tutorial, tutorijal, ukra≈Γavanje torti, uputstvo za dekoraciju, virΟΓg, virΟΓgok, wedding cake, wedding cakes, wire, yaprak, yapraklar, zimno porcelany, zuckerblumen, ύΗîύΗ≠ύΗ¹ύΙ³ύΗΓύΙâ, ύΛΗύΛ€ύΛΨ ύΛïύΞ΅ύΛï, ύΛ°ύΞâύΛΓύΛ≤ύΛΩύΛ²ύΛ½, ψÉΔψÉ΅ψÉΪ, ΟßiΟßek, ΟßiΟßek modelleme, ≈Γalto porceliano, εΜΚφ®Γ, ηΘùιΘΨ禴γ≥ï, λß³κ΄§κû?, ΈΚœ¹œçΈ± œÄΈΩœ¹œÉΈΒΈΜΈ§ΈΫΈΖ, ΈΦœÄΈΩœÖΈΚΈ≠œ³ΈΩ, Έ±ΈΕΈ±ΈΜΈ≠Έ±, ΈΜΈΩœÖΈΜΈΩœçΈ¥ΈΙ, ΈΜΈΩœÖΈΜΈΩœçΈ¥ΈΙΈ±, œ³ΈΩœÖΈΜΈ·œÄΈ±, œ³ΈΩœÖΈΜΈ·œÄΈΒœ², œ³Έ± œÜœçΈΜΈΜΈ±, œÜœçΈΜΈΜΈ±, œÜœÖœ³œ¨, –Κ–≤–Β―²–Κ–Α, –Κ–≤–Β―²–Κ―•, –Κ–≤―•―²–Η, –Κ–≤―•―²–Κ–Α, –Κ–Β―Ä–Α–Φ–Η―΅–Β―¹–Κ–Α―è ―³–Μ–Ψ―Ä–Η―¹―²–Η–Κ–Α, –Κ―É―¹―², –≥–≤–Ψ–Ζ–¥–Η–Κ–Α, –Ω–Ψ–Μ–Η–Φ–Β―Ä–Ϋ–Α―è –≥–Μ–Η–Ϋ–Α, –Ω–Ψ–Μ–Β–≤―΄–Β ―Ü–≤–Β―²―΄, –Ω–Ψ―à–Α–≥–Ψ–≤–Ψ, –Ω―Ä–Η―Ä–Ψ–¥–Α, –Φ–Κ, –Φ–Ψ–¥–Β–Μ–Η―Ä–Α–Ϋ–Β, –Φ–Α–Ι―¹―²–Β―Ä-–Κ–Μ–Α―¹–Η, –Φ–Α―Ä―à–Φ–Β–Μ–Μ–Ψ―É, –Φ–Α―¹―²–Η–Κ–Α, –Φ–Α―¹―²–Β―Ä-–Κ–Μ–Α―¹―¹, –Φ–Α―¹―²–Β―Ä-–Κ–Μ–Α―¹―¹ –Ω–Ψ –Μ–Β–Ω–Κ–Β, –Α–Ζ–Α–Μ–Η―è, –Α–Ζ–Α–Μ―•―è, –±―É–Κ–Β―², –Ζ–Α–≤–Ψ–¥, –Μ–Η―¹―²–Α, –Μ–Η―¹―²―¨―è, –Μ–Η―¹―²―è, –Μ–Α–Μ–Β, –Μ–Α–Μ–Β―²–Α, –Μ–Β–Ω–Η–Φ ―Ü–≤–Β―²―΄, –Μ–Β–Ω–Κ–Α, –Μ–Β–Ω–Κ–Α –Η–Ζ –≥–Μ–Η–Ϋ―΄, –Μ–Β–Ω–Κ–Α –Η–Ζ –Ω–Μ–Α―¹―²–Η–Κ–Η, –Μ–Β–Ω–Κ–Α –Ω–Ψ―à–Α–≥–Ψ–≤–Ψ, –Μ–Β–Ω–Κ–Α ―Ü–≤–Β―²–Ψ–≤, –Μ―•–Ω–Μ–Β–Ϋ–Ϋ―è, –Μ―•―¹―Ü–Β, ―Ä–Ψ―¹–Μ–Η–Ϋ–Α, ―Ä–Α―¹―²–Β–Ϋ–Η–Β, ―Ä–Α―¹―²–Β–Ϋ–Η―è, ―É–Κ―Ä–Α―à–Β–Ϋ–Η–Β ―²–Ψ―Ä―²–Ψ–≤, ―É–Κ―Ä–Α―à–Β–Ϋ–Η–Β ―²–Ψ―Ä―²–Α, ―¹–≤–Α–¥–Β–±–Ϋ―΄–Ι ―²–Ψ―Ä―², ―¹–Α―Ö–Α―Ä–Ϋ–Α―è –Φ–Α―¹―²–Η–Κ–Α, ―¹–Α―Ö–Α―Ä–Ϋ―΄–Ι –Κ–Μ–Β–Ι, ―É―Ä–Ψ–Κ–Η –Ω―Ä–Η–Κ―Ä–Α―à–Α–Ϋ–Ϋ―è, ―¹―²―É–¥–Β–Ϋ –Ω–Ψ―Ä―Ü–Β–Μ–Α–Ϋ, ―²–Ψ―Ä―², ―²―é–Μ―¨–Ω–Α–Ϋ, ―²―é–Μ―¨–Ω–Α–Ϋ–Η, ―²―é–Μ―¨–Ω–Α–Ϋ―΄, ―³–Η–Φ–Ψ, ―³–Μ–Ψ―Ä–Η―¹―²–Η–Κ–Α, ―³–Μ–Ψ―Ä–Α, ―Ö–Ψ–Μ–Ψ–¥–Ϋ–Ψ–≥–Ψ –Ω–Ψ―Ä―Ü–Β–Μ―è–Ϋ–Η, ―Ö–Ψ–Μ–Ψ–¥–Ϋ–Ψ–≥–Ψ ―³–Α―Ä―³–Ψ―Ä–Α, ―Ö–Ψ–Μ–Ψ–¥–Ϋ―΄–Ι ―³–Α―Ä―³–Ψ―Ä, ―Ö–Α–Μ–Ψ–¥–Ϋ–Α–≥–Α ―³–Α―Ä―³–Ψ―Ä―É, ―Ü–≤–Β―²–Ψ–Κ, ―Ü–≤–Β―²–Ψ―΅–Ϋ–Α―è –Ω–Α―¹―²–Α, ―Ü–≤–Β―²–Β, ―Ü–≤–Β―²―è, ―Ü–≤–Β―²―΄, ―Ü–≤–Β―²―΄ –Η–Ζ –Ω–Ψ–Μ–Η–Φ–Β―Ä–Ϋ–Ψ–Ι –≥–Μ–Η–Ϋ―΄, ―Ü–≤–Β―²―΄ –Η–Ζ ―Ö–Ψ–Μ–Ψ–¥–Ϋ–Ψ–≥–Ψ ―³–Α―Ä―³–Ψ―Ä–Α, ―Ü–≤–Β―²―΄ –Ϋ–Α ―²–Ψ―Ä―², ―Ü–≤–Β―²―΄ ―Ä―É―΅–Ϋ–Ψ–Ι ―Ä–Α–±–Ψ―²―΄, ―Ü―é–Μ―¨–Ω–Α–Ϋ, ―Ü―é–Μ―¨–Ω–Α–Ϋ―΄, ―à–Α–≥ –Ζ–Α ―à–Α–≥–Ψ–Φ  |
|

