|
|
МК торт "Гамбургер"-3D Hamburger cake tutorial V2
|

18.04.2013, 19:19
|
|
Администратор
|
|
Регистрация: 05.03.2013
Сообщений: 665
|
|
 МК торт "Гамбургер"-3D Hamburger cake tutorial V2
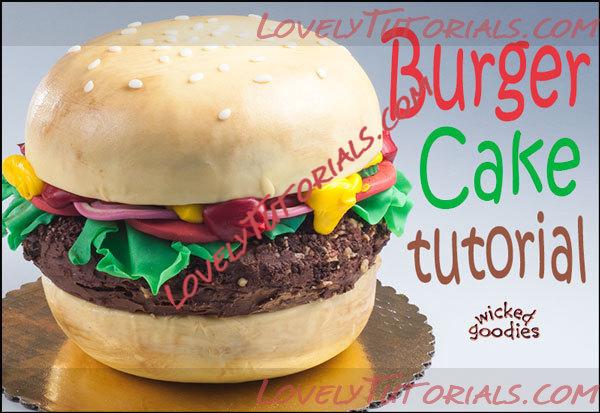
The illusion of the hamburger cake or cheeseburger cake is that it causes people to salivate for a juicy grilled beef patty that turns out to be nutty chocolate cake. I used modeling chocolate with a little fondant to decorate this cake but the same design could be done using just fondant (only then the lettuce would be harder to roll so thin).
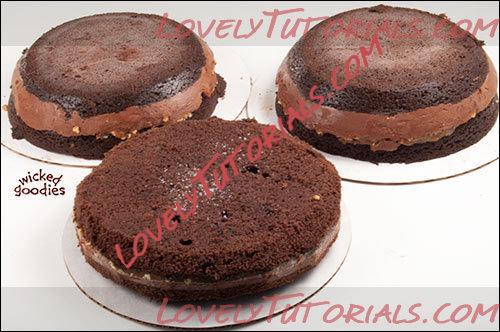
The above cakes were frozen for solid leverage since there is no infrastructure in this 3-tier design. Follow this link for my cake filling tutorial.
Items Needed
- Two 2” tall, 8” diameter half sphere cakes, leveled on top (above, top left and right)
- One 2” tall, 8” diameter cylinder cake, edges rounded (above, front)
- One 1” tall, 6” diameter disk of cake to raise the top bun
- Vanilla buttercream
- Chocolate buttercream
- Chopped dark chocolate
- Chopped nuts (I used pecans)
- Tan modeling chocolate + fondant (50:50)
- Green, red, purple, and white modeling chocolate
- Ball tool, part of this kit
- Foam shaping mat
- Rolled modeling chocolate equipment
- Red and yellow food coloring
- Cocoa powder
- Blush brush
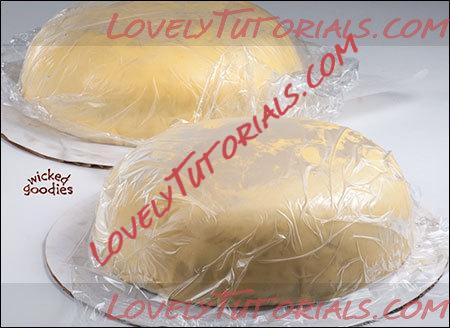
1. Crumb coat the top and bottom tier bun cakes with vanilla buttercream.
2. Combine 50:50 tan fondant and modeling chocolate (or use all fondant) and roll it out to 1/8” inch thickness. Cover each bun cake and trim away the excess.
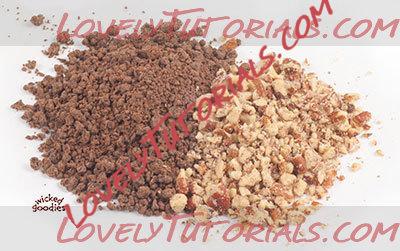
3. Chop up a small handful of dark chocolate and nuts using a knife or food processor. Mix them together in the bowl.
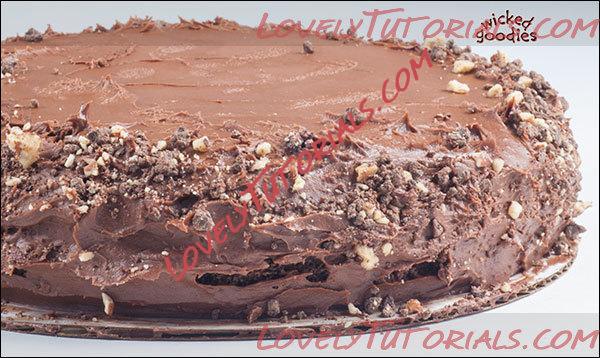
4. Frost the middle hamburger patty tier roughly with chocolate buttercream. It is important that the frosting job be haphazard and imperfect to convey the nooks and crannies of a ground beef burger.
5. Press the chocolate and nut mixture into the frosting around the sides of the hamburger tier. From a distance, this garnish will make the tier look more like a burger and from up close, it will remind people that it’s cake.
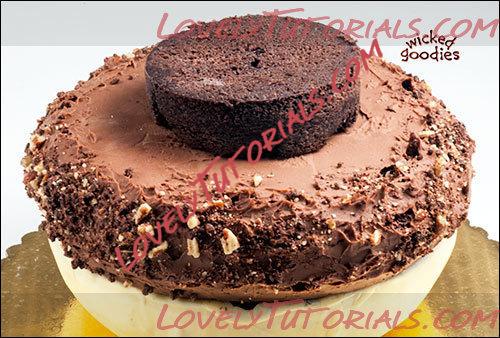
6. Add the 6” chunk of cake to the center of burger patty to make space around which the condiments can be piled.
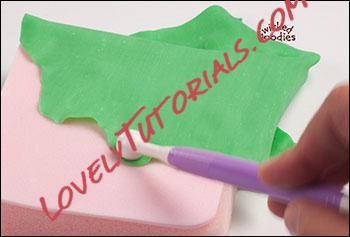
7. To create the lettuce, roll green modeling chocolate to 1/16” inch thickness and cut sheets with wavy edges. Atop a foam shaping mat, use the large end of a ball tool to rub the edges of the chocolate until it is as thin as lettuce. Only prepare one side of the chocolate lettuce sheets since only its edges will show out of the sides of the cake.
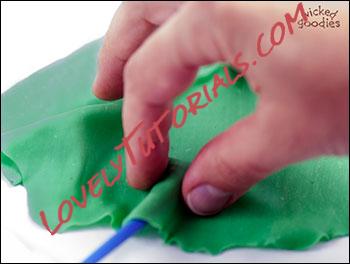
8. Use a pointed sculpting implement to ruffle the edge like lettuce.
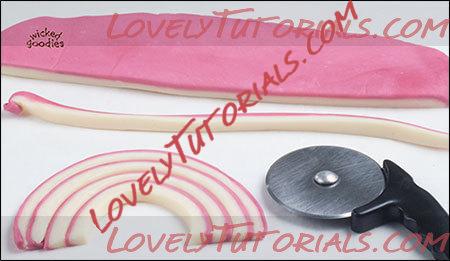
9. To make onion rings, roll out ¼” thick white modeling chocolate and cover it with a 1/16” thick sheet of purple modeling chocolate. Roll them gently with a plastic rolling pin to fuse them together.
10. With a roller cutter or long knife, cut strips the long way and turn them sideways to expose the dual colors. Face them so that they are purple-side-out. Wrap four or more strips in a concentric nesting formation like slices of onion.
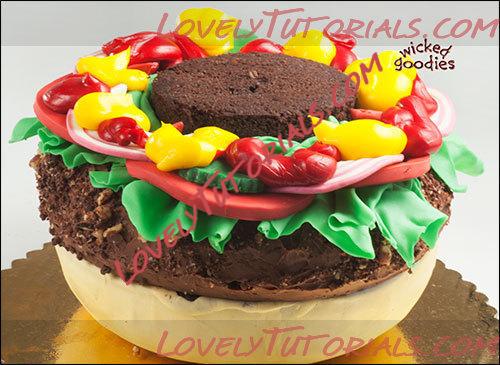
11. To make the tomatoes, roll out red modeling chocolate to ½” thickness and cut circles with large (3” diameter) round cutters. Cut the circles in half to make twice as many tomato slices since only the edges will show anyway.
12. To make pickles, roll out green modeling chocolate to ½” thickness and cut them with 1 ½” diameter fluted round cutters.
13. Add ketchup and mustard in the form of yellow and red buttercream.
14. Place the top bun on the cake. Using a blush brush, dust it with cocoa powder to give it a toasted look.
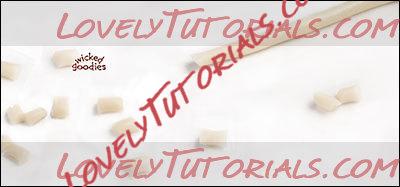
15. To make the sesame seeds, roll a small ball of white modeling chocolate into a 1/16” inch thick rope. Using a sharp knife, cut uniform-sized pieces from the rope. Roll each piece into an oval shape and press it flat into the top of the finished cake. Distribute them evenly.
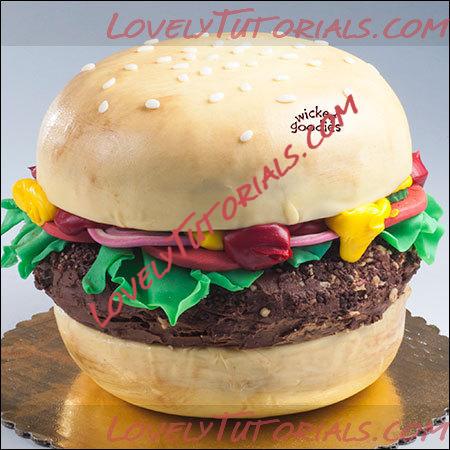
Here is another burger cake design of mine that’s four tiers high: a double double In-N-Out cheeseburger groom’s cake:
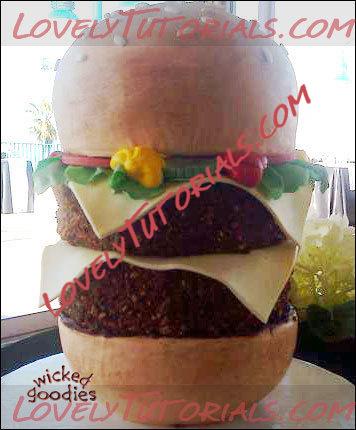
To make cheese for a cheeseburger cake, roll out white modeling chocolate to 1/8” thickness and cut it into 8 ½” squares. Drape the squares over the burger patties during assembly.
|
 |
|
Метки
|
3d bizcocho, 3d bolo, 3d cake, 3d dort, 3d hamburger cake tutorial, 3d kage, 3d kager, 3d kake, 3d kek, 3d pastel, 3d tarta, 3d torta, 3d torte, 3d torti, 3d torty, 3d κέικ, addım-addım, addım-addım təlimat, adım, adım adım, adım adım yönergeler, anmbègè, artesanatos passo a passo, askel askeleelta, bemutató, bolando bolos, bánh humburger, cake decorating, cake decorating techniques, cake humburger, chocolate, confeitando bolos, creazione e decorazione torte, crustulam humburger, céim ar chéim, decoracion de pasteles, decoración de tortas, decorada en fondant, decorare le torte, decorazioni, deko fondant, dekorace na dort, dekoracija, dekoracije, dekorasyon, dekorácie, dort humburger, etap pa etap, fender, fimo, flower paste, fondan, fondant, fondente, fondente di zucchero, fotopostup, foundant, gam wrth gam, gebak, glazuur, gradatim, gum pasta, gum paste, gumpaste, hakbang-hakbang, hamborgari, hamburczyk, hamburg, hamburgare, hamburger, hamburgero, hamburgers, hamburguesa, hamburgués, hambúrguer, hampurilainen, hanburgesa, hand-made, handmade, hap pas hapi, hatua kwa hatua, how to, how-to's, humburger bolo, humburger cacen, humburger cake, humburger císte, humburger gato, humburger gâteau, humburger kejk, humburger kek, humburger tortë, humburger เค้ก, humburger κέικ, humburger עוגה, instrucţiuni, instrukcijas, instrukcje, jak na, kage dekoration, kage humburger, kagedekoration, kaka humburger, kake humburger, kakebaking, kakku humburger, kek humburger, keki humburger, koek humburger, kook humburger, korak, korak po korak, korak za korakom, korak za korakom navodila, korak-po-korak upute, koristeet ja koristelu, krok, krok po kroku, krok za krokem, krok za krokom, krok-za-krokem, kuchen humburger, kuko humburger, kūka humburger, langkah demi langkah, las instrucciones, las técnicas, le tecniche, les techniques, lukie, lépésről lépésre, marshmallow, masa flexible, master-class, master-klasse, master-klasy, meistras klasės, metodikas, mistr třídy, modeling chocolate, modeling paste, modelling past, motivtorten, mėsainis, návod, opplæringen, pamoka, pap, pas, pas a pas, pas cu pas, pas à pas, pas-cu-pas, pas-à-pas et modèles, paso, paso a paso, pass pass, passo, passo a passo, passo dopo passo, passo-a-passo, passo-passo le istruzioni, pasta de miel, pastel humburger, pastís humburger, paŝon post paŝo, pljeskavica, postup na 3d torty, postupak za ukrasavanje, pâtisserie, rolled chocolate techniques, samm-sammult, schmelzend, schritt für schritt, schritt für schritt anleitung, schritt-für-schritt, schritt-für-schritt-anleitungen, sculpted cakes, skref fyrir skref, soli pa solim, stap, stap vir stap, stap voor stap, stap-voor-stap, stap-voor-stap instructies, steg for steg, steg för steg, steg-för-steg, steg-för-steg-instruktion, step, step by step, step-by-lépésre, step-by-step, step-by-step instructions, sugarcraft, sugarpaste, suikerglazuur, taart humburger, technieken, techniken, techniki, techniky, technikák, techniques, tecnicas de decoracion, tecniche, tehnici, tehnike, teknikker, teknikler, thịt băm viên, tips och trix, tort humburger, torta humburger, tortas humburger, torte, torte decorate, torten dekorieren, torti, tortu humburger, trin, trin for trin, trin-for-trin, trin-for-trin instruktioner, trinn, trinn for trinn, trinn-for-trinn-instruksjoner, trucs et questions sur la décoration de gateaux, tutorial, tutoriale, tutorials, tutorias, tutorias/ideas para decorar los bizcochos, tutoriel, tutorijal, từng bước, tårta humburger, tårtbottnen, tårtor, técnicas, ukrašavanje torti, uputstvo za dekoraciju, urratsez urrats, zuckermasse, ขั้นตอนโดยขั้นตอ� � �, ຂັ້ນຕອນທີໂດຍຂັ້ນ� � �ອນ, ઉત્તરોત્તર, કેક humburger, હેમબર્ગર, ಕೇಕ್ humburger, ಬೇಯಿಸಿದ, ಹಂತ ಹಂತವಾಗಿ, सजा केक, ट्यूटोरियल मास्टर वर्ग, केक humburger, कदम, कदम से कदम, कदम दर कदम निर्देश, तकनीक, हैमबर्गर, পিষ্টক humburger, ধাপে ধাপে, হ্যামবার্গার, படிப்படியாக, கேக் humburger, స్టెప్ బై స్టెప్, కేక్ humburger, హాంబర్గర్, แฮมเบอร์เกอร์, ტორტ�? humburger, ბ�?ლ�?არდ�?, ეტაპობრ�?ვად, ハンバーガー, ケーキhumburger, étape, étape par étape les instructions, öğretici, 一步一步來, 一步一步来, žingsnis, žingsnis po žingsnio, 宗師級教程,一步,一步一步的指示� � � �技術,udžbenik, 少しずつ, 漢堡, 汉堡, 裝飾蛋糕, 蛋糕humburger, 단계적으로, 만들기 제작 과정, 케이크 humburger, 햄버거, βήμα, βήμα προς βήμα, βήμα προς βήμα οδηγίες, οδηγίες βήμα βήμα, παντεσπάνι art, τεχνικές, φροντιστήριο, χάμπουργκερ, декорация на торти стъпка по стъпка, инструкция, корак по корак, как сделать, крок за кроком, крок за крокам, от днес за днес, гамбургер, покроково, пошагово, пошаговые фотки, пакрокава, миниатюра, мк, мк торт "гамбургер", майстор-класа урок, майстар-клас, майстер-клас, майстер-класи, маршмеллоу, мастика, мастер-класс, зд торт, зд торта, ручной работы, ручная работа, украшение тортов, сахарная мастика, уроки прикрашання, стъпка, стъпка по стъпка, стъпка по стъпка инструкции, торт humburger, торта humburger, торта стъпка по стъпка, торта хумбургер, техники, техника, техніка, туториал, туторіал, тэхніка, хамбургер, чекор по чекор, шаг за шагом, інструкцыя, інструкція, האַמבורגער, המבורגר, צעד אחר צעד, שרי�? דורך שרי�?, ש�?יקל הומבורגער, قدم بہ قدم, کیک humburger, ہیمبرگرbirthday cake designs  |
|

