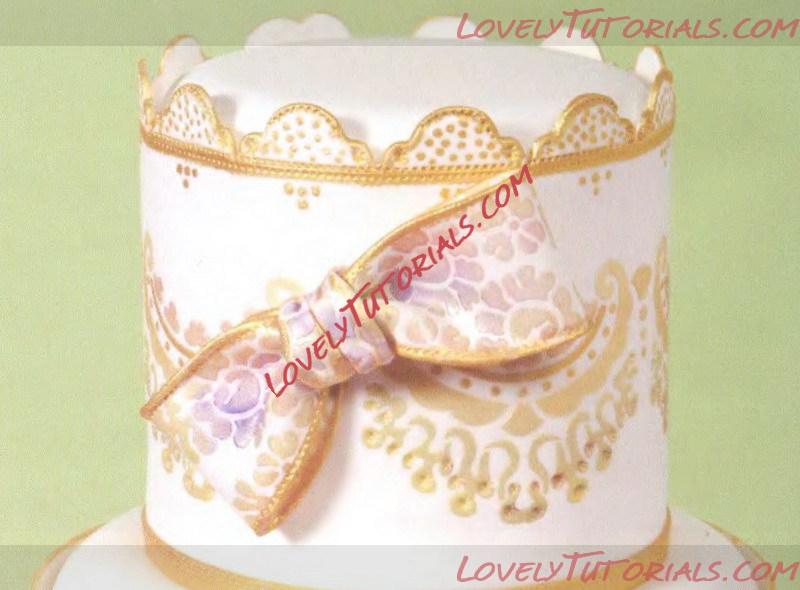
Огромная благодарность
Kerry Vincent за Мастер-класс
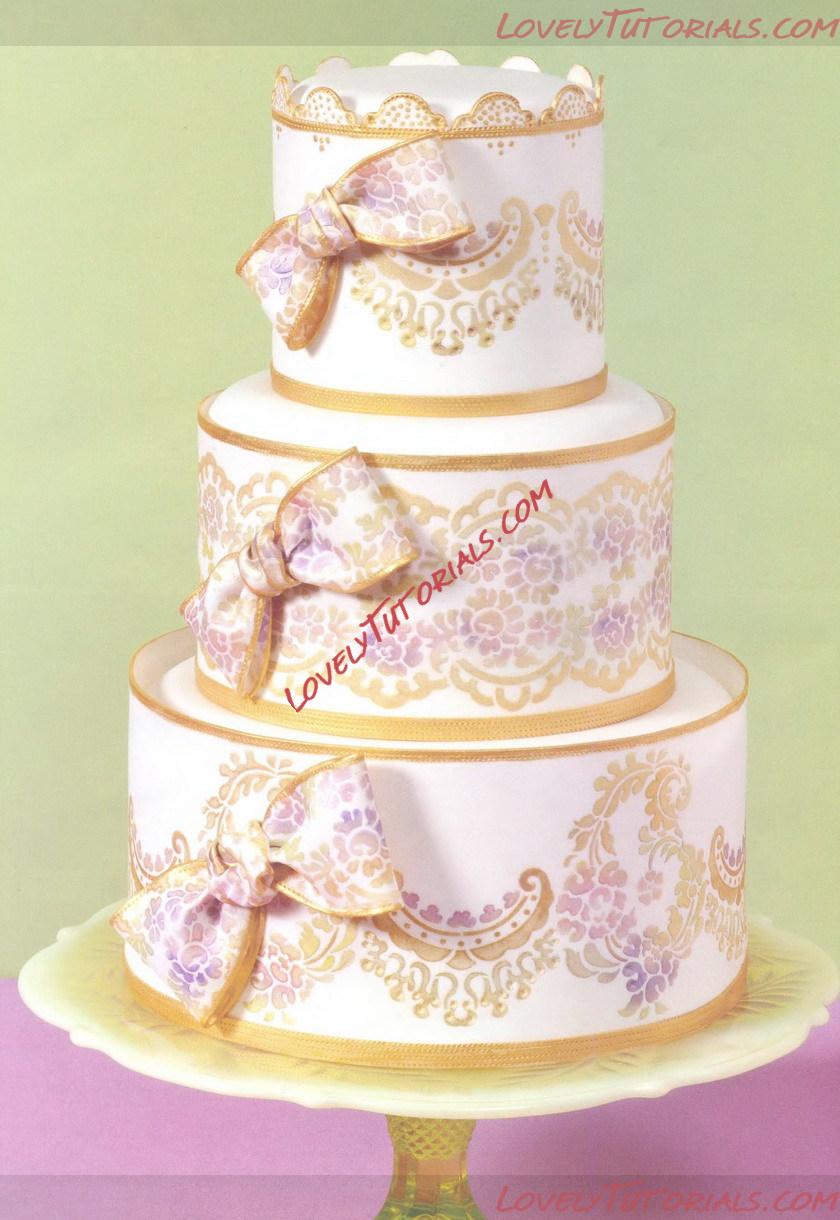
CAKE PREPARATION & ASSEMBLY SIDE ACCENT WORK ORDER
Cover the cakes with white rolled fondant then set aside to crust overnight.
The next day, dowel the lower two cakes then decorate each tier with the stencilled wraps.
Stack the cakes and for security include a dollop of royal icing between each tier.
Add the ribbon borders to the three cakes.
Drive a sharpened long dowel through the lower two tiers and nip off level with the top of the middle cake.
Secure the top cake in place with royal icing. Apply the bows, glue in place with royal icing.
YOU WILL NEED
cakes 10, 15, 20cm (4, 6, 8in) x 10cm (4in) deep, coated
in white rolled fondant/sugarpaste. Place the two smallest
cakes on matching cake cards and the bottom tier on a
28cm (11in) lime glass pedestal cake plate; or
alternatively cover an 28cm (11in) cake drum with rolled
fondant and edge with lime ribbon
fondant/sugarpaste white 4kg (8lb)
gum paste white 100g (4oz)
Tylose®
border cutter No. 3 (FMM)
umbrella tool
lustre dusts rose pink, light green, super gold
petal dusts african violet, lime (Vee Bee, Global Sugar
Art, Cake Craft Shoppe - USA)
cutting wheel (PME)
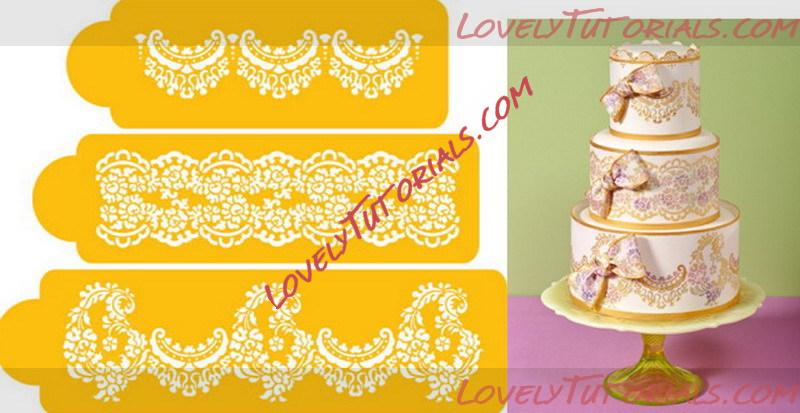
Alengon Lace three tiered stencil No. 370 (Designer
Stencils - Cake Craft Shoppe, Lindy Smith, Global Sugar Art)
non-stick rolling pin
white alcohol
craft knife
brushes liner, mop or flat
water or gum glue and royal icing
GUM PASTE OPTION
Suggestion for a quick gum paste, knead in two teaspoons of Tylose® to 1/2lb or 250g of rolled fondant - allow the paste to rest for at least an hour before using then knead well again. This is what I use most of the time. Rolled fondant varies by manufacturer so experiment first or use your own personal gum paste recipe.
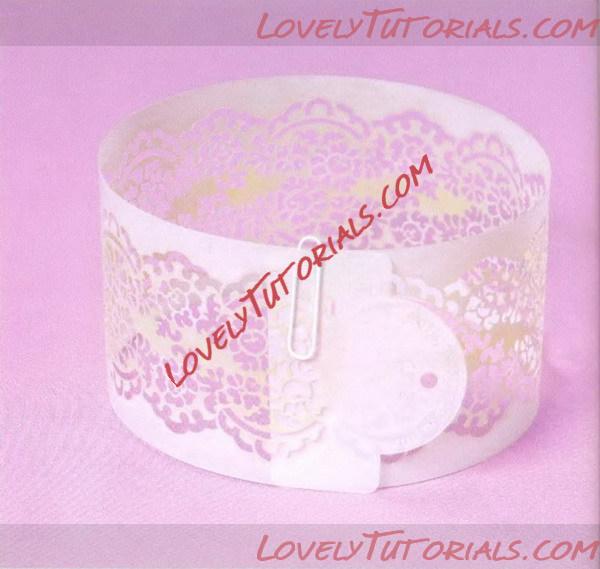 THE STENCIL FULL CIRCLE
These stencils are my favourites because they are measured and graduated to match the circumference of each cake.
It is important to make sure that the fondant covering on each cake is a uniform 1/4 in depth then the stencilled patterns will meet perfectly at the centre back.
Measure the circumference of each cake and the depth. The depth of the top and bottom wrap is 1/4 in taller than the actual cake, which gives an illusion of eggshell porcelain.
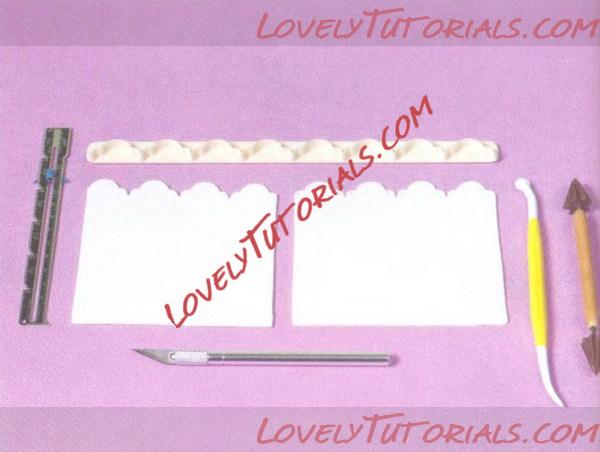 CUTTING THE TOP BORDER AND PREPARING THE STENCIL FOR THE TOP TIER
Use rolled fondant two to one with gum-paste for the stencil work and the bows.
Roll out the paste until it measures the length and width of the stencil.
Cut the top edge scallop with the border cutter to the required measurement with the stencil edge as a guide.
Emboss the scalloped border with the stitching and umbrella tool. Turn the panel over taking care not to damage the top border.
Lay the panel over the stencil extending the upper border 1/2in above the straight edge of the stencil.
Press the paste firmly into the stencil.
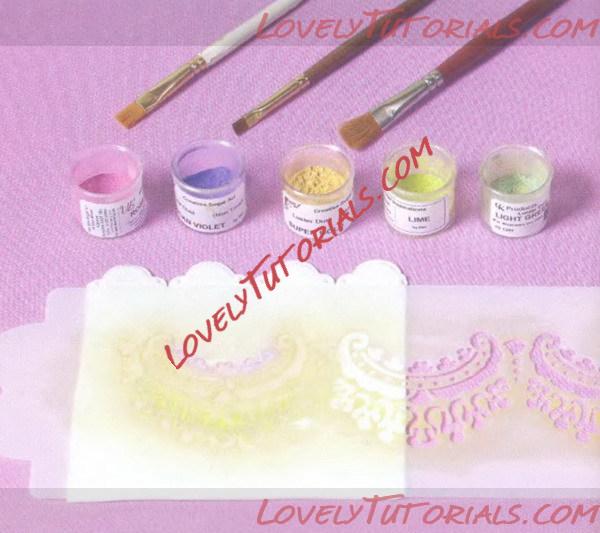 TURN STENCIL OVER AND ADD COLOUR
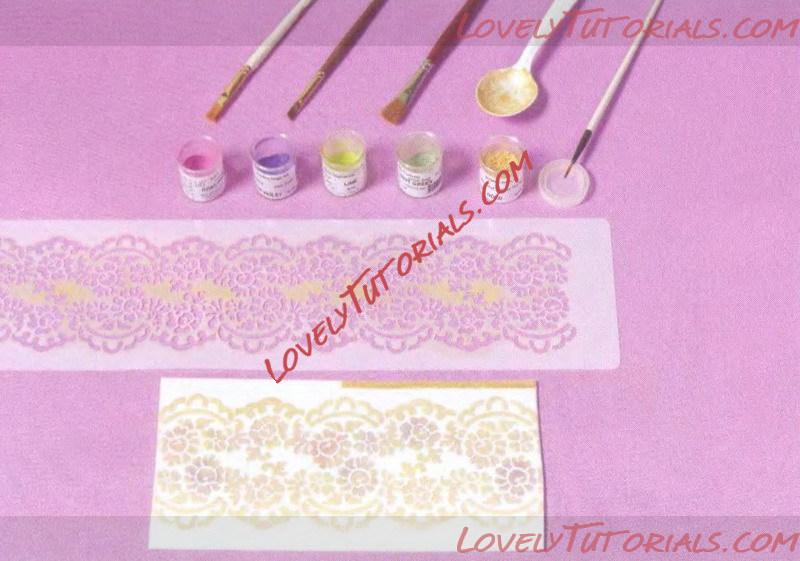
Turn the stencil over with the paste firmly attached then brush on the colours.
Looking carefully at the pattern and apply the colours separately and sparingly to the flowers and greenery in the design, so the stencilled paste doesn't get muddy.
Brush over the exposed paste with individual brushes for the strong colours.
First add super gold for the banners and graduated circles then brush a touch of African violet petal dust followed by a smidgeon of rose lustre dust across the flowers within the design. Finally, colour the foliage with lime green and light green.
Following the bottom edge of the stencil outline, trim the excess paste with a craft knife.
Run the wheel along the top edge of the stencil and beneath the scallops.
Remove the stencil; peel it away gently so the paste does not stretch.
Place a ruler parallel to the first stitched row, 1/16in beneath the first line then run the stitching wheel along the edge of the ruler.
Do this three more times 1/16in beneath each line.
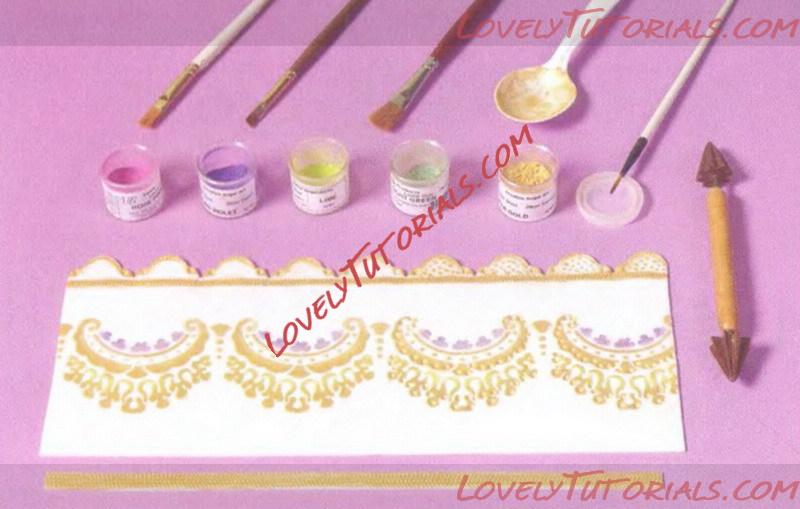
Paint the stitched strip with super gold mixed with white alcohol.
Accent the top border with super gold mixed with white alcohol then fill in the scalloped space with dots.
Press the umbrella tool into the lace design beneath the golden banner.
Check the height of the finished piece it should be 4 1/4in, if it is more, then trim away the excess from the base.
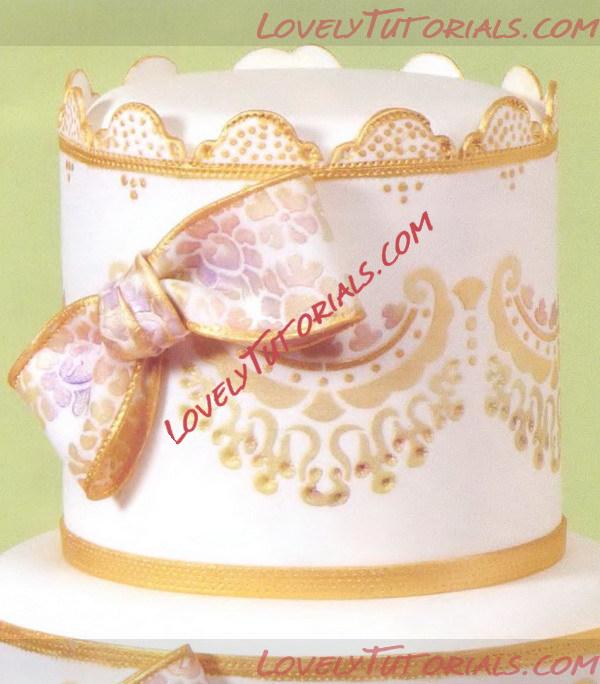 THE FINISHED DESIGN
Wrap the cake attaching the panel at the centre back of the cake with a few brush strokes of water.
Allow the surface to firm up before moving the cake. Put a dollop of royal icing at the centre of the middle tier.
Slip an offset spatula under the top tier and place it on the middle tier.
Press down gently so the cake is firmly in place.
The procedure is exactly the same for each of the stencilled panels.
Make sure to use the patterns in the order shown adjusting the height from tier to tier.
They are specifically graduated in size to match each cake.
 MIDDLE TIER
Continue with the middle tier using the same colours; rose pink, African violet, lime, light green and super gold in the following order; outline the scalloped border top and bottom with super gold, the flowers a combination of African violet and rose pink then the foliage lime, flecked with light green.
Remove all of the excess dust with a large brush. After colouring, peel the stencil away.
Check the height at several different points to make sure that it is only 4 1/2in high.
Run the wheel along the top edge of the panel.
Place a ruler parallel to the first stitched row, 1/16in beneath the first line then run the stitching wheel along the edge of the ruler.
Do this three more times 1/16in beneath each line.
Paint the stitched strip with super gold mixed with white alcohol.
Wrap the cake with the completed panel joining at the centre back secure with dabs of water.
Put a dollop of royal icing at the centre of the base tier.
Slip an offset spatula under the middle tier and place it on the base tier.
Press down gently so the cake is secure.
 BASE TIER
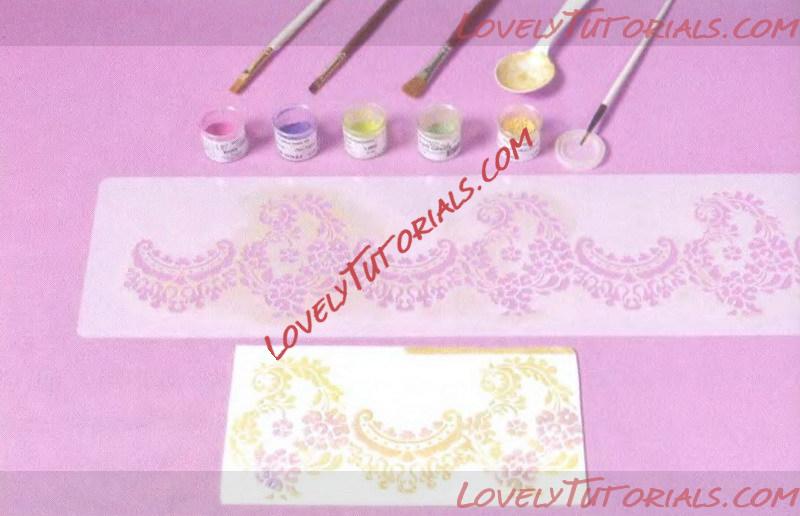
Create the stencilled panel using the same method as previously directed for the base tier. This will be the longest panel.
Use the same colour combination of rose pink, African violet, lime, light green and super gold in the following order: Use super gold on the banner as well as tingeing the stems and the edges of the leaves. Next fill in the flowers with a combination of African violet and rose pink then finally complete the foliage with lime-flecked light green.
Remove all of the excess dust with a large brush.
Once again run the wheel along the top edge of the panel.
Place a ruler parallel to the first stitched row, 1/16in beneath the first line
then run the stitching wheel along the edge of the ruler.
Do this three more times 1/16in beneath each line.
Paint the stitched strip with super gold mixed with white alcohol.
Press the umbrella tool into the lace design beneath the golden banner.
And, finally wrap the base tier with the longest panel securing with
dabs of water.
 BORDER RIBBONS
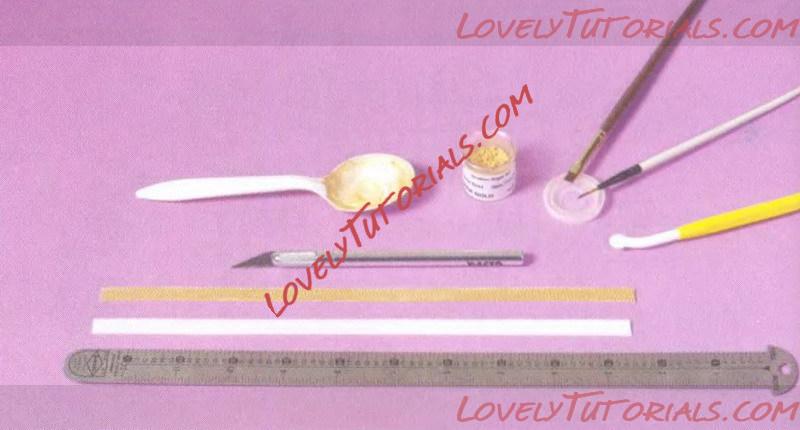
Measure the circumference of each cake.
Cut the border ribbons from rolled fondant, the ribbons will border
each tier and are approximately a 1/4in wide.
Roll out the paste and cut into long strips to match the circumference measurement of each cake.
Run the wheel along the edge of a ruler to keep the lines straight.
Paint the surface and top edge only with super gold mixed with white
alcohol.
There is good reason to leave the bottom edge raw and that is to
avoid smudging the gold onto the cake surface.
Let the painted surfaces dry, it will be very fast, then lift the strips and encircle each cake. Trim the joins neatly at the centre back of each cake.
BOWS
Given the clean lines of the cake the bows perched at an angle give it a character that has an edgy and modern touch.
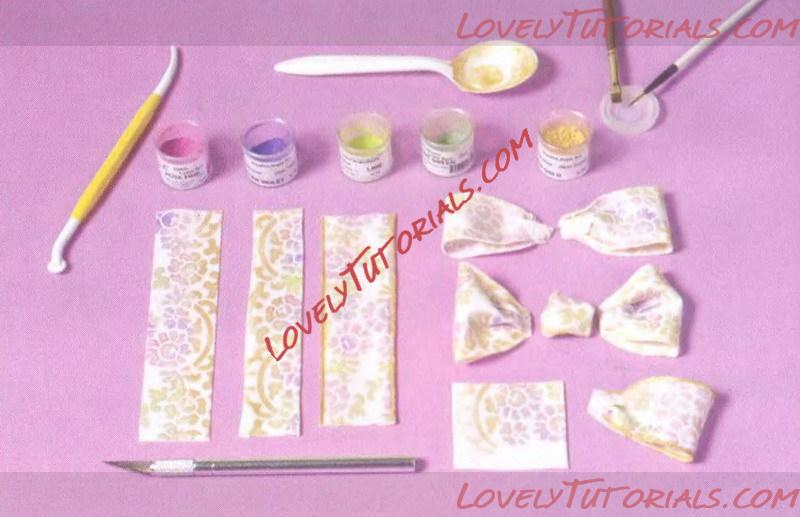
The bows are made from Tylose® enhanced rolled fondant.
They are graduated in size; for the top tier the sugar ribbon will be 1 3/<\n
wide, for the middle tier 2in wide and for the base tier 2'/2in wide.
Roll out the paste and lay it along the centre of the middle stencil.
Using the selected colours match the depth of colour previously used
on the side designs of the cake.
Gently remove the stencil from the paste.
Cut the ribbon in 9in increments then turn the edges under and stitch down with the wheel.
Cut the lengths in half and keep the pairs together - each set will be a different width.
Fold in half to make the loops and pinch the raw edges together. Trim
the raw edges.
Cut a 12 1/2in square and bundle it into a knot and position it between
the loops.
Paint the bow edges with super gold mixed with white alcohol.
Allow the pattern pieces to firm up then attach in position on the cake sides with very firm royal icing; loops first, then add the knots at the centre.
