Огромная благодарность
Sabine Kreuger & Tirza Boer за Мастер-класс
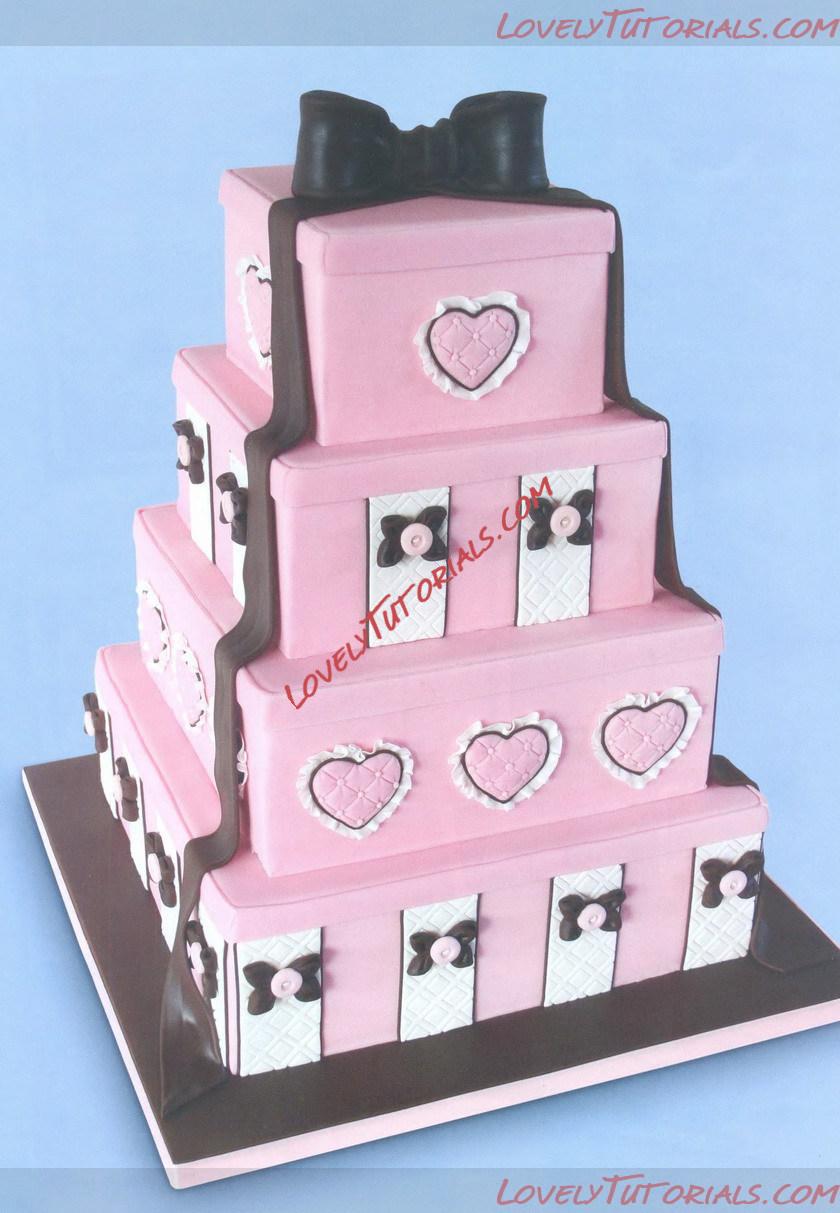 Place the cakes onto their cake boards. Fill them with a filling of your choice and coat them with buttercream. Cover the 40cm drum with chocolate fondant and all four cakes with pink fondant and dowel and stack them onto each other. Finish the drum with the pink ribbon.
You will need
sponge cake square 15, 20, 25, 30cm (6, 8,10,12in)
fondant/sugarpaste pink pre-colored 3kg (6lb 6oz)
(Bakels)
fondant sugarpaste chocolate 500g (1lb 2oz)
fondant/sugarpaste white 200g (7oz) Bakels
cake drum square 40cm (16in)
pink ribbon
rolling pin
nesting heart cookie cutters (Wilton)
diamond design cutter (Patchwork Cutters)
trellis (Patchwork Cutters)
flute-vein tool (FMM)
multi-ribbon cutter
foam mat
ball tool (FMM)
circle cutter Medium (Kitbox)
button mold
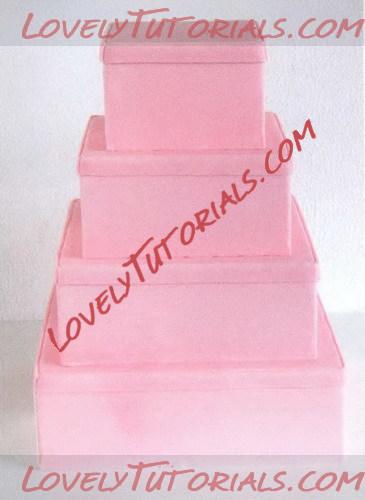
1 Roll out pink fondant and use the multi-ribbon cutter to make strips of 1.5cm wide. Use these strips around the top of the cakes to make them look like boxes.
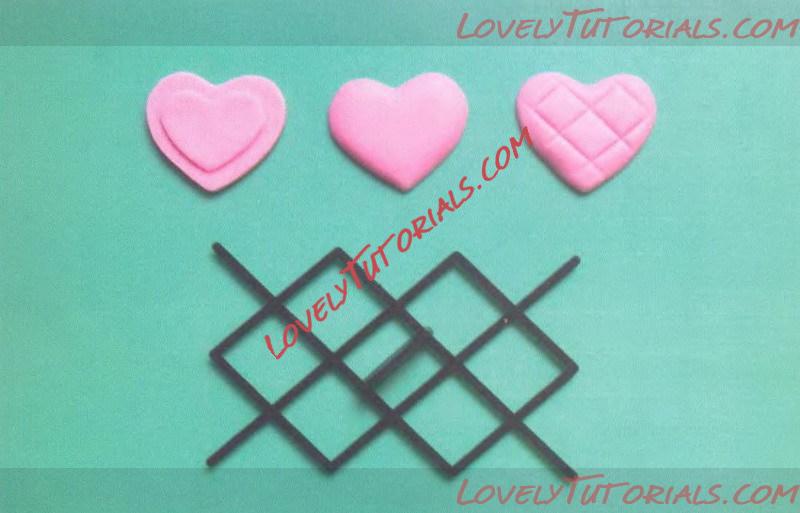
2 Roll out pink fondant and use two heart cutters. Place the
cutouts on top of each other as shown. Make 16 sets of hearts. Turn the cutouts upside down, and stroke with your finger over the edges of the heart to make the heart look puffy. Use the diamond design cutter to mark the squares. Use the cutter twice in the same heart, so the squares are smaller as you can see in the picture.
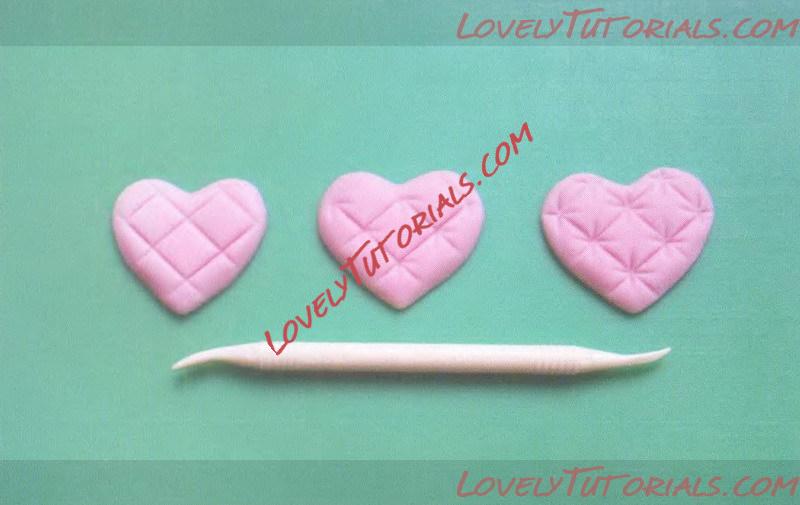
3 Use the smallest side of the flute-vein tool at the point where the lines cross, to make a small groove. This makes the cutout look more like a cushion.
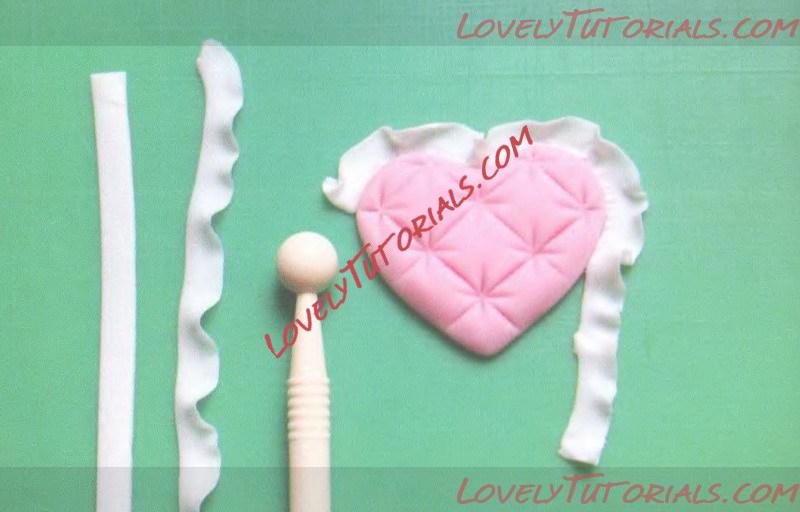
4 Thinly roll out fondant and use the strip cutter to make strips. Frill the strips with a ball tool on a foam mat. Pleat the frilled strips and glue these to the sides of the hearts.
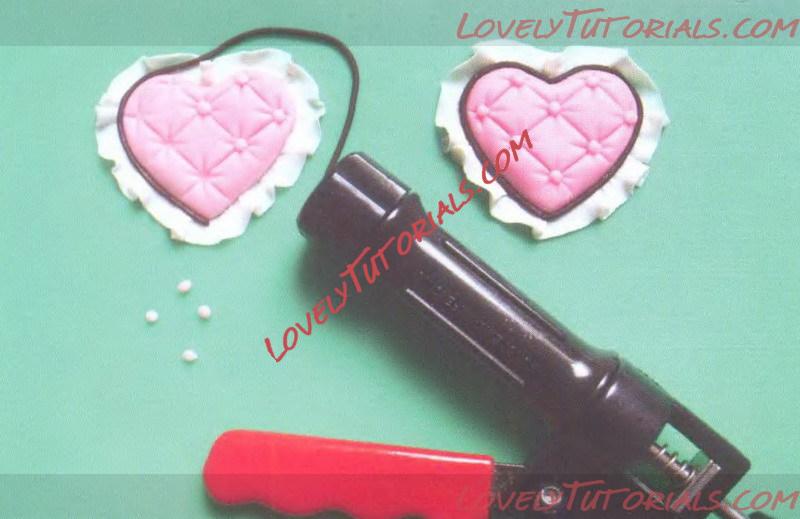
5 Place softened chocolate fondant in a sugarcraft gun fitted with
the smallest plain disc. Squeeze the gun and attach the line around the heart.
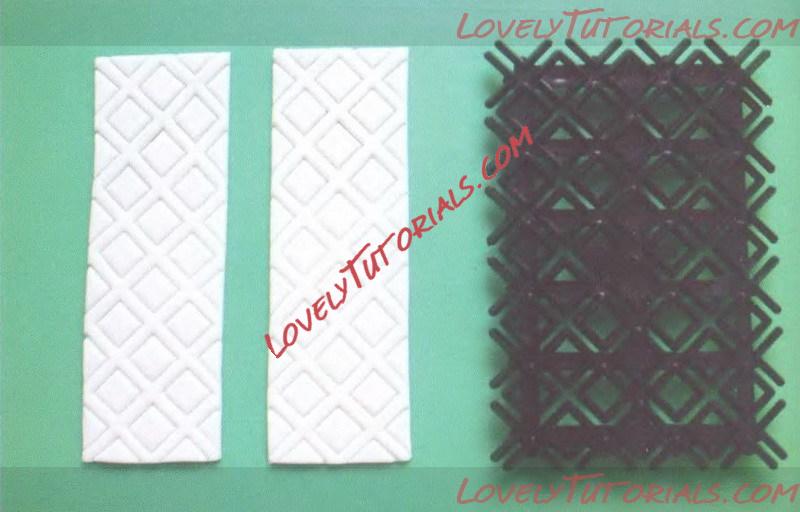
6 Roll out white fondant and make an impression with the trellis cutter. Cut out 24 x 4cm wide strips with the ribbon cutter. Make sure the strips fit vertically underneath the pink strip and that there is an even space between the strips when you glue them to the two tiers.
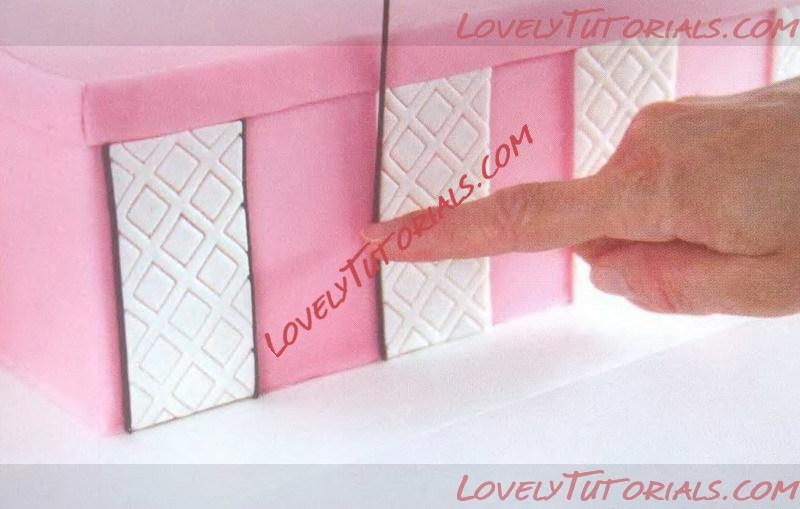
7 Squeeze a line of chocolate fondant using the sugarcraft gun fitted with the smallest round disc, and glue the line to the sides of the white strips.
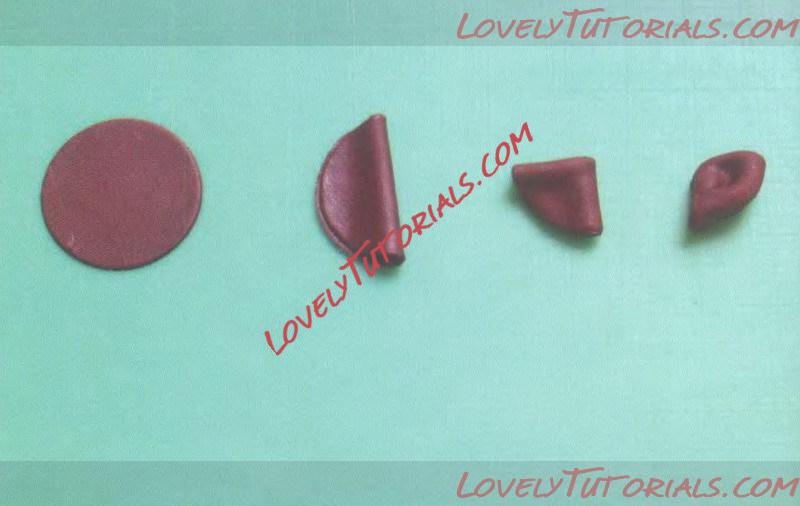
8 Thinly roll out chocolate fondant and cut out four circles. Fold the circles in half and then into quarters. Make sure the pleat is a little puffy. Then pleat the end of the cutouts together. Pinch two knots together and glue them to the other two knots.
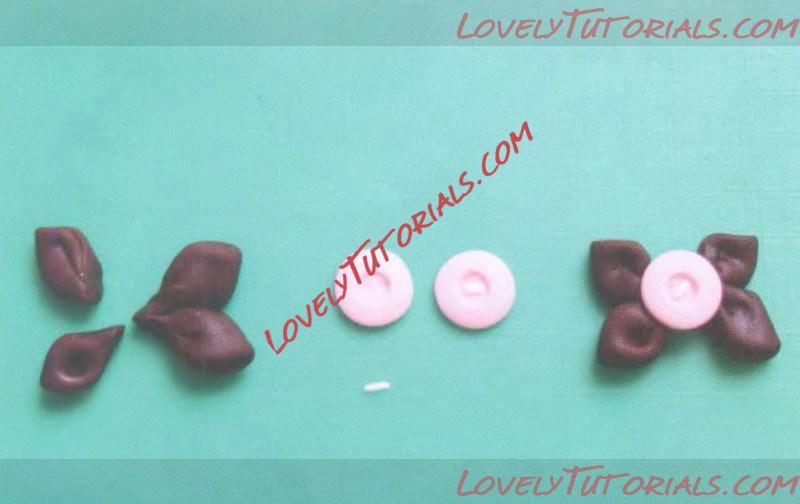
9Make a pink button in a button mold. Shape a small line with your fingers and white fondant. Use a flute vein tool, to fit the white line in the dimples of the button, so they look like threads. Glue the button on the knots and then glue the knots to the white strips.
To make chocolate fondant more pliable, knead one part of white fondant through four parts of chocolate fondant.
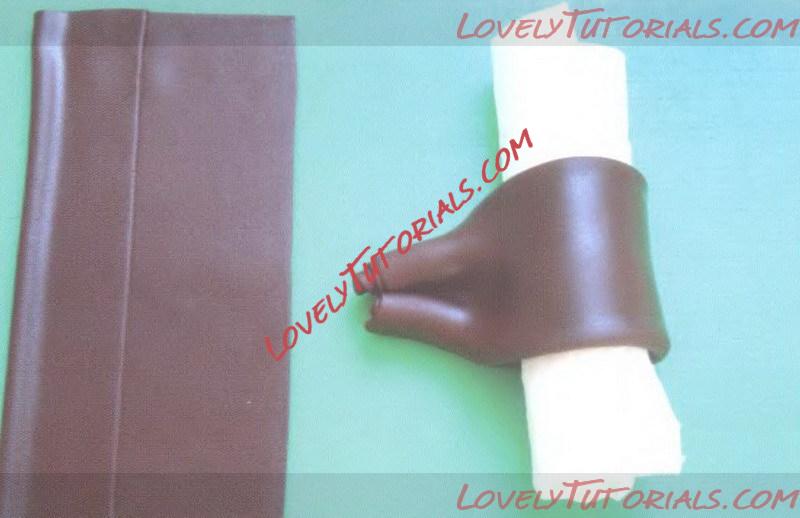
10 Roll out a long piece of chocolate fondant 57 x 6cm, fold the long sides of the piece to the middle line. Do not push the folds together; it gives a softer look when it is a bit puffy.
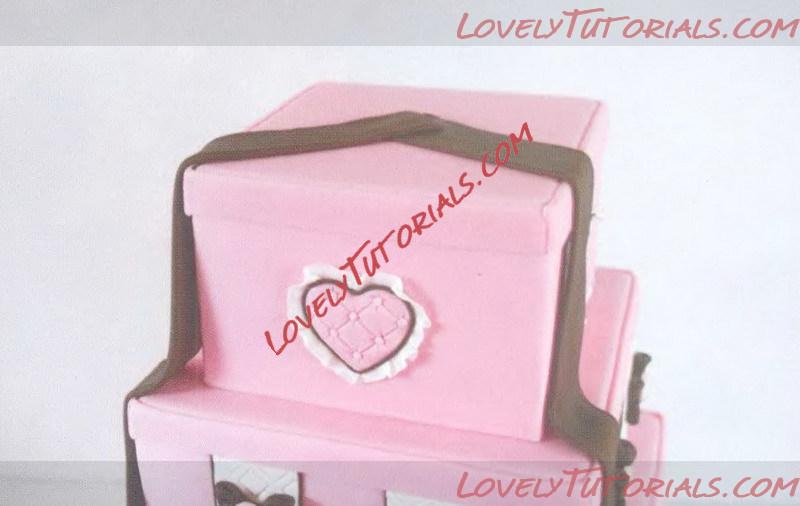
11Fold the end of the ribbon a little inward. Make two and drape these from the top of the tiered cake to the bottom.
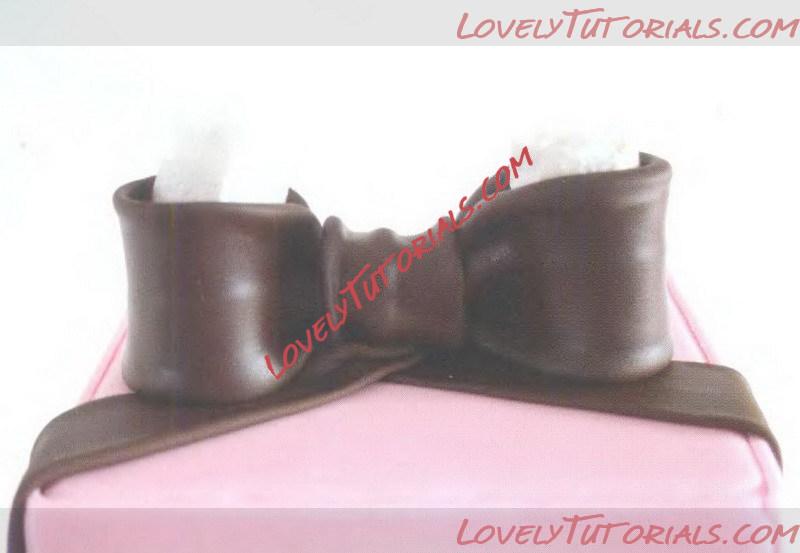
12 Follow the same technique to make a bow in the same way
that you did with the ribbons, with a piece 11 x 7cm. Make two bows and let them dry a little. If the fondant is too soft, roll up kitchen paper and push it carefully into the bow.
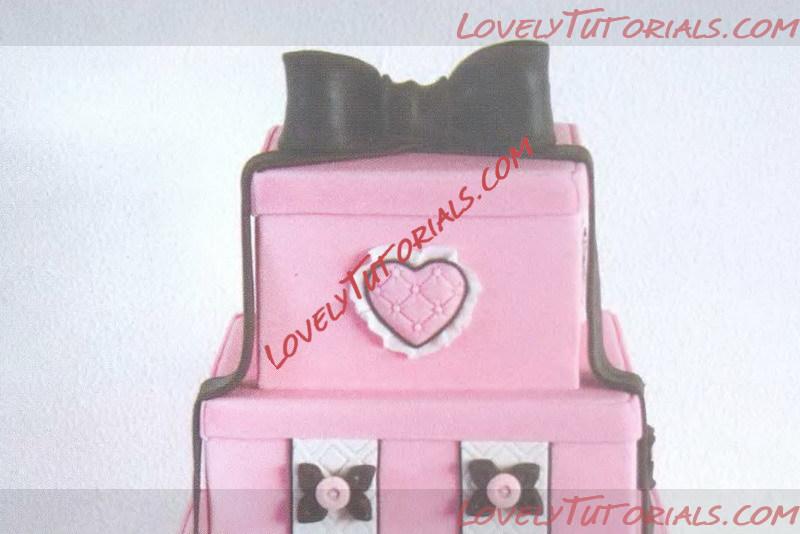
13 Roll out a piece and fold it the same way, pleat it a little and glue it to the bow, so it looks like the knot. Glue the bow on top of the cake, right on top of the ribbons.

