|
|
МК торт "Свисающие сосульки из мастики"-How to Make Hanging Icicles on Your Cake
|

06.01.2013, 18:52
|
|
Администратор
|
|
Регистрация: 07.09.2010
Сообщений: 7,669
|
|
 МК торт "Свисающие сосульки из мастики"-How to Make Hanging Icicles on Your Cake
Огромная благодарность Автору Debrah Green за Мастер-класс
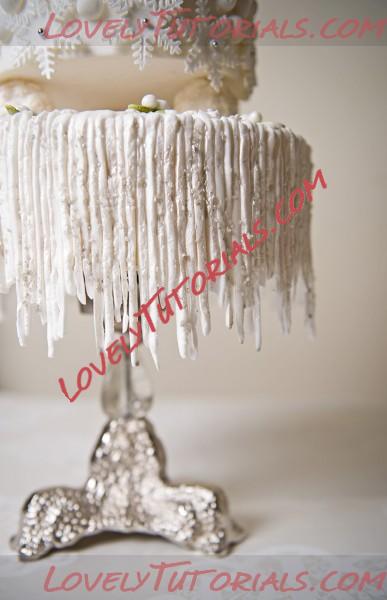 Equipment required
- Cake stand of adequate height
- Measuring tape
- Straight edge
- Textured impliment to create ice effect
- Regular fondant icing (mine is British type I know Americans use a different recipe and how different it handles I don’t know)
- Silver dusting powder
- Glitter sugar crystals
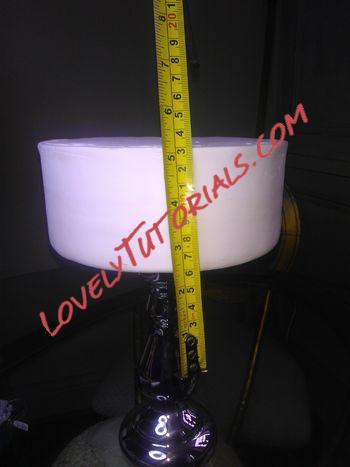 Step 1
Start by taking your iced cake and positioning it on your chosen cake stand. Ideally this should be at least the height of your cake to allow for a decent length of icicle. Then measure the depth of your cake and the length of you longest icicle to be
 Step 2
Roll out a quantity of fondant paste as if to cover the side of the cake but leaving a ragged edge to one side. Ensure the with of this strip is wider than the width of the cake and at least as wide as you intended longest icicle
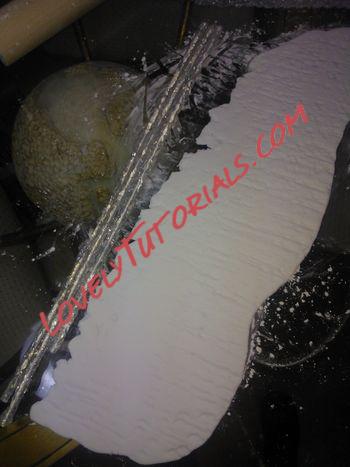 Step 3
Press a textured impliment into the soft icing to create the icicle effect. I happened to have plastic icicle decorations however any textured impliment would sufice.
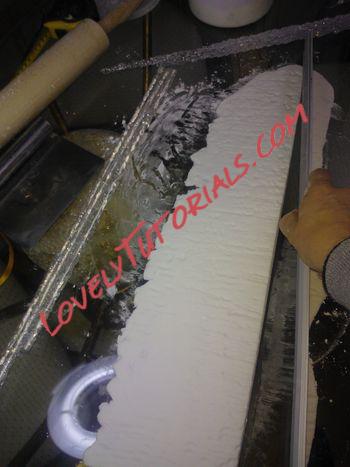 Step 4
Once complete simply cut off one edge at an angle so that there is a wider end for the larger icicles.
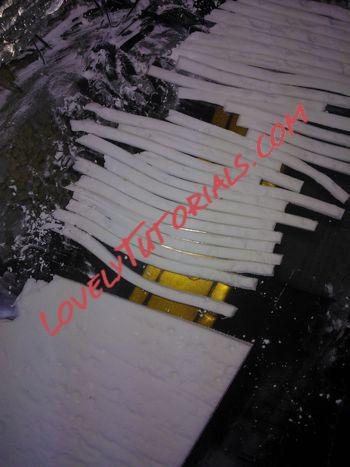 Step 5
Using a straight edge begin cutting fine slivers to form the icicles. It is not important for them to be exactly the same width, but there or threabouts as they would be in nature. I tended to taper the cuts ever so slightly, alternating each cut as I went along
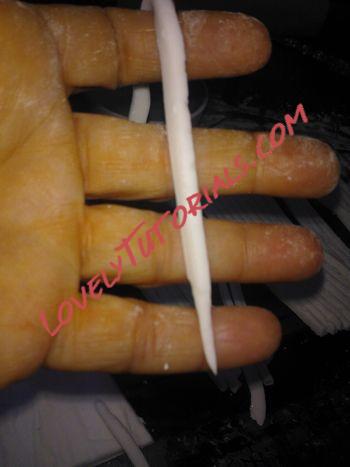 Step 6
Using a brush, paint on a sugar solution to make the cake tacky in order to glue on the icicles. I suggest you randomly select the icicles so that the cuts don’t marry up on the cake. Just befor you apply the icicle you may want to tweak some of the ends to a point
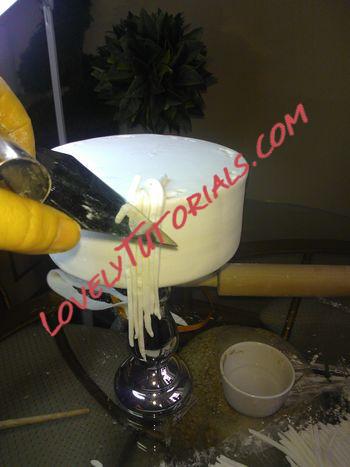 Step 7
Begin to select the icicles and press onto the cake altering the lengths as you see fit. You can leave the excess on top of the cake and cut off after you have a few in place
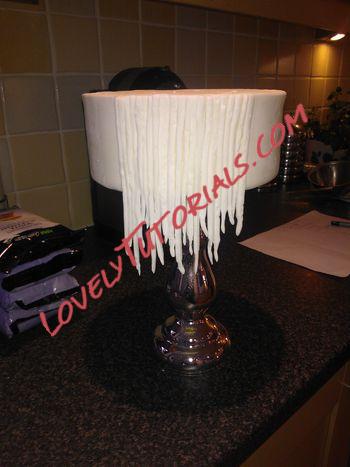 Step 8
Continue in this manner until you have covered the sides of the cake, tweaking the ends of the icicles as you go
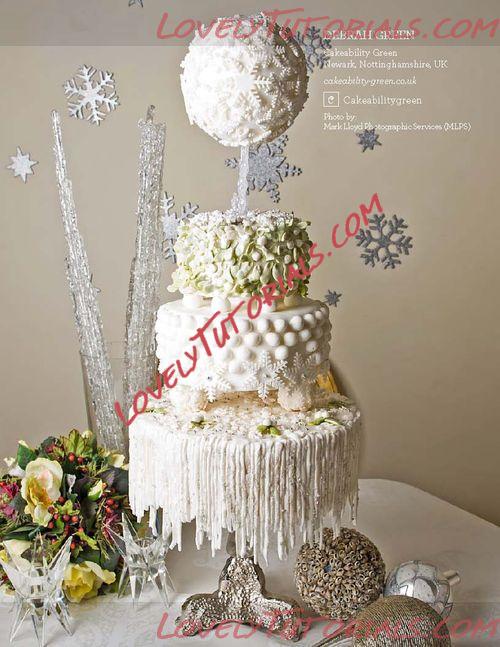 Step 9
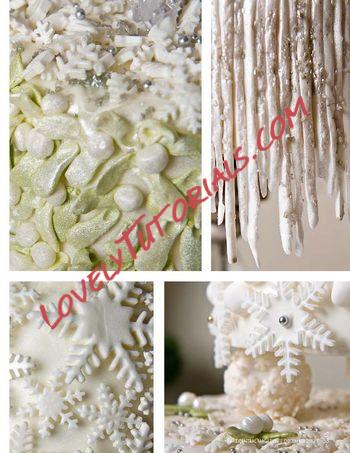
The finished article. You can add more interest to the icicle eefect by brushing a pearlised silver powder onto it when dry. I also used some silver glitter crystals to catch the light
 Debra has been decorating cakes for about 30 years for family and friends. Within the last two years, she began to decorate seriously after participating in a charity cake hunt. Now, she makes cakes at her shop, Cakeability Green, where she especially loves to turn everyday objects into cakes. With her cover cake, Debrah says she was trying to tell a story and reflect the idea that what will be will be.
"I thought, 'How brilliant, I can do so much with this theme'-- possibly so much that my mind went into overdrive with endless ideas! I wanted to make use of the changing effects the weather presents in winter because the textures and effects are so diverse and have a magical quality.
I once saw a photo of a frozen fountain that was covered in snow and looked like a tiered wedding cake. There were long icicles hanging off the bottom basin where the frozen water had expanded and spilled over. I knew this was beautiful in real life; therefore, it would be beautiful in cake.
I thought that if the cake ended with icicles, then it must begin with snow falling from the sky, hence a giant snowball appearing to be suspended and melting [on the top of the cake]. The snowflakes fall and rest on the next tier to 'frost' the mistletoe. From here, the snowflakes get smaller (I broke down larger flakes for effect). This makes for good snowballs, [so I have used some] to decorate the sides and hold up the tier...The snow melts and... the icicles develop."
"I used traditional methods mainly, but to create the floating snowball I used an acrylic icicle with a plastic cup slid part way down for the cake to balance on, with the tip of the icicle piercing the cake. This was disguised with icing and snowflakes. "I like how [the cake] tells a story of a journey (a bit like life), with each stage having a different quality but all equally beautiful in their different ways, even at the end before [the snow] melts away." Debra has been decorating cakes for about 30 years for family and friends. Within the last two years, she began to decorate seriously after participating in a charity cake hunt. Now, she makes cakes at her shop, Cakeability Green, where she especially loves to turn everyday objects into cakes. With her cover cake, Debrah says she was trying to tell a story and reflect the idea that what will be will be.
"I thought, 'How brilliant, I can do so much with this theme'-- possibly so much that my mind went into overdrive with endless ideas! I wanted to make use of the changing effects the weather presents in winter because the textures and effects are so diverse and have a magical quality.
I once saw a photo of a frozen fountain that was covered in snow and looked like a tiered wedding cake. There were long icicles hanging off the bottom basin where the frozen water had expanded and spilled over. I knew this was beautiful in real life; therefore, it would be beautiful in cake.
I thought that if the cake ended with icicles, then it must begin with snow falling from the sky, hence a giant snowball appearing to be suspended and melting [on the top of the cake]. The snowflakes fall and rest on the next tier to 'frost' the mistletoe. From here, the snowflakes get smaller (I broke down larger flakes for effect). This makes for good snowballs, [so I have used some] to decorate the sides and hold up the tier...The snow melts and... the icicles develop."
"I used traditional methods mainly, but to create the floating snowball I used an acrylic icicle with a plastic cup slid part way down for the cake to balance on, with the tip of the icicle piercing the cake. This was disguised with icing and snowflakes. "I like how [the cake] tells a story of a journey (a bit like life), with each stage having a different quality but all equally beautiful in their different ways, even at the end before [the snow] melts away."
|
 |
|
Метки
|
3d bizcocho, 3d bolo, 3d cake, 3d dort, 3d figures, 3d kage, 3d kager, 3d kake, 3d kek, 3d pastel, 3d tarta, 3d torta, 3d torte, 3d torti, 3d torty, 3d κέικ, addım-addım təlimat, adım, adım adım yönergeler, artesanatos passo a passo, bemutató, birthday cake, biscuit, bolando bolos, bolos decorados, cake decorating, cake decorating techniques, cake topper, cake toppers, cake tops, carámbanos colgantes, cerâmica plástica, character figures, characters, children's cake, cold porcelain, confeitando bolos, creazione e decorazione torte, curso de modelado, decoracion de pasteles, decoración de tortas, decorada en fondant, decorare le torte, decorazioni, deko fondant, dekorace na dort, dekoracija, dekoracije, dekorasyon, dekorácie, especializada em modelagem de biscuit, fender, figur kager, figuras, figure making tutorials, figuren, figures, figurice, figurice od fondana, figurine on the cake, figurines, figurinhas, figurky, figúrky, figür modelleme, fimo, fixando a cabencinha, flower paste, fondan, fondant, fondente, fondente di zucchero, fotopostup, foundant, függesztett jégcsapok, gebak, ghiaccioli appesi, glazuur, glaçons suspendus, gum pasta, gum paste, gumpaste, hand-made, handmade, hanging icicles, hengende icicles, how to, how to make hanging icicles on your cake, how-to's, hängande istappar, hängende eiszapfen, hængende icicles, instrucţiuni, instrukcijas, instrukcje, jak na, kabantys varvekliai, kage dekoration, kagedekoration, kakebaking, korak, korak za korakom navodila, korak-po-korak upute, koristeet ja koristelu, krok, krok po kroku, krok za krokem, krok-za-krokem, la modélisation, las instrucciones, las técnicas, le tecniche, les techniques, lukie, marcipanové figurky, marshmallow, marsipanfigurer, masa flexible, master-class, master-klasse, master-klasy, meistras klasės, metodikas, mistr třídy, modelado, modelagem, modelando a barriga, modelando a cabencinha, modelando a perninha, modelando as maozinhas, modelando o cabelinho, modelando o corpinho, modelando os bracinhos, modelando os pezinhos, modelare, modelerte figurer, modeling, modeling paste, modeliranje, modellazione, modelleme, modellering, modellieren, modellierpaste, modelling, modelling past, modelləşdirmə, modelovanie, modelování, modelování krok za krokem, modelowanie, motivtorten, návod, návody a postupy, návody na květy a lístky, opknoping ijspegels, opplæringen, orelhas, ozdoby, pamoka, pap, pas, pas-cu-pas, pas-à-pas et modèles, paso, paso a paso, passo, passo a passo, passo-a-passo, passo-passo le istruzioni, pasta de goma, pasta de miel, pasta flexible, pasta laminada, pingentes pendurados, pintura dos olhos, pocelana fria, polymer clay, postup na 3d torty, postupak za ukrasavanje, pravljenje figurica za torte, pâtisserie, předměty z marcipánu, schmelzend, schritt für schritt anleitung, schritt-für-schritt, schritt-für-schritt-anleitungen, sculpting, soggetti, sople zwisające, souvenirs, stap, stap-voor-stap, stap-voor-stap instructies, steg for steg, steg för steg, steg-för-steg, steg-för-steg-instruktion, step, step by step, step-by-lépésre, step-by-step, step-by-step instructions, styrofoam, sugarcraft, sugarpaste, suikerglazuur, technieken, techniken, techniki, techniky, technikák, techniques, tecnicas de decoracion, tecniche, tehnici, tehnike, teknikker, teknikler, telgopor, tips och trix, topo de bolo, topo do bolo, topos de bolo, torte, torte decorate, torten dekorieren, torti, trin, trin for trin, trin-for-trin, trin-for-trin instruktioner, trinn, trinn for trinn, trinn-for-trinn-instruksjoner, trucs et questions sur la décoration de gateaux, turturi agățat, tutorial, tutoriale, tutorias, tutorias/ideas para decorar los bizcochos, tutoriel, tutoriels, tutorijal, tårtbottnen, tårtor, técnicas, udžbenik, ukrašavanje torti, uputstvo za dekoraciju, viseći icicles, zuckerfigürchen, zuckermasse, závesné cencúle, závěsné rampouchy, सजा केक, ट्यूटोरियल मास्टर वर्ग, कदम, कदम दर कदम निर्देश, तकनीक, मॉडलिंग, モデル, étape, étape par étape les instructions, öğretici, 一步, 一步一步的指示術, žingsnis, žingsnis po žingsnio, 宗師級教程, 宗師級教程,一步,一步一步的指示� � �技術,udžbenik, 建模, 裝飾蛋糕, 黏土教程, 만들기 제작 과정, 슈가모델링, κρεμαστά icicles, βήμα, βήμα προς βήμα οδηγίες, οδηγίες βήμα βήμα, παντεσπάνι art, τεχνικές, φροντιστήριο, декорация на торти стъпка по стъпка, инструкция, как сделать, крок за кроком, крок за крокам, висячие сосульки, висячі бурульки, висящите icicles, вісячыя ледзяшы, покроково, полимерная глина, пошагово, пошаговые фотки, пакрокава, персонажи, миниатюра, мк, мк торт "свисающие сосульки из мастики", моделиране, майстор-класа урок, майстар-клас, майстер-клас, майстер-класи, маршмеллоу, мастика, мастер-класс, зд торт, зд торта, лепка, ліплення, ручной работы, ручная работа, украшение тортов, сахарная мастика, уроки прикрашання, стъпка, стъпка по стъпка инструкции, торта стъпка по стъпка, техники, техника, техніка, туториал, туторіал, тэхніка, фигурки, фигурка на торт, фимо, фігурки, фігуркі, холодный фарфор, шаг за шагом, інструкцыя, інструкція  |
|

