|
|
выравнивание торта под мастику How to get a smooth cake
|

10.09.2010, 08:12
|
|
Администратор
|
|
Регистрация: 07.09.2010
Сообщений: 7,669
|
|
 выравнивание торта под мастику How to get a smooth cake
|

20.09.2010, 05:10
|
|
Администратор
|
|
Регистрация: 07.09.2010
Сообщений: 7,669
|
|
|

13.01.2012, 07:38
|
|
Администратор
|
|
Регистрация: 07.09.2010
Сообщений: 7,669
|
|
 Выравнивание круглого торта под мастику
Огромная благодарность evgesha.s за Мастер-класс
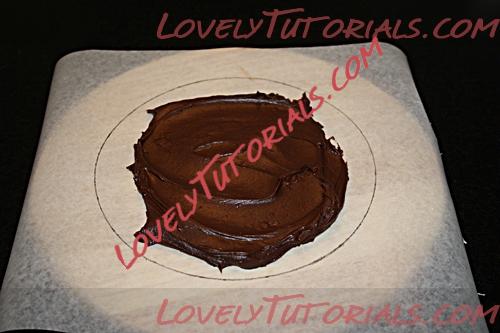
1. В певую очередь лучше иметь столик, который может вращаться ... такой можно купить в Икее.НА него я кладу доску, либо картонку, а на неё кладём отрез бумаги для выпечки, на которой контуром обведён круг, такого же Д., как и подложка , на которой стоит ваш тортик. Круг смазываем ганашем, ганаш не должен выходить за контуры круга.
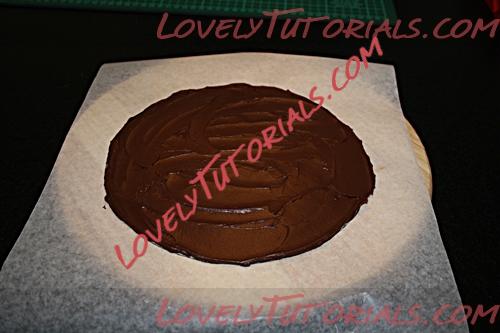
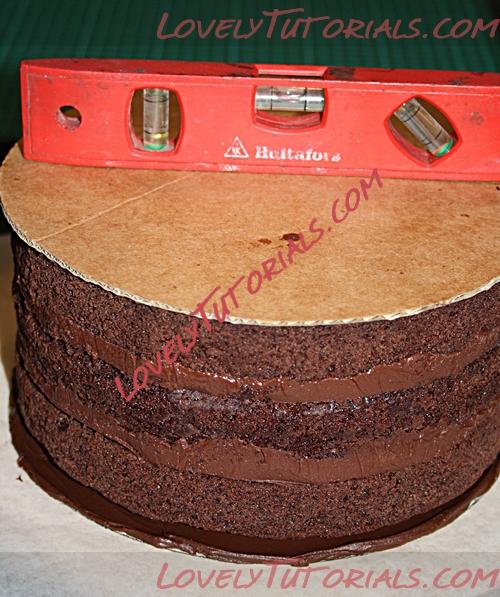
Ставим тортик верхом вниз на наш круг с ганашем, теперь низ с картоном будет верхом тортика. Быстро центруем тортик. Я ещё дополнительно ставлю уровень на верх тортика. Так как торт из холодильника, то ганаш под ним очень быстро застывает и тортик не будет двигаться!
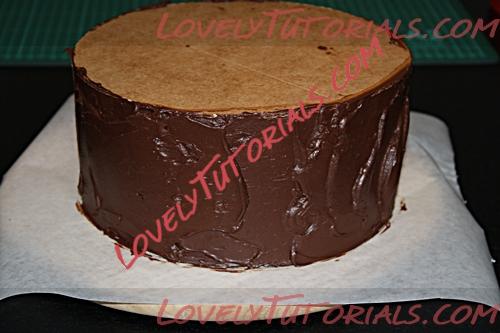
4. Наносим ганаш спатулой.
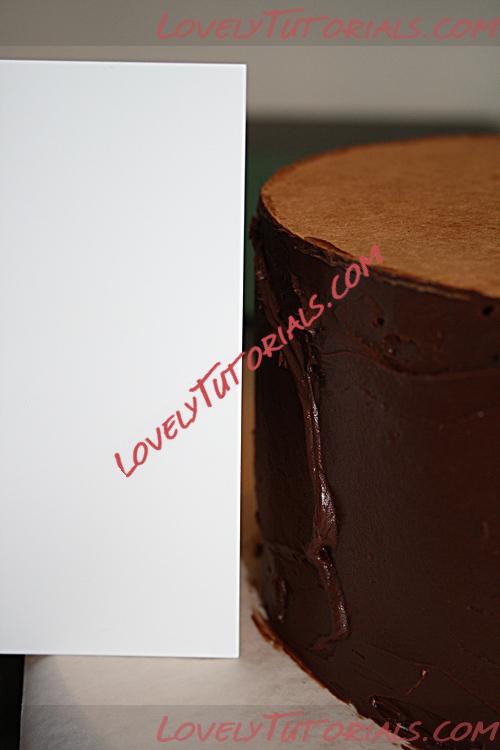
5. и каким-либо инструментом с острым углом начинаем убирать излишки ганаша.
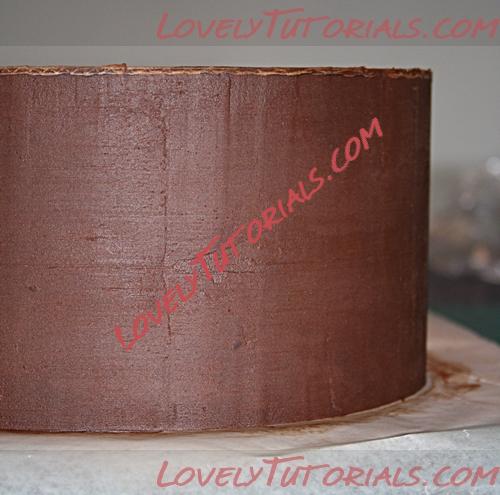
6. Теперь следим, чтоб вы не убрали слишком много ганаша .. вы должны только, только дойти то контура карандаша на бумаге, вот здесь вы должны остановиться, так как Д. контура на бумаге и подложки у вас одинаковый. Теперь ставим тортик в холодильник, всё в таком же перевёрнутом виде и бумагой. Даём ганашу как следует застыть!
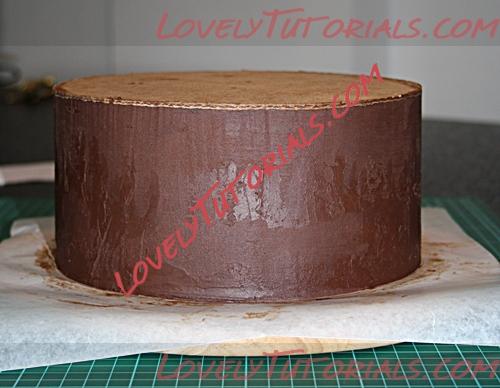
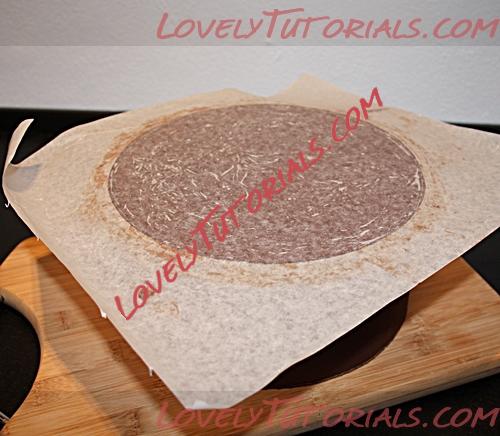
8. После того как ганаш застыл, нам нужно перевернуть тортик. Делаем это быстро и уверенно! Теперь низ с подложкой из картона будет внизу, а бумага вверху, вот её и надо снять.
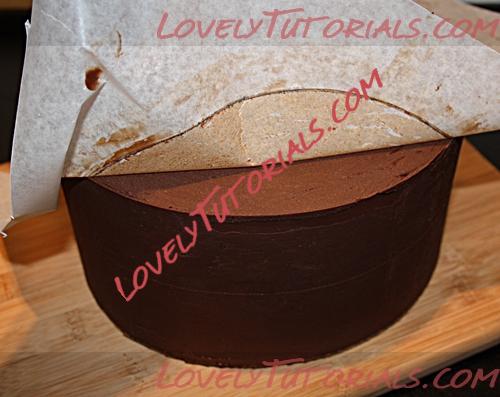
9. Отделяется она без проблем, а под ней будет ваш красивый и острый верхний край! 
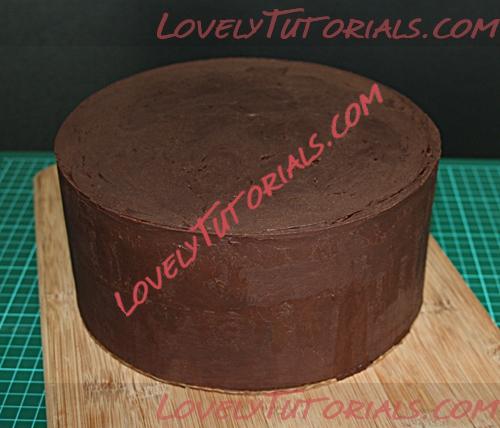
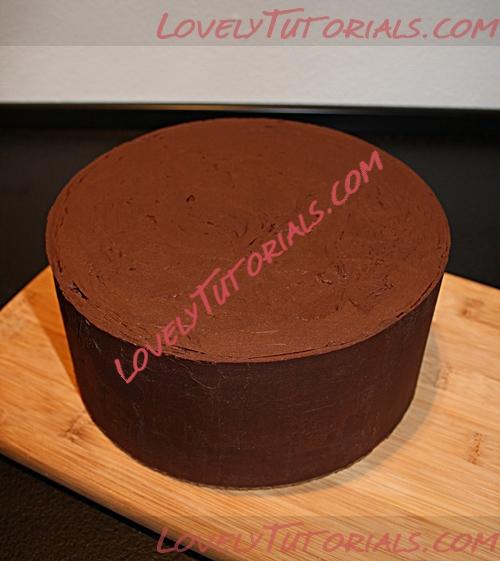
10. Теперь можно пройтись горячей спатулой по ганашу, чтоб загладить неровности или нанести ещё немного ганаша если у вас остались небольшие пустоты на поверхности тортика после снятия бумаги. Пустоты надо заполнять обязательно .... чтоб не было не очень красивых пузырей воздуха под мастикой, этот воздух увеличивается под мастикой ипортит внешний вид тортика. Ну вот и всё! 
|

13.01.2012, 07:55
|
|
Администратор
|
|
Регистрация: 07.09.2010
Сообщений: 7,669
|
|

Огромная благодарность Автору за Мастер-класс
Icing a Cake Smoothly
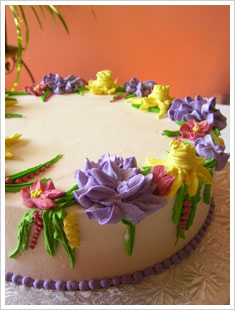
Icing a cake to a smooth finish is quite challenging for a beginner to learn. It is, however, worth the time to learn how to do it. It takes a lot of p's - patience, persistence and practice, practice, practice!
A round cake is the easiest shape to cover with icing, so it is best to start practicing icing a cake with this shape. Other shapes such as square or hexagon can be a bit harder to do.
The equipments needed for icing the cake are a lazy susan, a metal spatula, an icing bag and the secret tool to a smooth cake - a plastic spackle tool. Yes, this unassuming little tool is what will make your life easier in smoothing a cake. Make sure you have one dedicated just for your cake making. I got mine from the local home improvement store for less than ten dollars.
You will also need a cake, buttercream icing and a cake board.
A really fresh cake can sometimes be quite a challenge to frost because it is too fragile and crumbly. I like freezing cakes for a couple of reasons: it makes the cake moister and it settles the cake so it is less crumbly and less likely to bulge. Leaving it in the freezer even for an hour after baking will help firm it up.
When freezing cakes, make sure it is tightly wrapped with a plastic cling wrap. I usually freeze it overnight and use the next day. I don't like keeping in the freezer for a long time as it will have freezer burn and will change the taste. Leave the plastic wrap on when thawing the cake; it will help lock in the moisture.
For buttercream, I use this recipe. Be sure to have plenty of icing; it is better to have extra than running out and making more in the middle of covering the cake. I don't know about the other shortening based icing if the secret tool will work well with it. I will experiment with it on a later date.
The cake board to use will depend if the cake will be stacked or not. If the cake is just one layer, use a cake board that is slightly bigger than the cake. If the cake is for stacking, use a cake board that is the same size as the cake.
TORTING A CAKE Place the cake on the lazy susan. Trim to level the top by using a serrated knife. To torte the cake, take the knife to the side of the cake. Slowly turn the cake while moving the knife in a back and forth motion. You can cut the cake more layers if you wish.
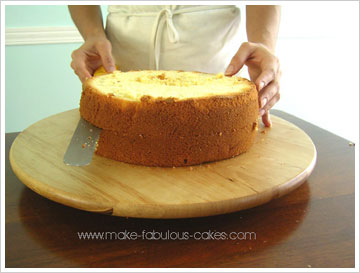
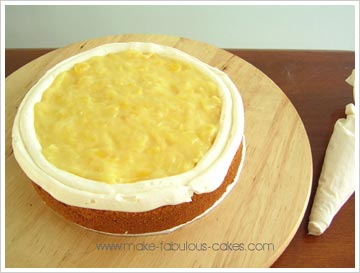
Place the top half of the cake onto the cake board with a dab of icing. This will help "glue" it into place.Make a dam of buttercream around the cake using the icing bag with no tip. Fill with desired filling. This will help prevent the filling from leaking and also prevent the cake from bulging.
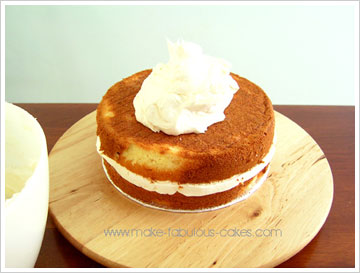
Place the bottom half on top of the filling. If the cake is quite large, use a cake board underneath the cake and slide the cake off the board. ICING A CAKE
Put a huge amount of icing on top of the cake. Don't be hold back on this, we will move this icing around and remove most of it.
Now, spread the icing to cover the top of the cake. Try not to lift the spatula too much so you won't have any crumbs. If you do get crumbs just wipe it off on another bowl and use those for the filling. You can spread some of the icing towards the side of the cake and you can take some of the extra icing off, too. 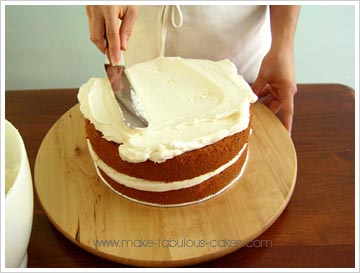
Take some icing with your spatula hold it against the side on a 45 degree angle and spread it, covering the cake all around. Use your other hand to turn the lazy susan while doing this. Make sure the edges are a hanging little bit higher on the top of the cake. 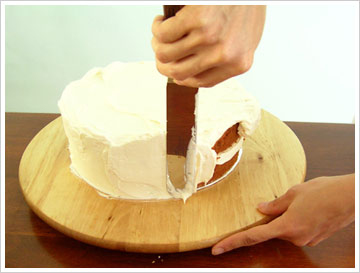
When the cake is covered all around, take the spackle tool and hold it against the sides again on a 45 degree angle. Turn the cake round and round while leaving the spackle tool in the same place. It may take a few round trips before you smooth it out. 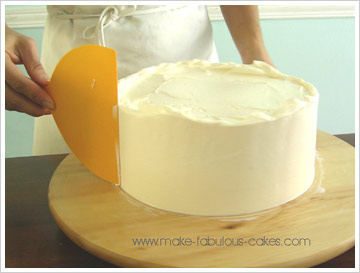
Using the metal spatula push those overhanging edges towards the center of the cake. Repeat all around, wiping the excess buttercream to the bowl. You should have nice, clean edges. 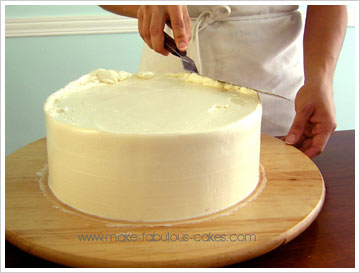
Clean the spatula and run it across the top to smooth it. What also helps to smooth the cake is using a spatula that was dipped in hot water. The heat helps melt the buttercream a bit.
And voila, the smooth cake!
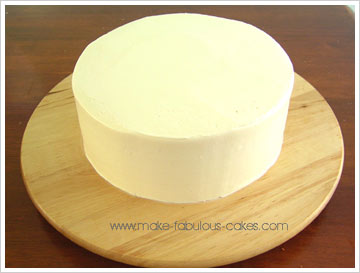
|

13.01.2012, 09:57
|
|
Администратор
|
|
Регистрация: 07.09.2010
Сообщений: 7,669
|
|

Огромная благодарность Cake Boss за Мастер-класс
The main causes of bulging cakes I have found are:
- Unlevel or domed cakes
- Not letting the cake rest long enough
- Too much filling
- Under-dowelling
To avoid these pitfalls, follow these instructions:
1. I like to fill my pan about 2/3 full. The goal is to get the cake to rise OVER the top of the cake pan.
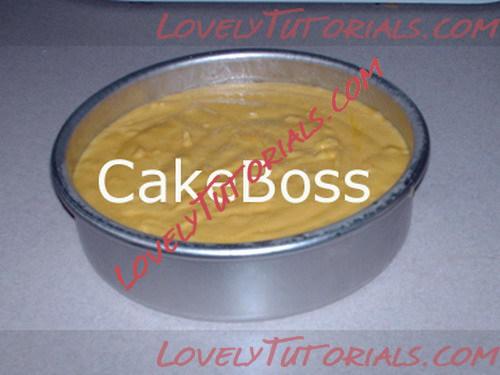
2. When the cake is done baking, cool for about 10 minutes in the pan. After 10 minutes, take a long serrated knife or cake leveler, and, using the top of the pan as a guide, level off the excess amount on top.
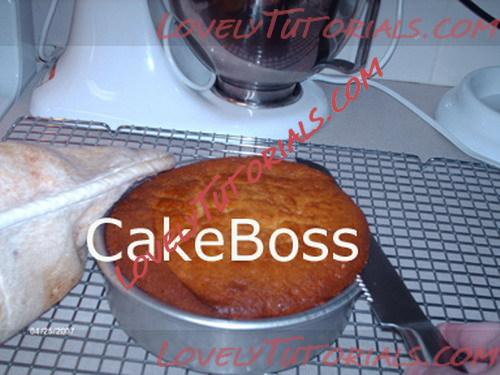
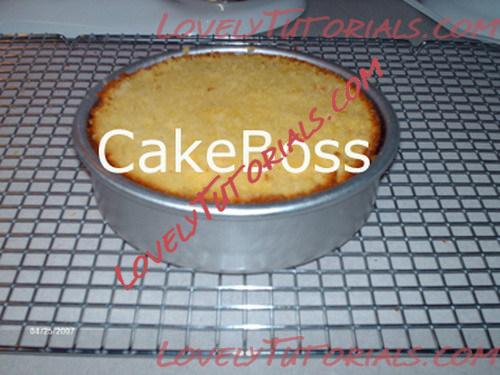
3. When you've cut off the top, you will have a perfectly level cake. Feed the "muffin top" to your family or make cake balls! It does take a little extra batter for this method, but the results are well worth it for wedding cakes, or other cakes where the LOOK of the cake is extremely important.
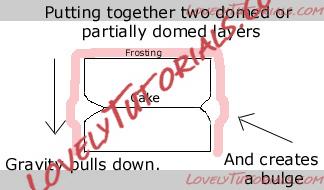
This diagram shows how putting together domed layers causes a bulge in the frosting.
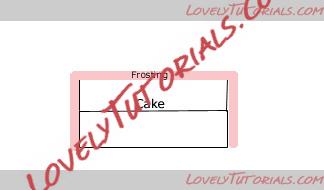
This is what we are trying to achieve in this tutorial.
4. Turn the cake out onto a cooling rack and cool completely. At this point I like to wrap and freeze my cakes.
5. If you are filling your cake, use a #12 tip to draw a line of frosting around the torted area to be filled, about 1/4 - 1/2" in from the outside edge of the cake.
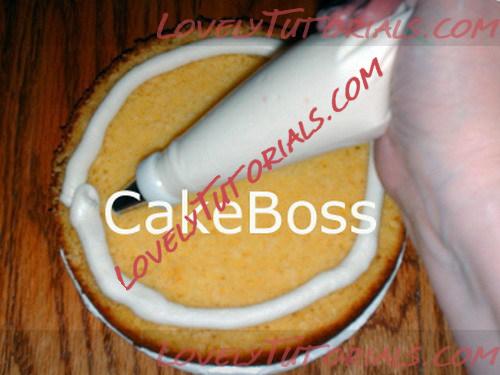
6. Spoon in your filling, pushing it with a spoon to the edge of the ring of frosting. Be very careful not to use too much filling. Use just enough to cover the cake.
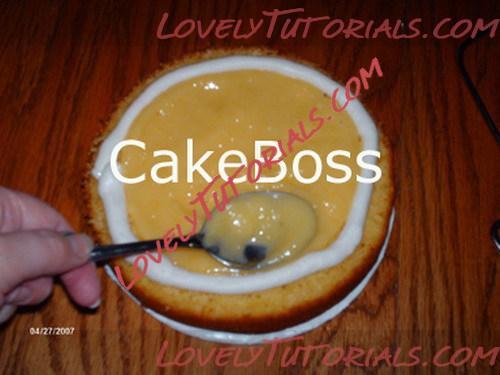
7. Repeat with all torted layers.
8. When the cake is filled and assembled, use your #12 tip again to go around the outside and fill frosting into the small gap left in between the layers.
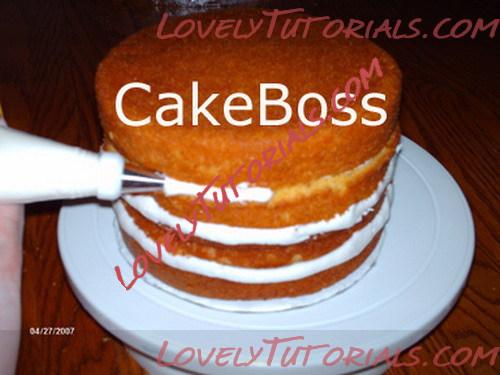
9. Crumb coat.
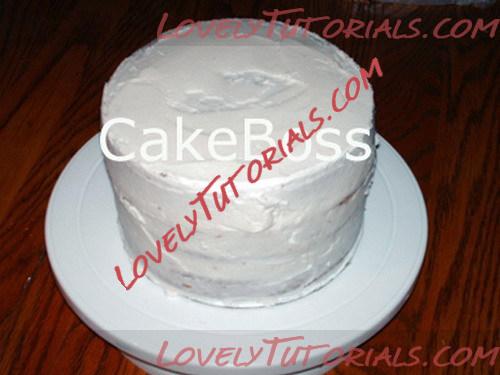
10. If you are in a hurry, or your filling is perishable, place in the refrigerator for at least 20-30 minutes (or wrap and leave overnight). If the filling is not perishable, leave the cake on the counter for several hours so it can settle. The longer you leave your cake to rest, the more settling it will accomplish. Many cake artists leave their cakes to settle overnight before proceeding with the final coat of buttercream or covering with fondant.
If you don't have a lot of time to let the cake settle, you can accelerate the settling process by placing a heavy object on top of the wrapped cake, such as a book or ceramic tile. A ceramic tile (about the same size as the diameter of your cake) will settle the cake in about 2 hours.
* Note, if you refrigerate the cake for more than 30 minutes, let it sit at room temperature for a few minutes before proceeding to the next step. The air inside very cold cakes will start to expand when it heats up and if it is trapped, may start to create air pockets in the frosting.
11. Frost as usual. I like to use the big icer tip for getting a quick, thick layer of frosting on the cake.
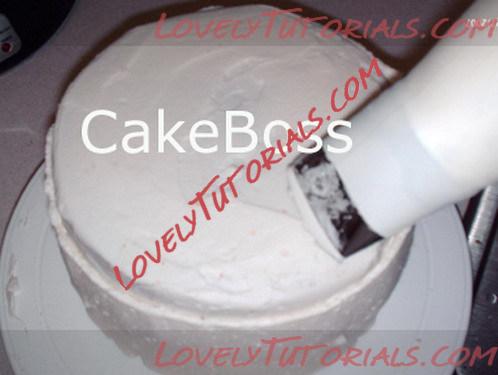
12. I use a cake decorator's comb run under hot water for a smooth cake.
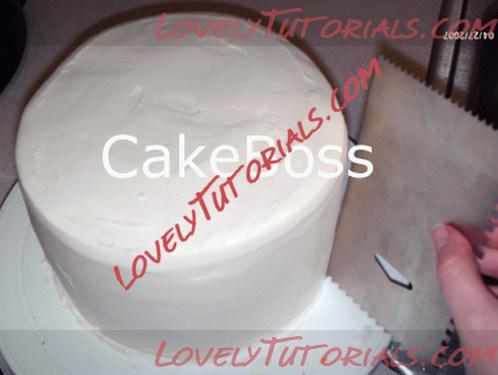
As long as you have not used too much filling, you should have a bulge-free cake! If this is a stacked cake, cut your dowels exactly to the height of the cake, not lower! If you cut them lower than the height of the cake, the weight of the higher tiers can press down into the cake and cause a bulge.
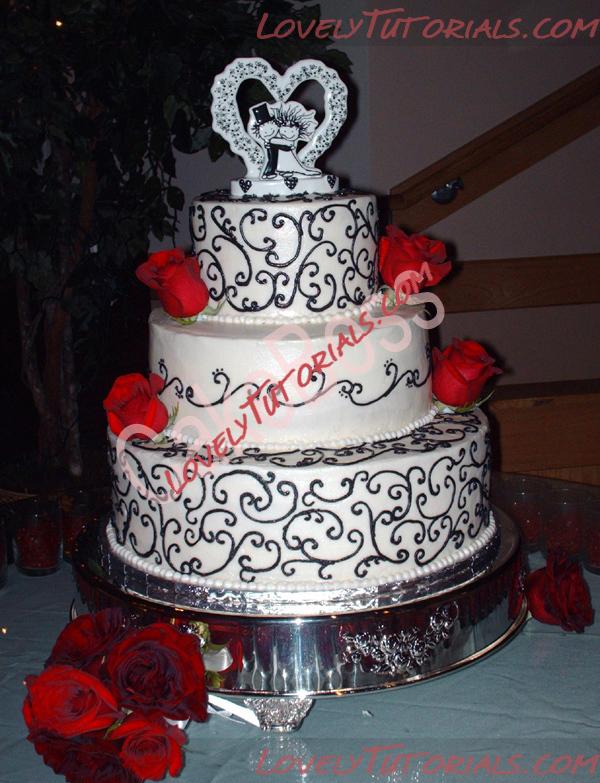
This is a cake done using this method. Each tier is torted with 3 layers of filling. It is a 15", 11", and 7".
|

03.04.2012, 11:48
|
|
Администратор
|
|
Регистрация: 07.09.2010
Сообщений: 7,669
|
|

Огромная благодарность Автору- Jeff Arnett за МК
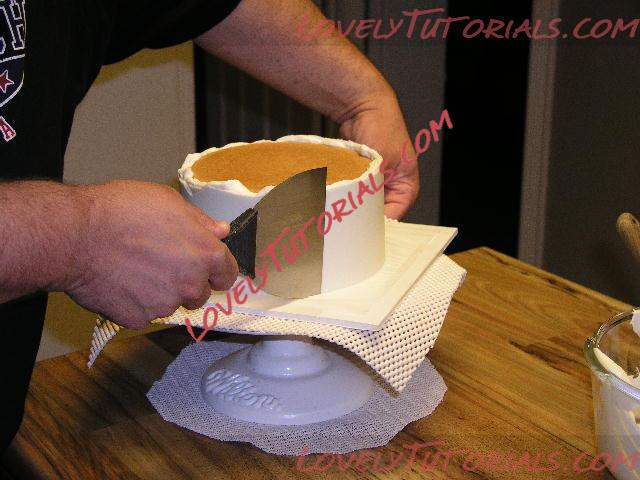
This technique works best with an icing containing at least one-third butter, but can be done with an all shortening icing with slight modifications in the chilling steps.
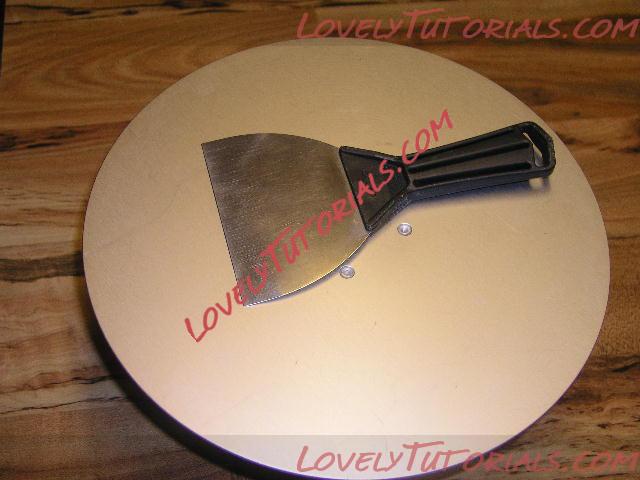 1. To begin with, there are some tools I consider “must have” items:
A Turntable
A Spackling Knife [from a hardware store]
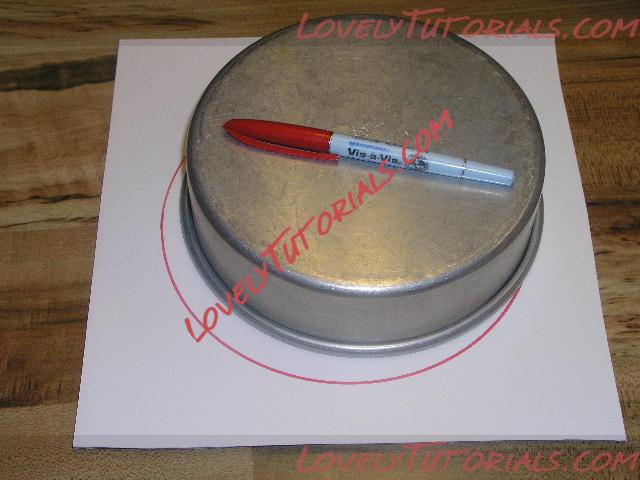 2. Trace the outline of the pan [top side down] onto a sturdy surface, such as a piece of foamcore, cardboard, or for a more permanent use, masonite.
 3. Cover the outline with a piece of parchment paper about 1 to 2 inches larger than the pan’s outline and tape securely so that there are not wrinkles. Some people have had success using acetate instead of parchment.
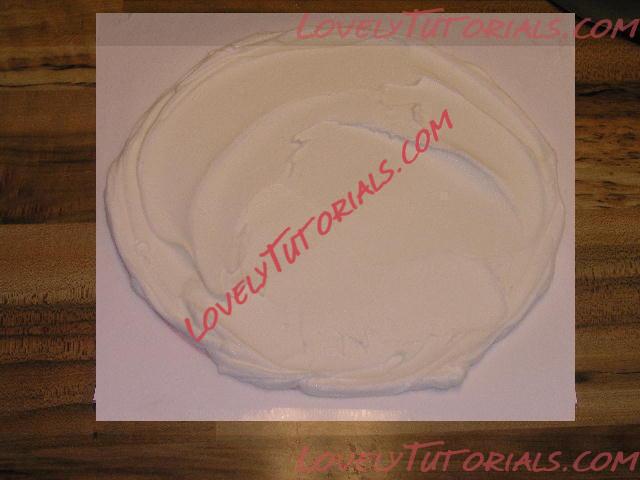 4. Using a very smooth icing, “ice” the area of the circle, extending the icing about 1/4″ past the outline; any extra icing will be removed later. Apply the icing about 1/4″ thick.
Place the “iced” board in the refrigerator and allow to chill until firm, about 10 to 15 minutes. If using an all shortening icing, you may need to place the board in the freezer instead.
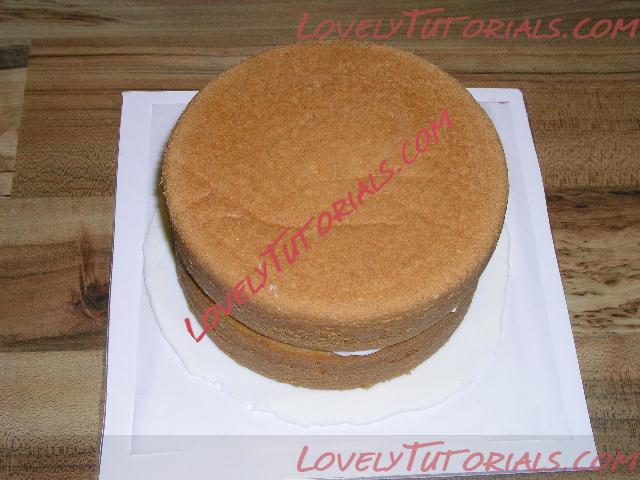 5. Once chilled, remove the board from the refrigerator and place the “top” cake layer top down on the iced circle, centering is in place. Fill and add aditional layers. Here I have used only 2 layers, but normally I would have torted the layers into four.
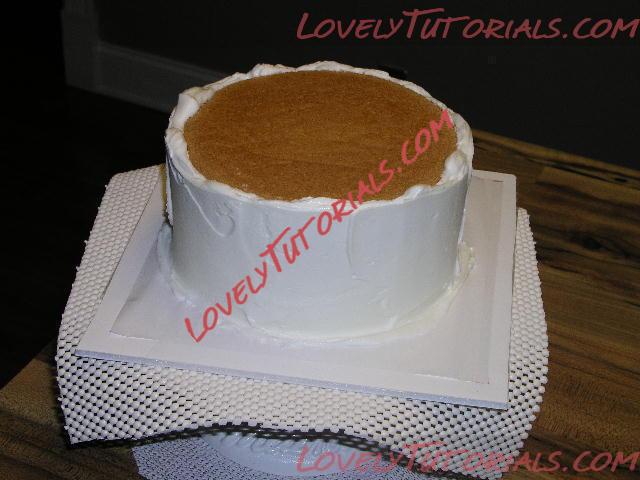
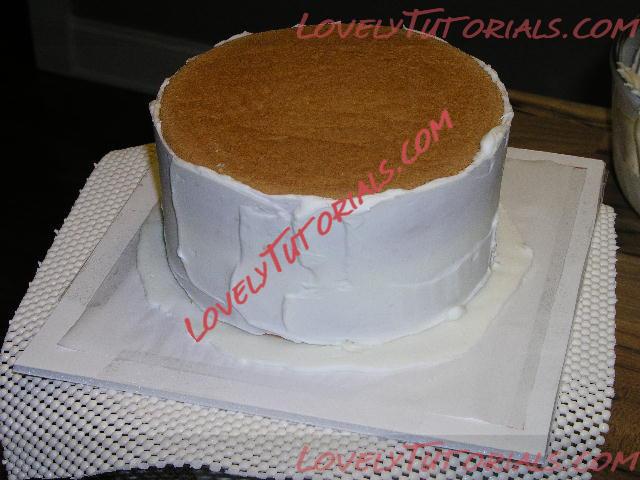 6. Lightly crumb ice the sides of the cake and chill a few minutes if desired before applying the final coat of frosting. Apply the final coat of frosting to the desired thickness using a spatula or large icing tube.
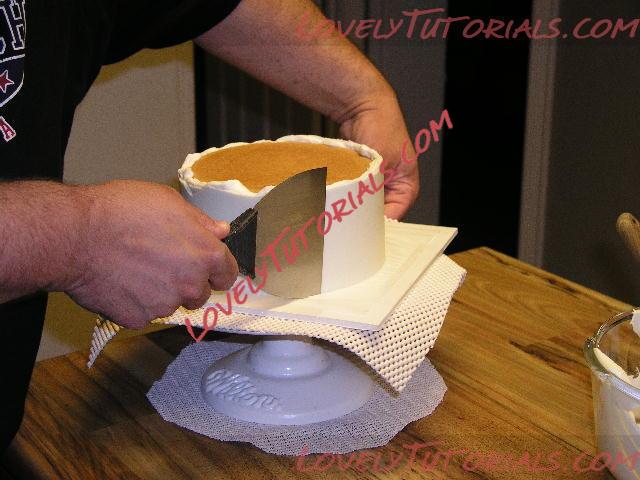
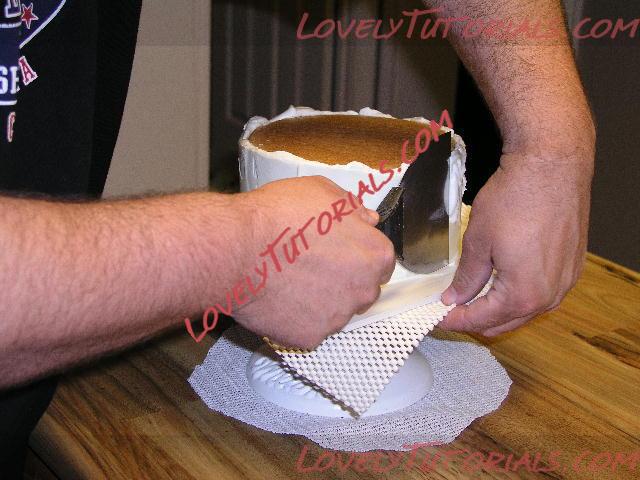 7. Place the cake on the turntable. Dip the spackling knife in hot water and dry with a paper towel. Hold the blade against the side of the cake at about a 45 degree angle and reach the other hand around the back until it is near the hand holding the knife.
BE SURE THE SPAKLING KNIFE IS TOUCHING THE PARCHEMENT or else there will be a line of icing pushed out beneath it.
 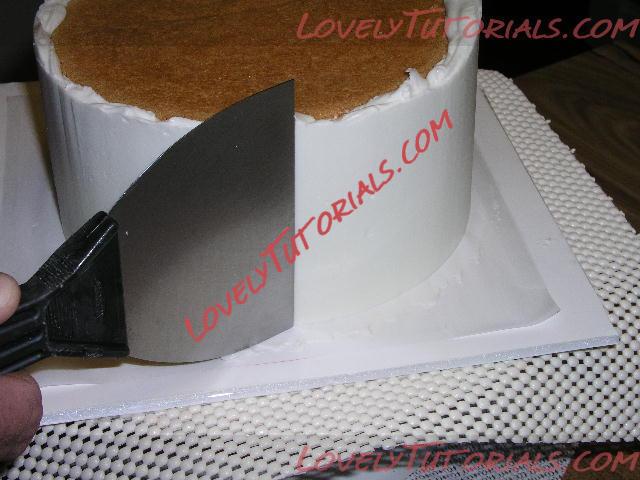 8. SLOWLY turn the turntable one full rotation WITHOUT STOPPING. Inspect the side so the cake. If it is not smooth to your satisfaction, repeat step #7 again. If a small amount of icing has pushed under the blade, simply scrape it away before step #7.
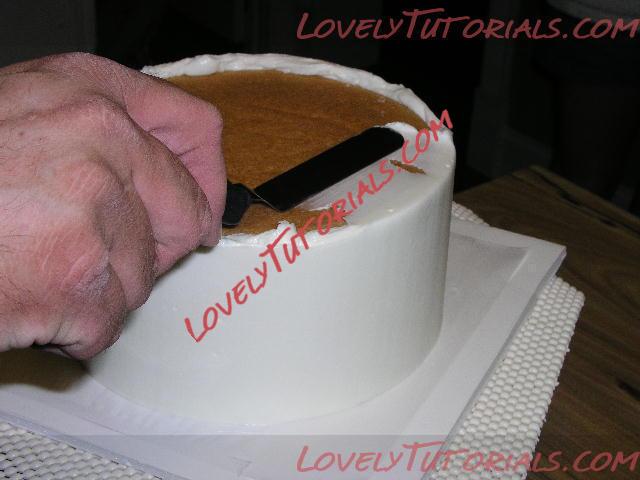 Smooth any icing build up over onto the “bottom” of the cake with a small angled spatula. When the side are smooth to your satisfaction, carefully cut the parchment paper loose from the board ALL THE WAY AROUND THE CAKE using an Exacto Knife. Carefully return the cake to the fridge for about 10 to 15 minutes to firm the icing [all shortening icing may need to be put in the freezer].
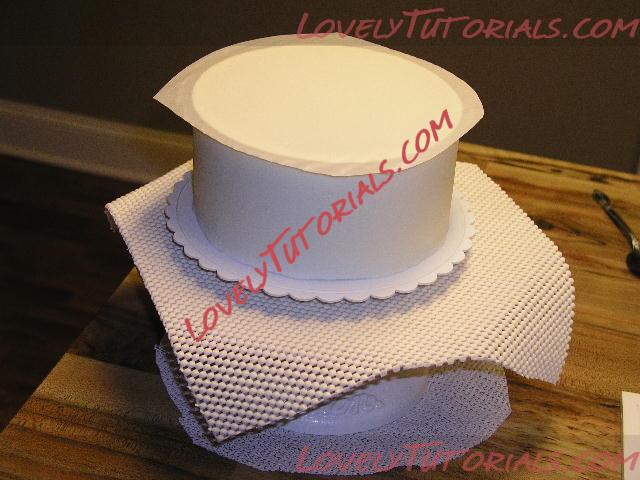
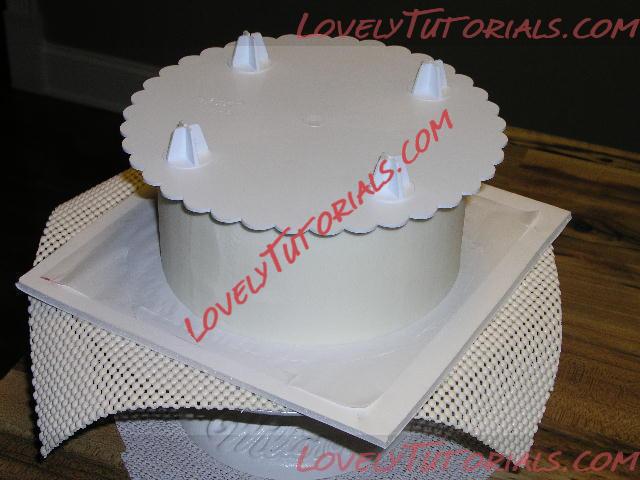 9. Prepare the final cake board by smearing a few strokes of icing on it. Remove the cake from the fridge, center the board and quickly “FLIP” the cake over. REMOVE the cardboard, but leave the parchment in place and return to the fridge for about 10 minutes.
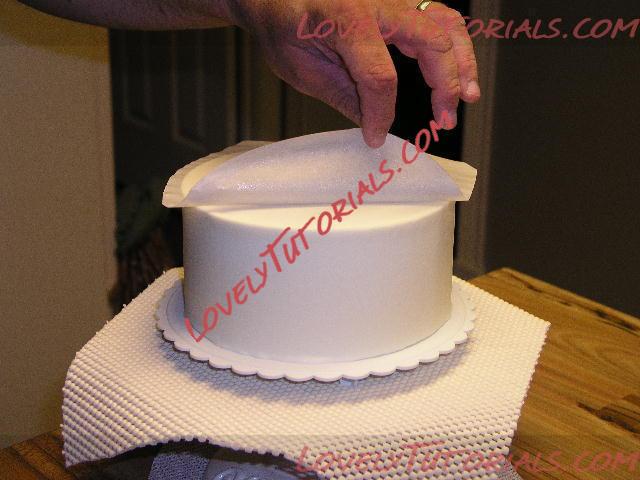
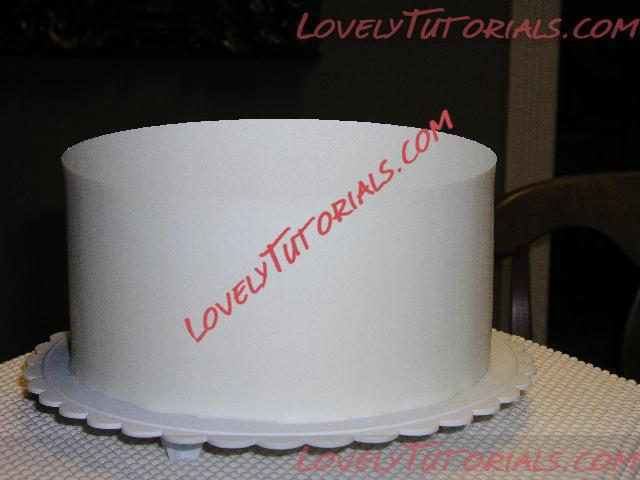
\ 10. Carefully remove the parchment…..you should have a beautifully iced cake with perfect edges and a very level top.
|
 |
|
Метки
|
3d bizcocho, 3d bolo, 3d cake, 3d dort, 3d kage, 3d kager, 3d kake, 3d kek, 3d pastel, 3d tarta, 3d torta, 3d torte, 3d torti, 3d torty, 3d κέικ, a secret to smoothing icing, addım-addım təlimat, adım, adım adım yönergeler, arte en azucar, artesanatos passo a passo, artesanía, australian stringwork, azúcar gla, bemutató, bizcocho, bolando bolos, bolo, butter cream, butter icing, buttercream, buttercreme, bánh, cake, cake decorating, cake decorating techniques, canache, chocolate, ciasto, clara de huevo, confeitando bolos, cream, creaming butter, creamy glaze, crema de manteca, crème au beurre, cukru pudru i białek, císte, decoracion de pasteles, decoración de tortas, decorada en fondant, decorare le torte, decorazioni, deko fondant, dekorace na dort, dekoracija, dekoracije, dekorasyon, dekorácie, deser, dort, egg whites, embroidery accents, fender, filigran, filigrana, filigranarbeit, filigrane, filigree, filling, filum, fimo, flower paste, fondan, fondant, fondente, fondente di zucchero, fotopostup, foundant, frosting the cake, ganache, gebak, genache, glaseado, glaseado blanco, glaseado real, glassa, glassúr, glasur, glasyr, glaze, glazuur, glaçage, gum pasta, gum paste, gumpaste, gâteau, hand-made, handmade, how to, how to create the flat, how to frost a really smooth cake, how to get a smooth cake, how to ice a cake, how-to's, icing, icing sugar, instrucţiuni, instrukcijas, instrukcje, jak na, kage, kage dekoration, kagedekoration, kager, kaka, kake, kakebaking, kakku, kanasch, kejk, kek, keks, kook, korak, korak za korakom navodila, korak-po-korak upute, koristeet ja koristelu, kristyr, krok, krok po kroku, krok za krokem, krok-za-krokem, kuchen, kue, küche, kūka, la crema de mantequilla, la ganache, las instrucciones, las técnicas, le tecniche, les techniques, lukie, lukier królewski, marshmallow, masa flexible, master-class, master-klasse, master-klasy, meistras klasės, metodikas, mistr třídy, mock cream, modeling paste, modelling past, motivtorten, návod, opplæringen, pamoka, pap, pariser creme, pas, pas-cu-pas, paso, paso a paso, passo, passo a passo, passo-a-passo, passo-passo le istruzioni, pasta de miel, pastel, perfectly smooth buttercream icing, piping methods, polewa, postup na 3d torty, postupak za ukrasavanje, powdered sugar, puderzucker, pâtisserie, royal icing, schmelzend, schritt für schritt anleitung, schritt-für-schritt, schritt-für-schritt-anleitungen, smjörkrem, smooth buttercream, smooth cake, smooth frosting, smooth icing, stap, stap-voor-stap, stap-voor-stap instructies, steg for steg, steg-för-steg, steg-för-steg-instruktion, step, step by step, step-by-lépésre, step-by-step, step-by-step instructions, sugarcraft, sugarpaste, suikerglazuur, sykurbráð, tarta, tarte, technieken, techniken, techniki, techniky, technikák, techniques, tecnicas de decoracion, tecniche, tehnici, tehnike, teknikker, teknikler, telkârî, tips och trix, tort, torta, tortas, torte, torte decorate, torten dekorieren, torti, tortu, torty, trin, trin for trin, trin-for-trin, trin-for-trin instruktioner, trinn, trinn for trinn, trinn-for-trinn-instruksjoner, tutorial, tutoriale, tutorias, tutorias/ideas para decorar los bizcochos, tutoriel, tutorijal, tårtbottnen, tårtor, técnicas, ukrašavanje torti, upside down, uputstvo za dekoraciju, ways to smooth cake icing, zuckerglasuren, zuckermasse, सजा केक, ट्यूटोरियल मास्टर वर्ग, केक, कदम, कदम दर कदम निर्देश, तकनीक, เค้ก, ケーキ, étape, étape par étape les instructions, öğretici, žingsnis, žingsnis po žingsnio, 宗師級教程,一步,一步一步的指示� � �技術,udžbenik, 生チョコレート, 裝飾蛋糕, 蛋糕, 케이크, κέικ, βήμα, βήμα προς βήμα οδηγίες, οδηγίες βήμα βήμα, παντεσπάνι art, τεχνικές, φροντιστήριο, инструкция, королевская глазурь, кваратный торт, как сделать, крок за кроком, крок за крокам, крем, крэм, острый край, ганаж, ганаш, глазурь, выравнивание кремом, выравнивание пошагово, выравнивание торта под мастику, покроково, пошагово, пошаговые фотки, пакрокава, миниатюра, мк, майстор-класа урок, майстар-клас, майстер-клас, майстер-класи, маршмеллоу, мастика, мастер-класс, мастер-класс по выравниванию торта под мастику, айсинг, белкого-рисовальная масса, зд торт, зд торта, ручной работы, ручная работа, украшение тортов, сахарная мастика, уроки прикрашання, стъпка, стъпка по стъпка инструкции, торт, торта, техники, техника, техніка, туториал, туторіал, тэхніка, филигрань, шаг за шагом, інструкцыя, інструкція  |
|

