ą×ą│čĆąŠą╝ąĮą░čÅ ą▒ą╗ą░ą│ąŠą┤ą░čĆąĮąŠčüčéčī HowToCAKEThat ąĘą░ ą£ą░čüč鹥čĆ-ą║ą╗ą░čüčü
ą×ą│čĆąŠą╝ąĮą░čÅ ą▒ą╗ą░ą│ąŠą┤ą░čĆąĮąŠčüčéčī HowToCAKEThat ąĘą░ ą£ą░čüč鹥čĆ-ą║ą╗ą░čüčü
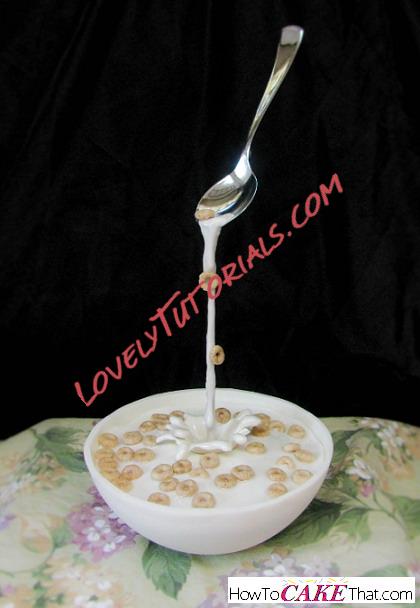
Now this is the ultimate personal-size cake for any cereal lover! This anti-gravity cake is the perfect way to wow your friends and family at a birthday party or to surprise your breakfast-loving husband-to-be with this as his groom's cake! And the best part about this cake? You won't believe how easy it is to make!! A few simple tricks give this cereal cake the that over-the-top realistic appearance. Check it out in this tutorial...
Note: certain parts of this cake will need a couple of days to dry. So plan ahead!
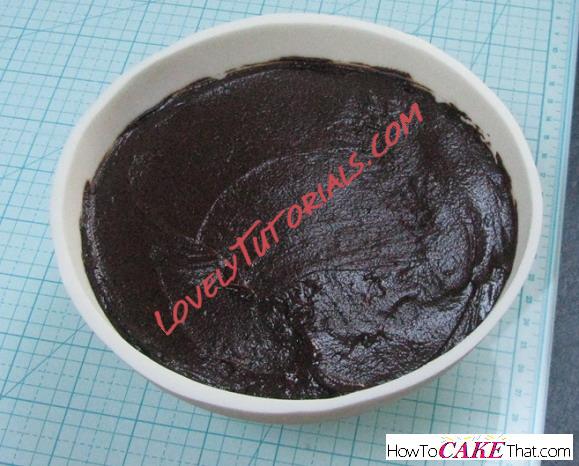
For this tutorial, we will be using the Wilton ball pan to create the bowl, and it will be used for baking the cake. Place 1/2 of the Wilton ball pan open side down and dust surface with cornstarch. The cornstarch will help keep the edible bowl from sticking.
Next, knead a mixture of about 2/3 gum paste to 1/3 fondant (if you are in a humid climate, or if it's summertime, you may want to use a little more gum paste). Dust work surface generously with cornstarch and roll out fondant mixture into a round disk shape large enough to cover the ball pan half. Ensure fondant disk is thick enough to make a sturdy bowl - you don't want it thin! Drape fondant mixture over ball pan and gently shape fondant mixture over the pan using your hands. Trim off excess fondant, keeping the fondant shaped as closely to the bowl's shape as possible. Set aside to dry.
Now that the bowl is completed and drying, it's time to make the cute little splash of milk. To give the splash a uniformed cupped shape, I used a small Wilton flower former cup. To keep the splash from sticking, dust the inside of the cup with cornstarch.
Place a little patty of 100% gum paste into the flower cup. Use your fingers to press and shape the gum paste into a general "splashing" shape. Right now it looks like a sad little splash... but don't worry, we will build up on it a little more to give it more shape.
Create little teardrop shaped pieces and adhere them to the splash using a little water. And to keep all of the little droplets from being at the exact same level, slide something under a couple of the teardrops to hold them up and make them sit a little higher than the other droplets - I'm using cut pieces of Ziploc baggies.
Allow bowl and splash to dry for a few days!
The bowl is ready to use when it can be removed from the pan and it is semi-hard and holds its shape very well. If your bowl's edges aren't perfectly straight, very carefully trim them down by holding a razor blade perfectly flat and remove thin pieces of bowl at a time until the edges are smooth and just about even.

Once your cake is baked and cooled in the other 1/2 of the ball pan, it's time to place it in the edible cereal bowl. To do this, use a small spoon to smooth down a little frosting inside of the bowl where the cake will be sitting. Be sure to not get frosting on the edges of the bowl that will be showing. Level the surface of your cake before placing it in the fondant bowl. Once your cake is level and trimmed to an appropriate size for your cereal bowl, place it inside of the bowl. Smooth a layer of frosting over the cake's surface - ensure the layer of frosting is as smooth as you can get it. Place cake in the refrigerator and chill for at least 30 minutes to allow frosting to harden.
While the cake is refrigerating, slice some of the cereal (I'm using Cheerios) in half - these pieces will give the illusion that part of the cereal is under the milk's surface.
After cake has refrigerated for 30 minutes and frosting is hard, remove from refrigerator and plan where you'd like your splash to sit. Choose a spot near the middle - a small skewer will be inserted through the splash and into the cake... and to keep the skewer from poking out of your bowl, it must be near the center of the bowl. Using a small teaspoon, scoop out a shallow hole for your splash to sit. Remember, when pouring liquid into a liquid, the beginning of the splash sits slightly below the surface of the sitting liquid. (Geez! That's confusing! I hope you guys get what I'm trying to say there)

Next, line the hole with a little frosting.
On a surface dusted with cornstarch, roll out a round sheet of fondant large enough to cover the surface of the cake. Be sure fondant is thick enough to not let the frosting color show through. Plus, thicker fondant will be helpful when we stretch it across the surface.
Using your finger or a metal ball tool, press the fondant into the hole cut out for the splash.
Using an Xacto knife, carefully trim away excess "milk" fondant. If you accidentally cut away too much like I did, it's totally okay... we're gonna fix that!
Now it's time to cover up those gaps with icing showing, and also make the fondant super smooth all the way across the surface. To do this, hold one side of the fondant bowl with your hand to give it support. Using a fondant smoother, flatten and press the fondant toward the edge of the bowl where your hand is. Be very careful in doing this so your bowl doesn't break or you don't accidentally rip your fondant. Do this all the way around the bowl until fondant is nice and smooth and it reaches the edge of the bowl.
Some of my fondant milk had a little "lip" on the edge, but that made it look more realistic... like the milk in the bowl was being disturbed by the splashing. If you ended up with too much lip on one side, just trim it back with the Xacto and smooth it down again.
Perfect!!
Now that the cereal bowl and milk are complete, it's time to set up our gravity-defying spoon! Now, this spoon isn't edible - it's just a plastic spoon from my local dollar store, but one could be made from gum paste (hey, maybe that will be one of my next tutorials!). To prepare the spoon for wiring, drill two tiny holes near the tip of the spoon.
FYI: I'm totally taking the long way around this... when I posted the main photo in a facebook cake group, an awesome fellow decorator (Angie L-H) asked if I had glued the spoon to the support. Angie, you are too smart! For a quicker way to do this, hot glue the plastic spoon to the tip of the skewer instead of wiring it like I did!

Next, carve a small notch near the end of a bamboo skewer. This notch will give the wire a place to hold on to.
Next, use thin flexible florist wire and thread it through the two holes in the end of the spoon. Twist wires together under the spoon so the wire holds tight to the spoon.
Wrap the excess wire around the bamboo skewer to secure the spoon. Be sure the spoon is held tight to the skewer and isn't wiggly.
Seriously, gluing the skewer to the spoon would be so much easier

Now we're getting to the exciting part! Remove the dried milk splash from the flower cup and set it inside the hole in the milk.
The gum paste will be too hard to push a skewer through, so we must make a hole for it. Twist the tip of an Xacto knife into the center of the gum paste to create a small hole.
Press the end of the bamboo skewer through the hole in the gum paste and down into the cake.
Now it's time to add the spilling milk! Using a paint brush, brush a little water into the bamboo skewer to dampen it. The water will make the fondant stick to the skewer. Add a little fondant at a time and build up around the skewer. Try to keep the spilling milk as thin as possible to keep it realistic and believable. A tiny spoon can't spill a large amount of milk - this is why a thin bamboo skewer is used instead of a thick dowel rod. Feel free to add a couple little teardrop fondant drips to the spilling milk, if desired.
Use a soft rubber-tip shaping tool to smooth down the bottom of the spilling milk to make it look like the spill and splash are one piece. This step it totally optional if you do not own a shaping tool like this one.
Up until this point the milk has been looking pretty dull... pretty blah. But then, BAM! Once it gets glazed it really comes to life! To give your milk a realistic wet-looking glaze, paint corn syrup over the milk with a soft brush. Plain corn syrup is used for this (no glaze alcohol mixture recipe!). And since this is painted with plain corn syrup, it will not dry for a long time. So be sure to keep it in a clean, dust-free environment. Also, do not touch it!
- OR -
another awesome glaze option is vegetable oil! Painting just a thin layer vegetable oil over the surface will give it a lovely shine!
And the final touch... add cereal bits directly to the corn syrup glaze. The glaze will act as a glue and cereal will stick directly to the glazed fondant milk.


