Огромная благодарность
Jane Barraclough за Мастер-класс
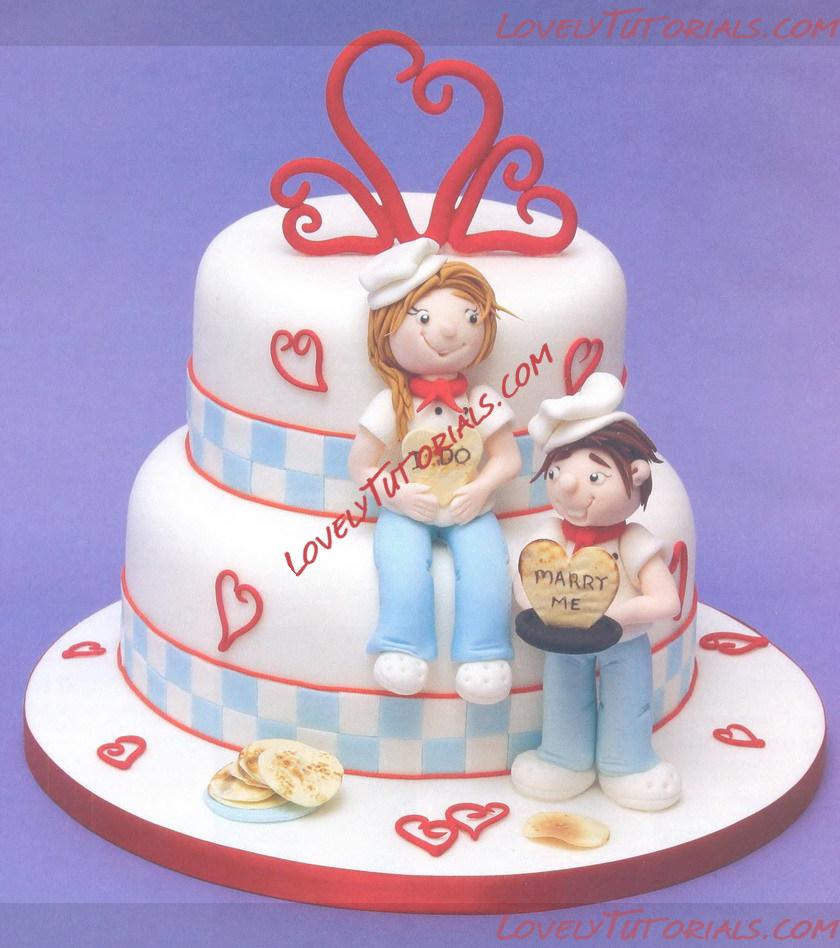
An unusual way of proposing!
This cake can be adapted for a chef or as a groom's cake or a fun wedding cake for a couple of chefs. Alternatively leave off the hearts and use for an annual pancake race event.
You will need
cake round 15, 20cm (6, 8in) coated
cake drum round 30cm (12in)
round cake card 15cm (6in)
dowels
Regalice Quantities (Renshaw Napier Ltd)
white l'/2kg (23/4lb)
pale blue 125g (5oz)
flesh-add paprika paste colour lOOg (4oz)
teddy bear brown, chocolate brown, pop
(loz) each
small amount of black
pale blue modelling paste 50g (2oz)
white modelling paste 16g (loz)
red flower paste 25g (loz)
small amount of black flower paste
small amount of white flower paste with ai
paste colour added
black liquid colour (Sugarflair)
pearl white lustre dust (Sugarflair)
food colour pen liquorice (Sugarflair)
square cutter 2cm (3/4in)
round cutter 3cm (1 V4in)
heart cutters 2, 3 (FMM)
clay gun
piping nozzle
smoother
work board
craft knife
ball tool
dresden tool
stitch tool
star tool-5 point
smile tool
cutting wheel
celpin
cocktail stick
tweezers
rolling pins
non-slip mat
foam for support and drying
dummy to support model
alcohol
white fat
tea light
spaghetti or sugar sticks
paintbrushes
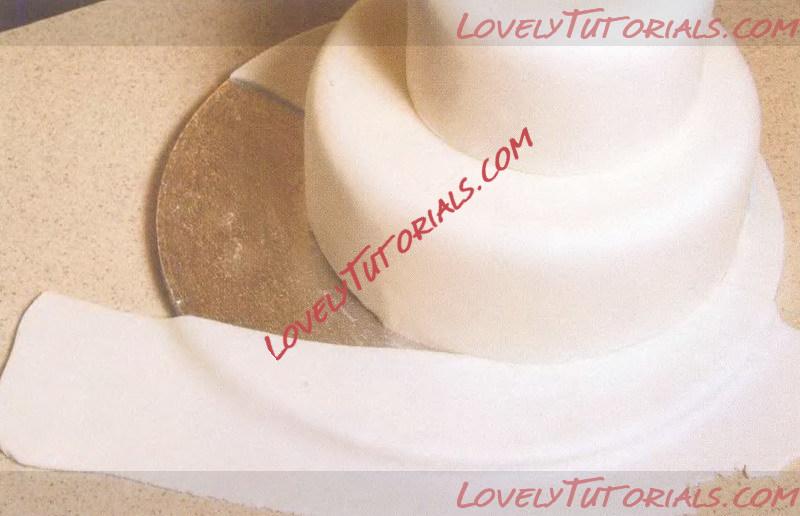
1Set the large cake to the back of the cake drum. Sit the small one onto the cake card. Coat both the cakes with white regalice. Dowel the bottom tier, stick the small cake on top and sit towards the back of the bottom tier. Ice the board white.
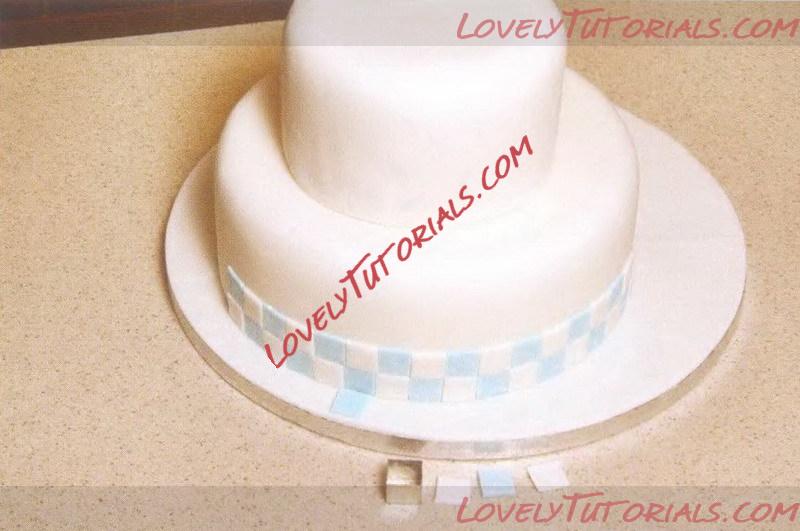
2Cut small blue and white squares. Brush around the base of each cake with water. Stick the squares around the base of each cake, alternating the colours. Start at the front and trim to fit at the back.
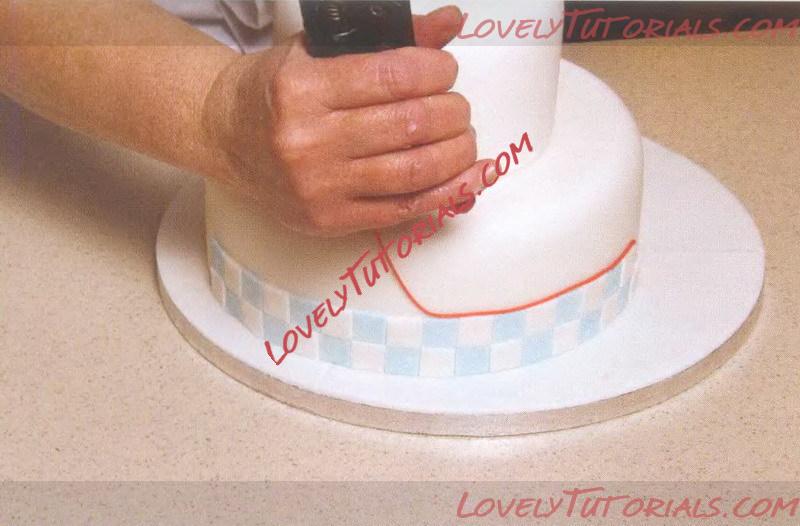
3Brush the top and the bottom edge of the borders with water. Soften red sugarpaste with white fat. Use the smallest hole disc in the clay gun and push the paste through onto the border, let it fall onto the edge from above.
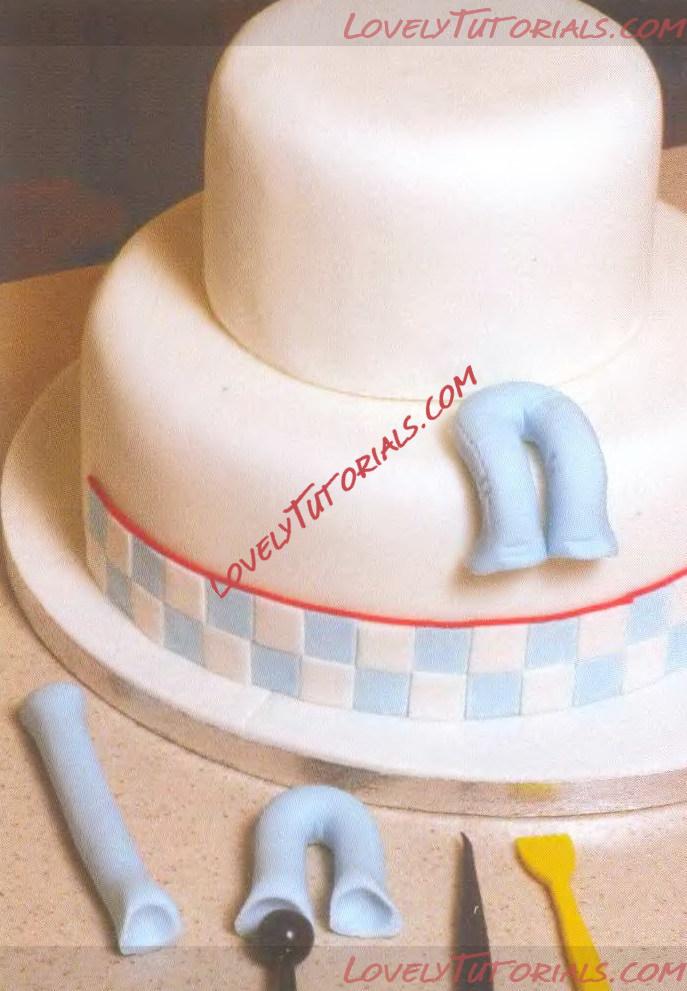
4Roll a 50g pale blue sausage 15cm long and cut off the ends. Push the ball tool into each end. Fold in half. Sit onto the bottom tier; bend the legs down over the edge. Mark creases and seams with a dresden tool and a stitch tool.
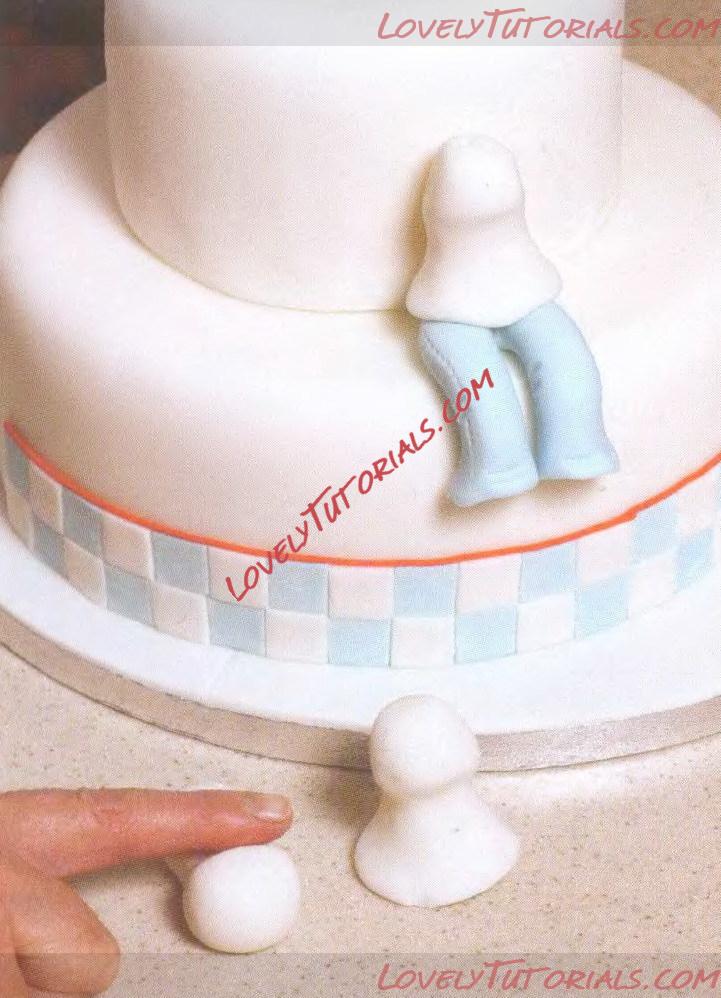
5 Roll a 30g whitecone; roll a finger around the middle to shape. Pinch out the fat end; attach over the trousers and also to the cake behind. You might need to adjust the trousers to make sure the jacket sits against the cake.
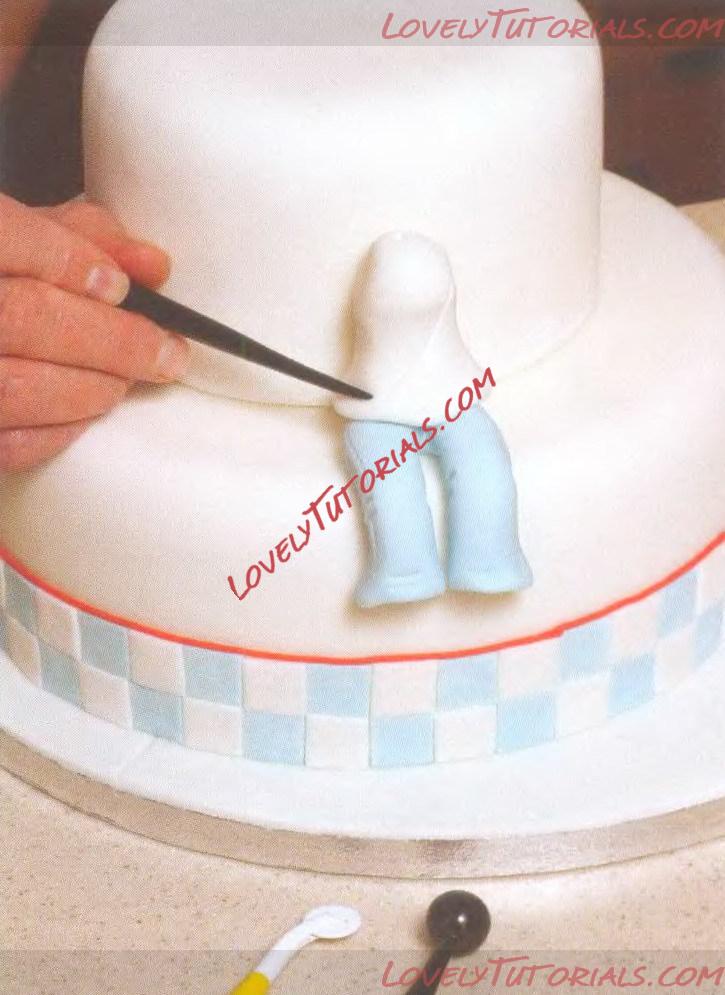
6 Use a cutting wheel to mark across the front of the body. Press gently down at the neck with a ball tool. Mark creases with a dresden tool. Push your fingers in either side of the neck to shape the shoulders where the arms will fit.
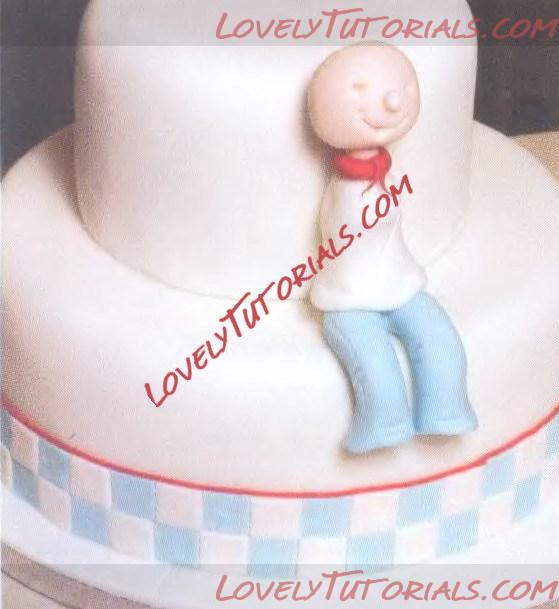
7Flatten a 5g red ball and stick to the neck. Press with a ball tool. Roll a tiny tapered red sausage; fold in half, stick to the front of the neck. Sit a small flesh ball into the neck and insert a support into the body.
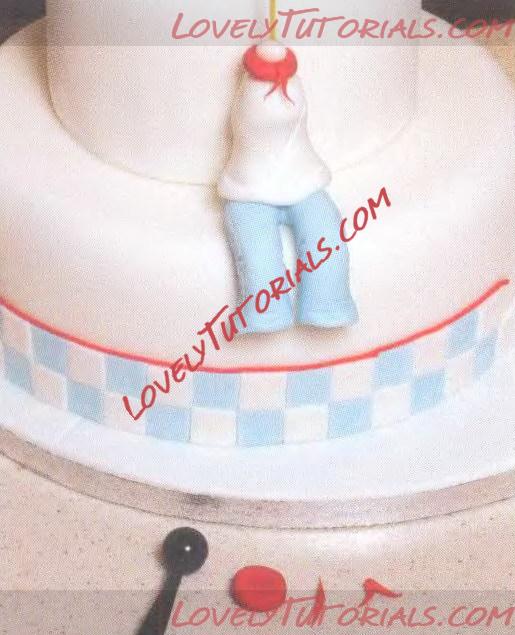
8Roll a 25g flesh ball and sit it onto the neck support. Mark a smile with a piping nozzle and mark each end with a celpin. Open out the mouth and eyes with a celpin and add the nose.
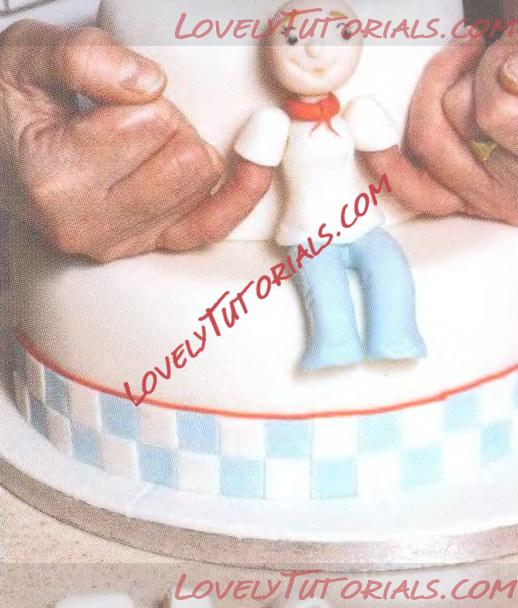
9Stick small white balls into the eyes, stick a tiny black ball on top for the pupils. Outline with black liquid colour and a fine paintbrush. Highlight with pearl white and alcohol. Add 2 tiny teardrops of teddy bear brown paste above the eyes.
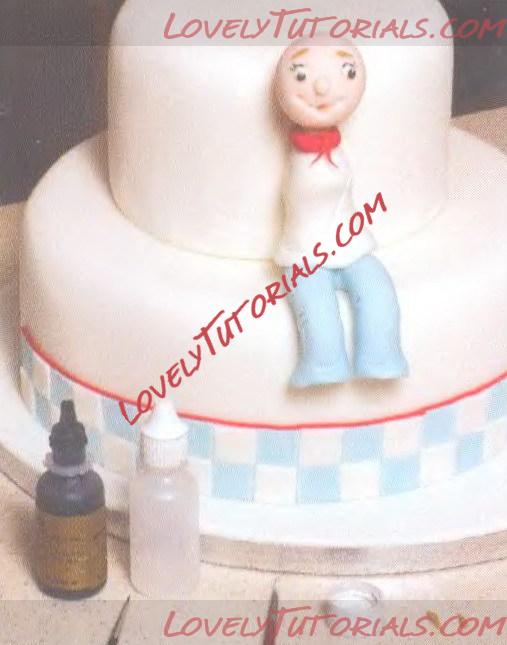
10Roll a 5g white oval and cut it in half. Open out the cut end with a celpin. Brush the shoulders with water. Sit the sleeves on to your little fingers and press onto the shoulders at the same time.
A checked ribbon around the cake bases will save you time.
If you don't have clay gun roll thin sausages of paste on a work board with a smoother.
Check the length of the pan handle before you push it into the body. If it is a bit loose brush a little softened regalice onto the handle and neaten any excess paste.
You can use brown dust to add colour to the pancakes instead of the tea light.
Make the small hearts on the cake in the same way as the larger ones on top.
Brush pink dust onto the woman's cheeks.
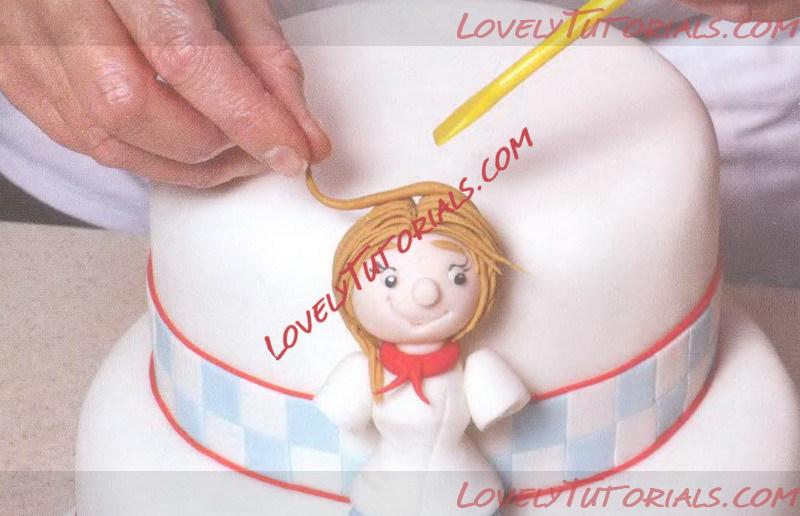
11 Roll thin strands of teddy bear brown paste. Brush the head lightly with water and lay strands over the head, press down the centre with a stitch tool.
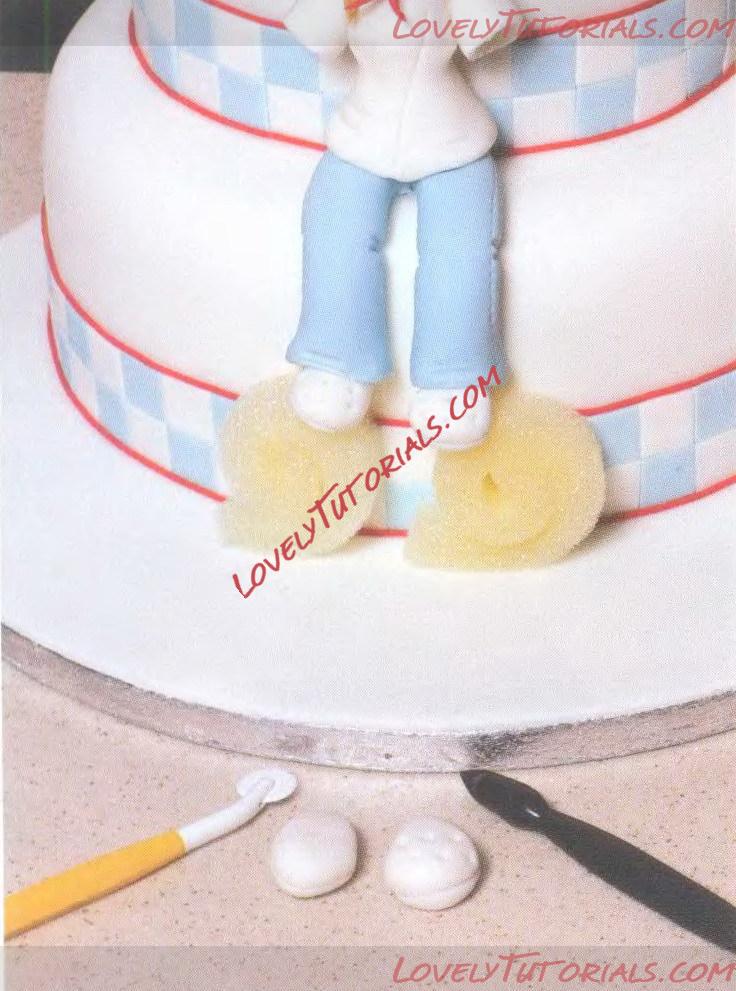
12Roll two x 5g white cones. Flatten slightly, mark around the base with a cutting wheel to mark the soles. Mark the top of the shoe with a 5-pointed star tool. Stick to the bottom of the trousers. Support the shoes with foam until dry.
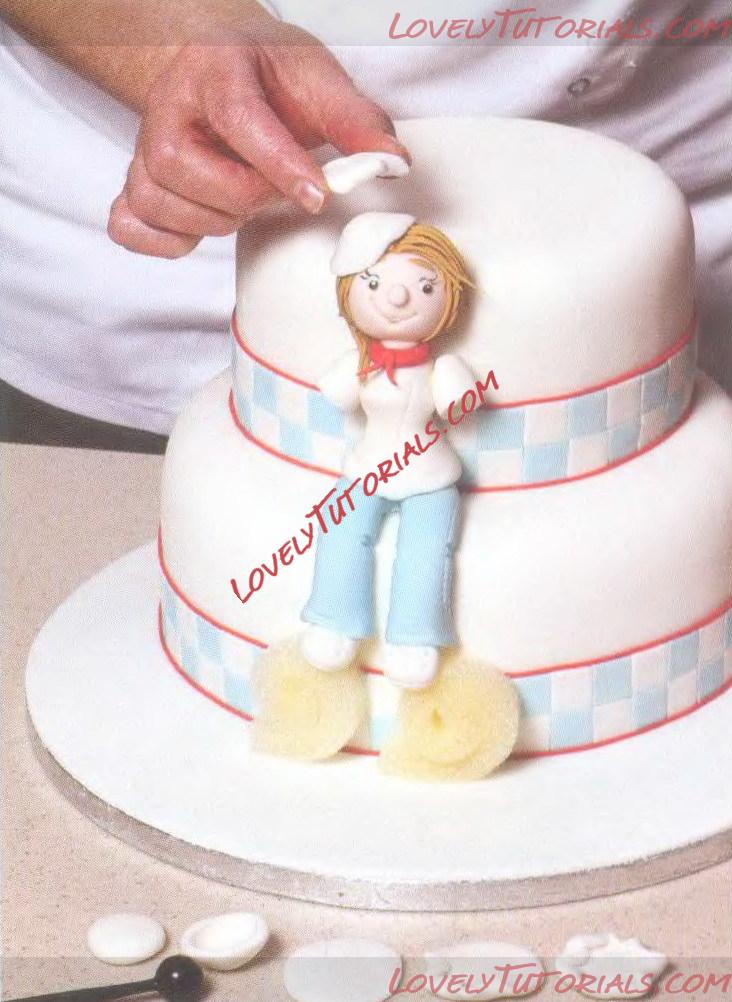
13 Flatten a 3g white ball and press with a ball tool. Stick onto the head. Flatten a 6g white ball into a 4cm disc. Fold the edges over and stick to the top of the hat.
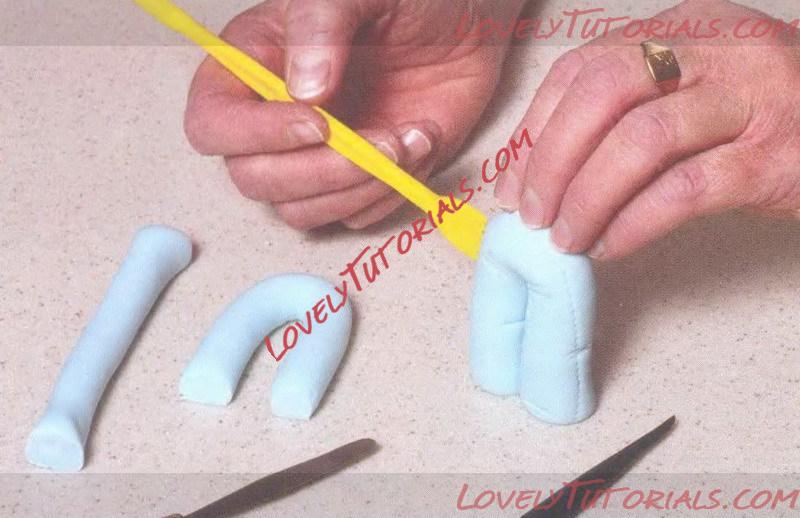
14 Roll a 50g blue modelling paste sausage as in step 4. Fold in half, do not push a ball tool into the ends, and leave flat.
Mark seams and creases.
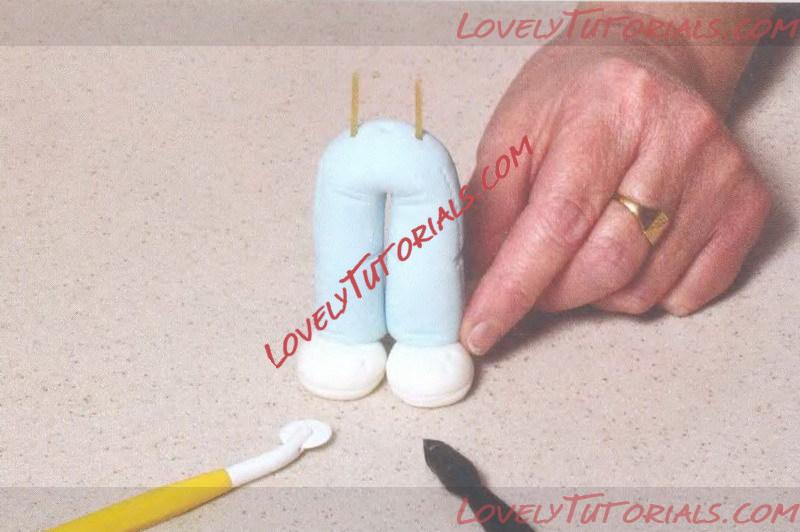
15 Roll two x 8g cones of white modelling paste and flatten these slightly. Brush with water and stick to the trousers. Push a support through each leg and into the shoes. Mark as in step 12. Support and leave overnight.
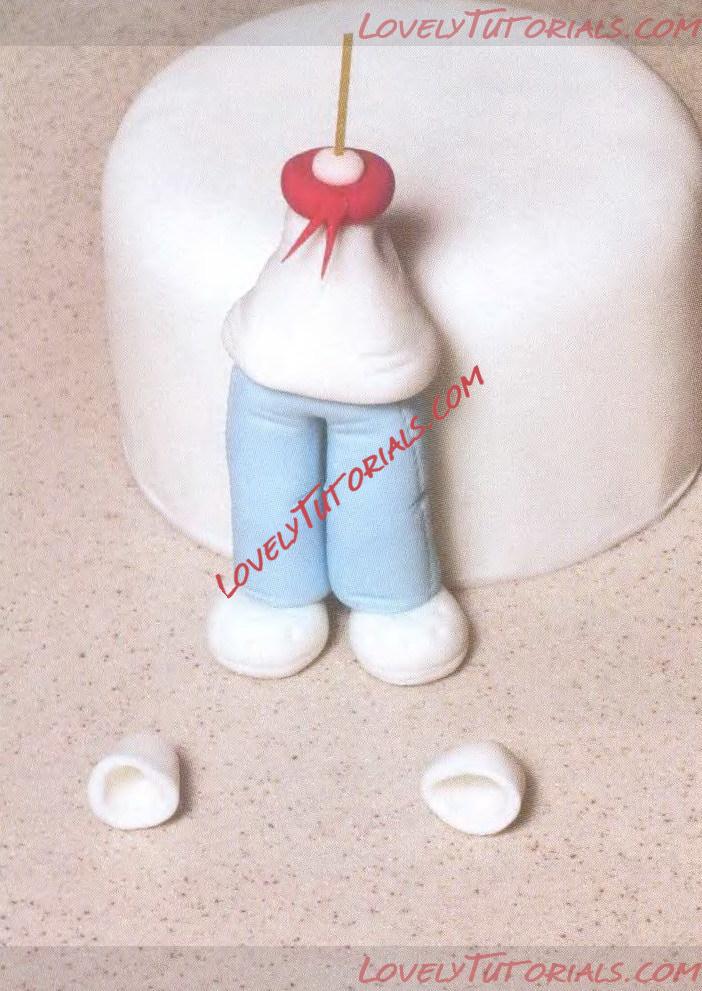
16 Make jacket as for steps 5 and 6 but do not shape around the middle. Add a red neckerchief and small flesh ball for the neck. Push a support through the body as far as the trousers. Make the sleeves as in step 10. Support the model with a cake dummy behind it.
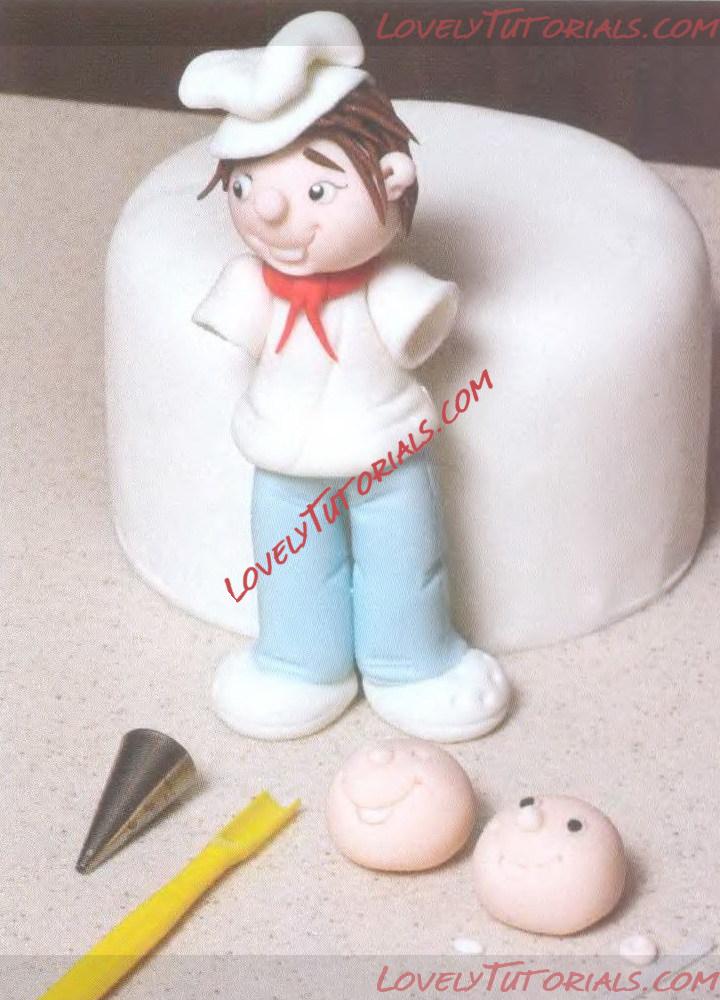
17 Make the head in the same way as the woman's but mark underneath the smile with a smile tool. Stick a small strip of white into the mouth for the teeth. Stick on dark brown hair. Add a hat as in step 13. Press a celpin into a small flesh ball and stick to the side of the head for the ears.
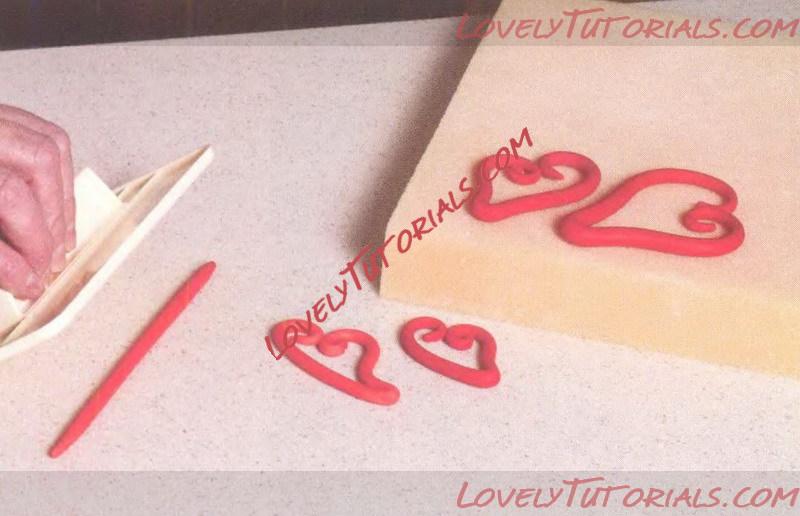
18 Roll one of each 10g, 7g and 5g tapered red flower paste sausages, use a smoother on the work board to get a good finish. Curl around the ends and bring together to form a heart shape. Brush where each curl meets together, with water. Leave to dry separately on foam.
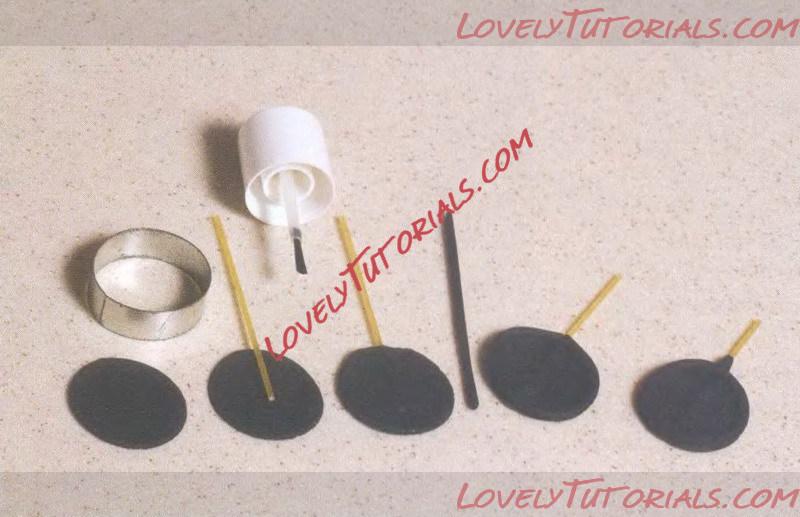
19 Cut two black flower paste circles. Brush one with water and lay spaghetti onto it then the other circle on top. Stick a thin black sausage around the edge and trim to fit. Push a small black sausage along the spaghetti for the handle.
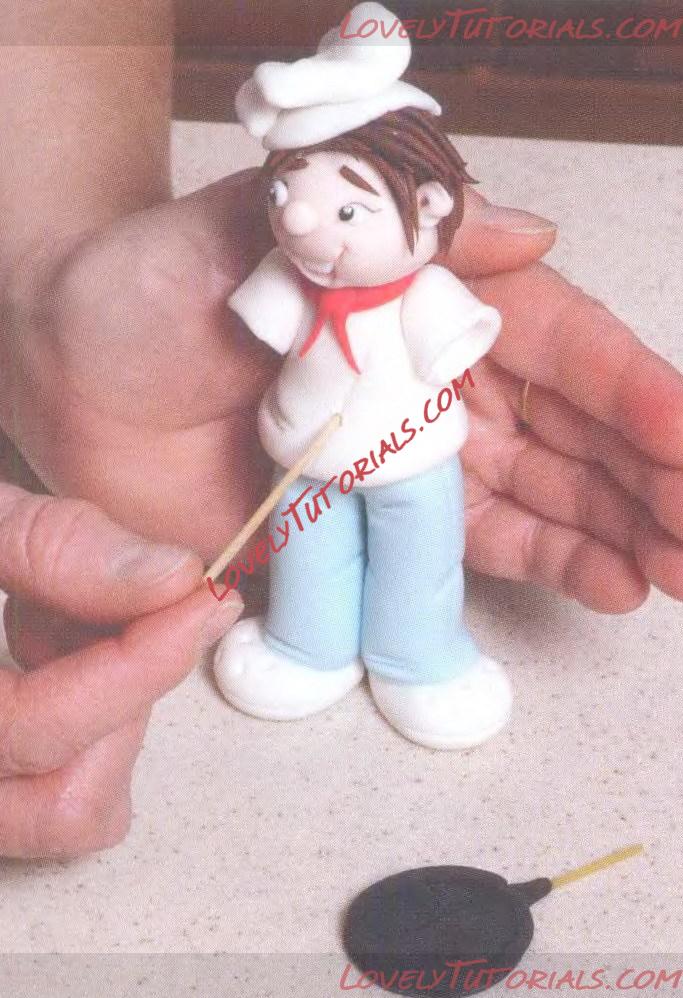
20 Use a pointed cocktail stick to make a hole in the male model. Support him from behind and push the stick in gently, twisting it as you go. Make sure you don't push through the body. Insert the frying pan.
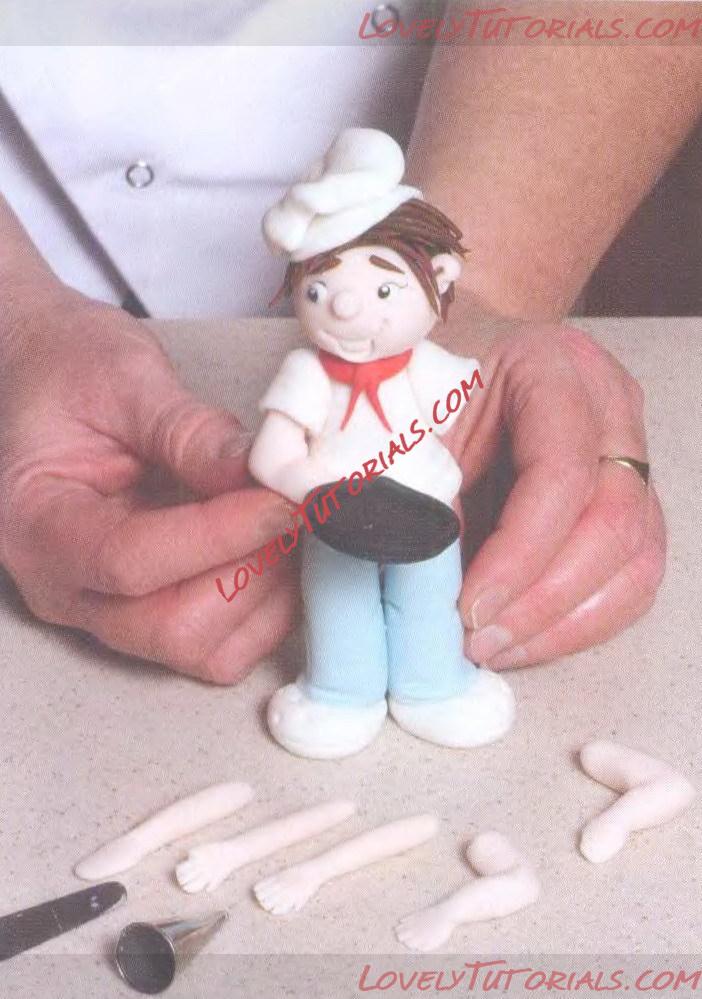
21 Roll two x 5g flesh sausages, taper one end and flatten the hand. Cut as shown, bend at the elbows and stick into the woman's sleeves. Repeat for the man but do not cut the hands, just shape them. Stick into the sleeves and stick the hands to the body beneath the panhandle.
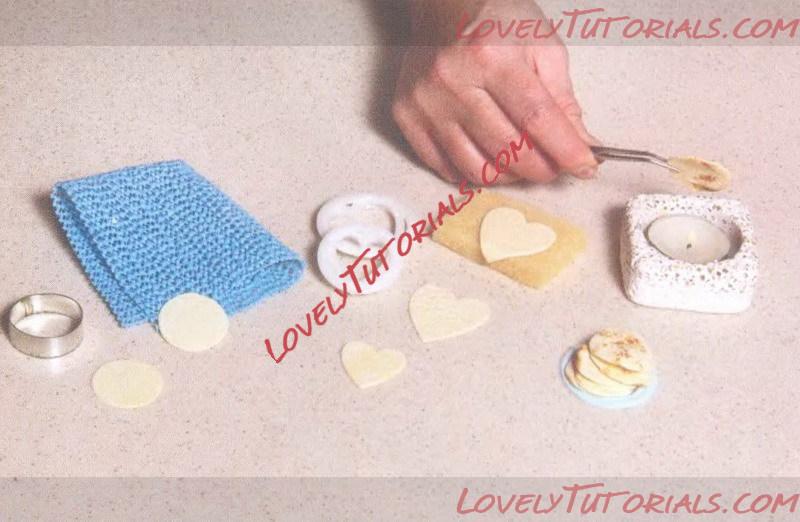
22 Cut several circles of autumn leaf flower paste, emboss with a non-slip mat. Cut one large and one smaller heart. Bend the point of the larger one. Leave to dry. Hold them briefly over a lit tea light with tweezers to caramelise. Stick the round ones in a pile on a pale blue plate.
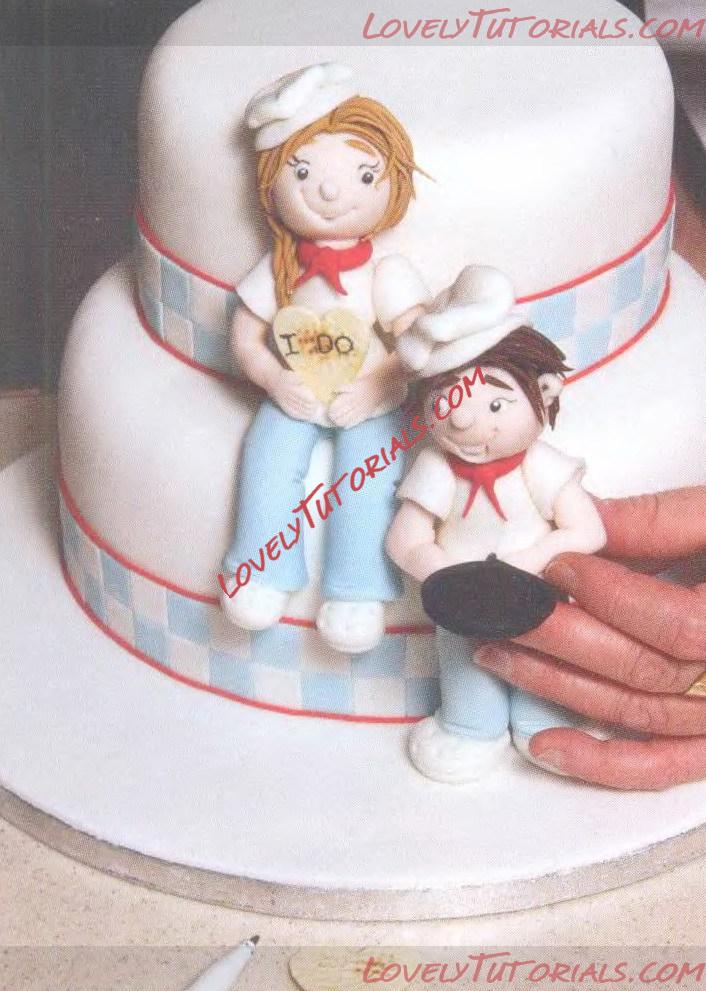
23 Write 'MARRY ME" on the large heart, and ' I DO 'on the small one. Stick the small one behind the woman's hands. Stick the man to the board at the side of the woman. Stick the large heart into the frying pan with softened regalice.
Cake top decoration
Lay the large hearts flat and stick together as one, this is easier if you find you have trouble balancing them separately. You will need to make sure they have points, which touch when you are making them so they can be stuck together when dry. Also ensure the bottom which will touch the cake is fairly flat to give the softened regalice a good base. A couple of small sausages of white paste stuck behind the hearts at the base won't be seen if you place them where the cake and heart meet. Support them with foam until dry and also for transporting the cake. Or you can put them together on a small iced board and add when the cake is in situ.
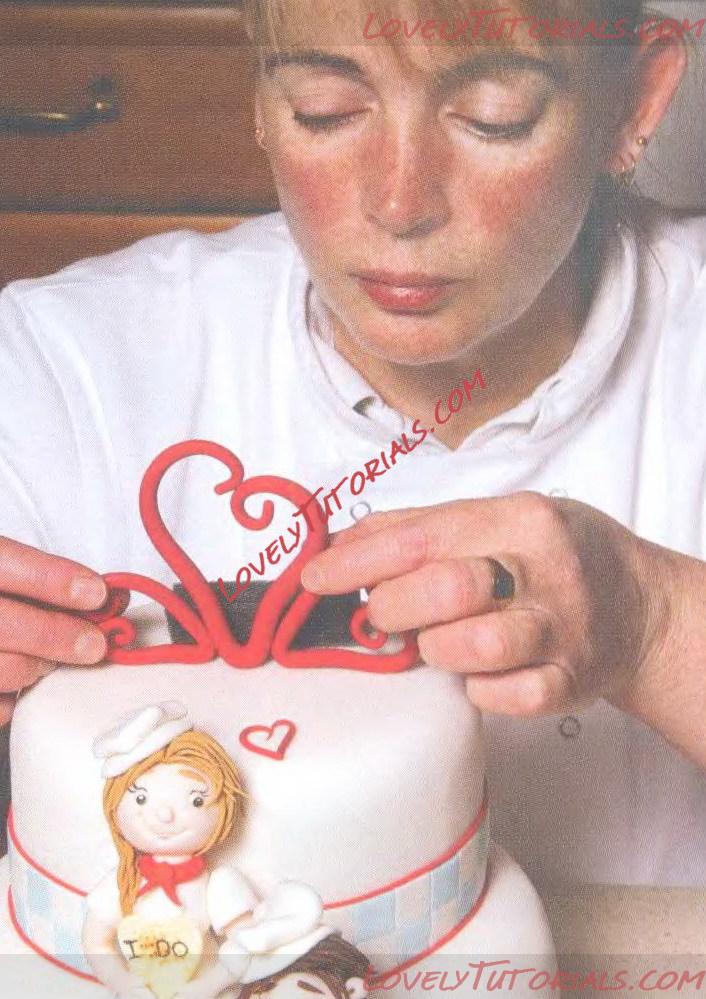
24 Stick the
hearts on the top of the cake with softened regalice. Use foam to support them until dry. Stick on small hearts made in the same way as the larger ones. Stick on the plate of pancakes. Finish the board with a red ribbon.

