Cake Decorating Tutorials  (How To's) Tortas Paso a Paso

Вернуться   Cake Decorating Tutorials (How To's) Tortas Paso a Paso > Cake Decorating Tutorials > Multi-tiered Wedding Cakes


Ваш профиль:
Your Avatar
Забыли пароль?
Регистрация


Ответ

МК Свадьбный торт в стиле винтаж - Vintage blue Wedding Cake step by step

 
LinkBack Опции темы Поиск в этой теме
  #1  
Старый 30.05.2012, 11:37
Администратор
 
Регистрация: 07.09.2010
Сообщений: 7,940
По умолчанию МК Свадьбный торт в стиле винтаж - Vintage blue Wedding Cake step by step

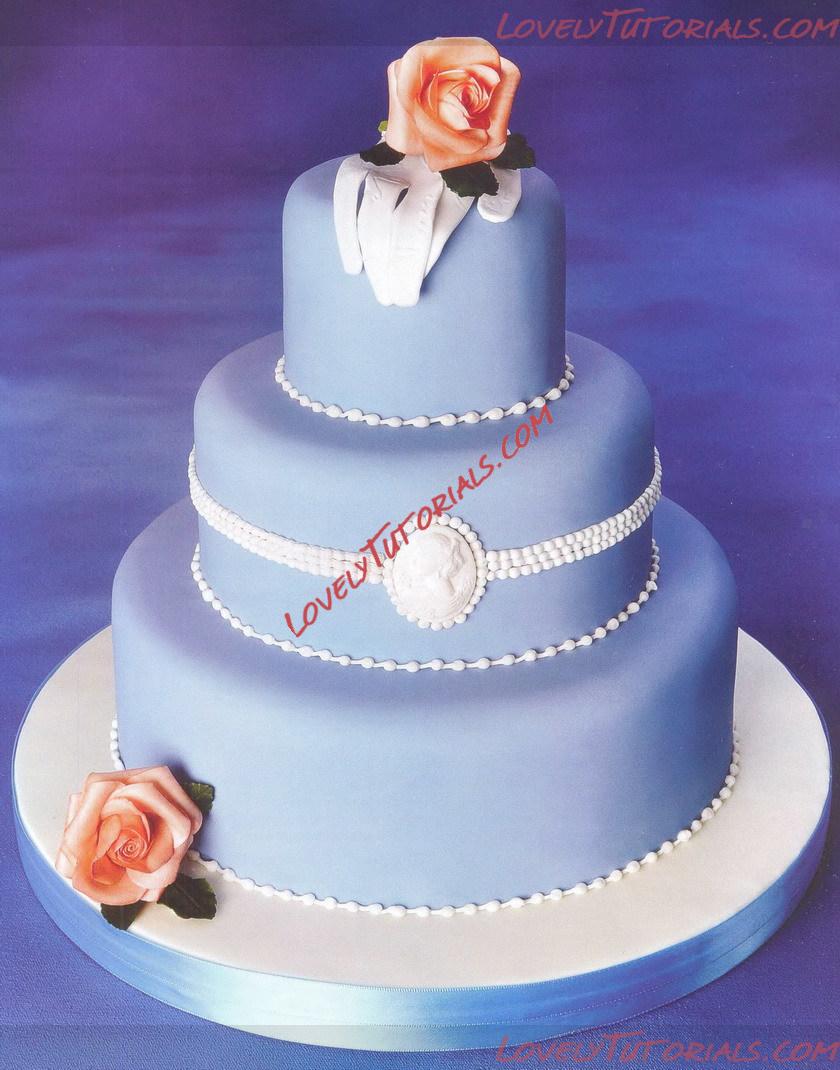
Огромная благодарность Kathryn Kelly за Мастер-класс
Название: 1.jpg
Просмотров: 4

Размер: 207.2 Кб

You will need
cake drum 2 round 35cm (14in)
marzipanned fruit cakes round on cake card
10, 17.5, 25cm (4, 7, 10in)
cake dowels 8
sugarpaste cream 3kg (6lb)
flower paste cream 100g (4oz), white100g (4oz)
dark green 25g (1oz)
royal icing cream
wires white 18, 26 gauge
paste colour wisteria (SK)
dusting colour damask rose (SK)
dusting colours ruscus, juniper (EdAble Art)
cameo mould (Aldaval)
bead maker (Hawthorne Hill)
rose petal cutters (TinkerTech)
large rose petal veiner (Great Impressions)
rose leaf cutters 276, 277, 278, 551 (TinkerTech)
rose leaf veiner (Great Impressions)
calyx cutter (FMM)
sugar glue
glue brush
palette knife
ball tool
foam pad
craft knife
baking paper
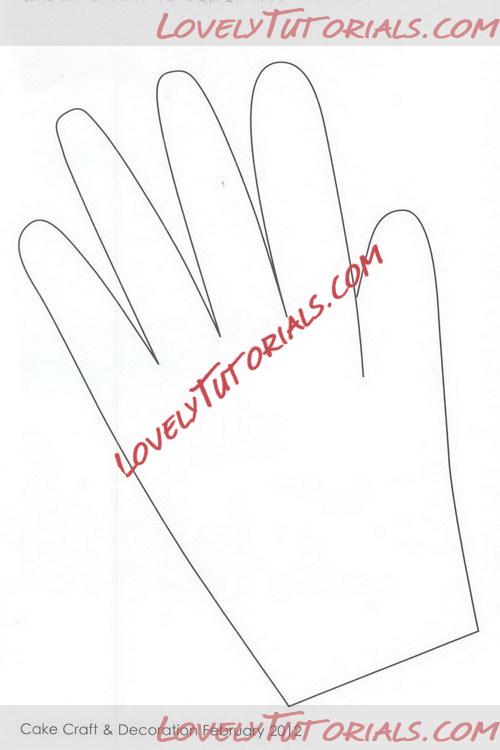
glove template
dowel cutter
dusting brushes
polystyrene dummy 10cm (4in)
rolling pin
spacers
embossing folder-stylized flowers (Cuttlebug)
piping nozzle No. 2
piping bag
green tape
small pieces of foam
blue ribbon 3m (3yds) 15mm wide


Название: 01_resize.jpg
Просмотров: 2

Размер: 92.8 Кб
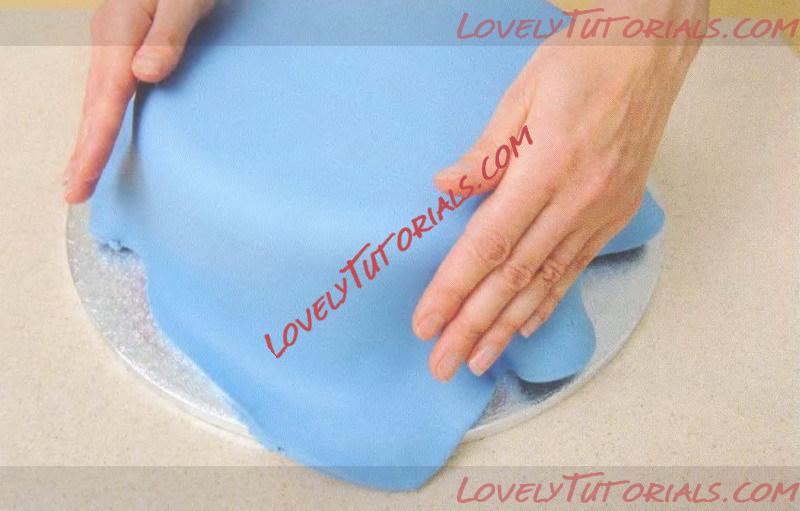
1 Colour 2.5kg of cream sugarpaste with wisteria paste colour, roll it out to a thickness of 8mm and cover the three marzipanned cakes. Roll out the remaining cream paste to a thickness of 4mm and cover the cake drum. Glue the other cake drum to the underside.
Название: 02_resize.jpg
Просмотров: 3

Размер: 76.8 Кб
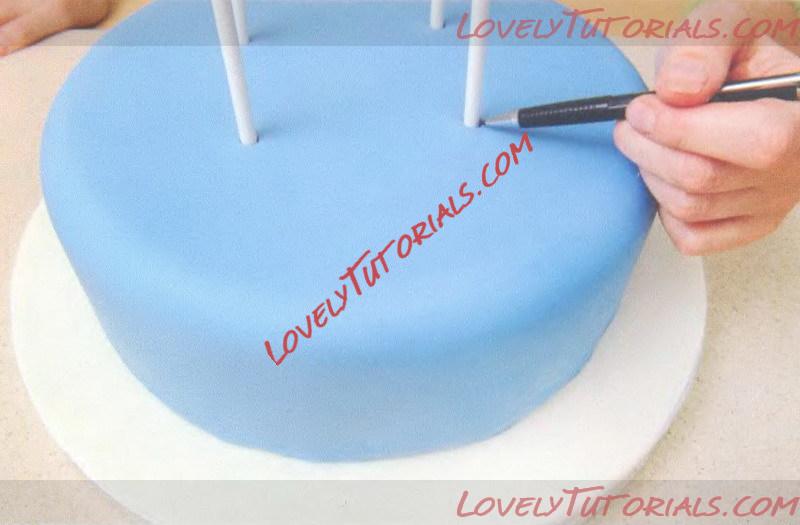
2Place the bottom tier on the iced board. Insert 4 dowels. Mark the height of each dowel, remove and cut them all to the greatest length. Wipe them with alcohol and push into the cake. Repeat with the middle tier. Stack the cakes and secure with a little royal icing.
Название: 03_resize.jpg
Просмотров: 3

Размер: 78.8 Кб
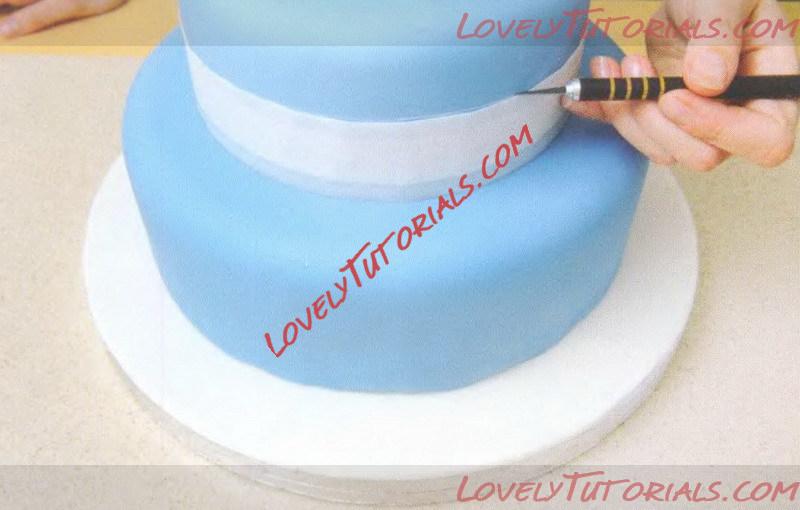
3 Cut a piece of paper 5cm (2in) high and long enough to go around the middle tier. Attach it to the cake with a piece of tape and use a craft knife or scribing tool to scribe around the whole cake. Remove the paper.


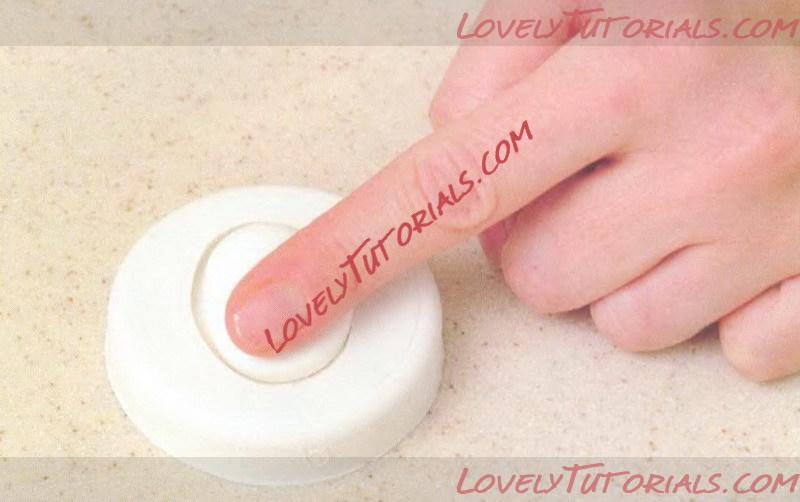
If the paste sticks to the mould, gently twist the longer sides in opposite directions until the paste is released.
Название: 04_resize.jpg
Просмотров: 1

Размер: 74.6 Кб
4Roll a ball of flower paste until it is smooth then press it firmly into the cameo mould, ensure all the detail is embossed. Leave to dry overnight in the mould, then invert to remove the paste.
Название: 05_resize.jpg
Просмотров: 1

Размер: 71.2 Кб
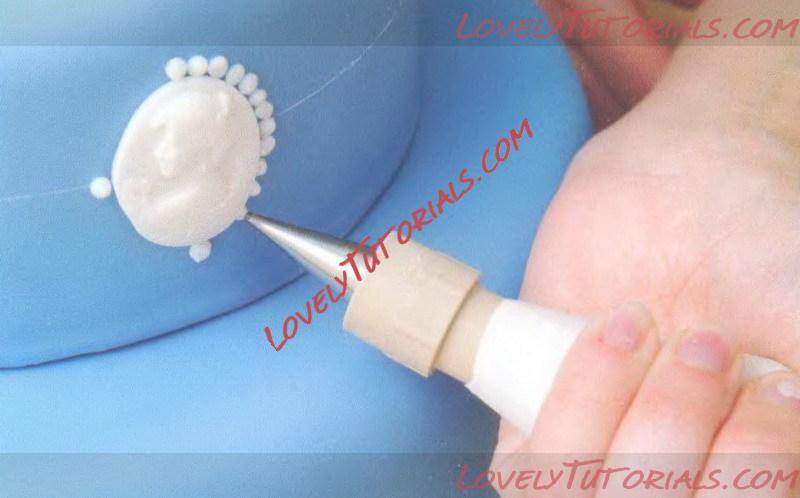
5 Use a small amount of royal icing to attach the dried cameo to the centre front of the middle tier, in line with the scribed line. With a No. 2 nozzle, pipe a series of 5mm (1/4in) dots around the edge of the cameo.
Название: 06_resize.jpg
Просмотров: 0

Размер: 96.6 Кб
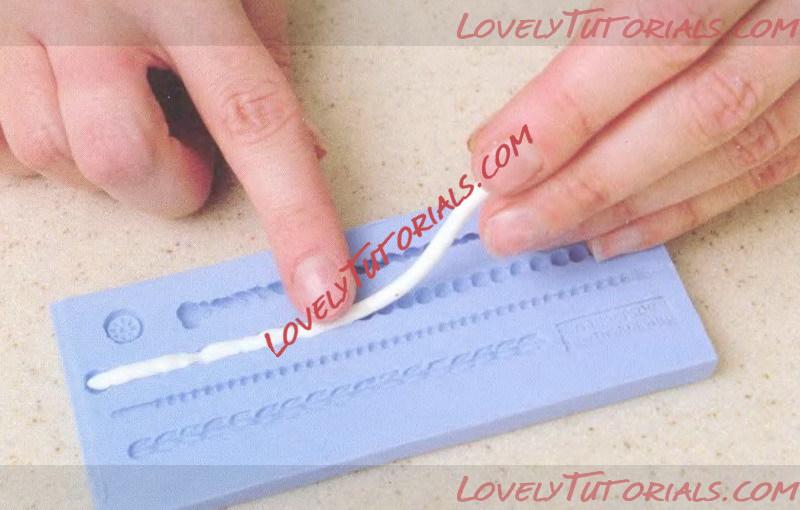
6 Roll a thin sausage of flower paste, approximately the same thickness as your bead mould. Start at one end and gently feed the sausage of paste into the mould, stretching and compressing to fill it completely whilst keeping the back flat.
Название: 07_resize.jpg
Просмотров: 1

Размер: 92.7 Кб
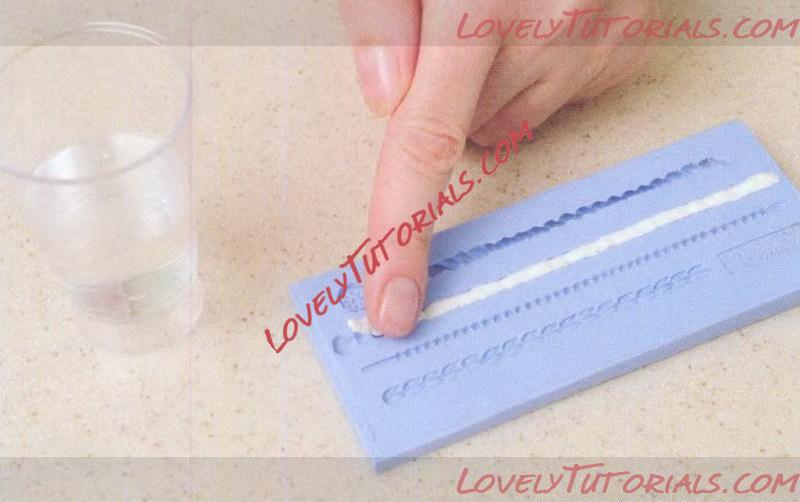
7With a damp finger, rapidly dab one end of the string of beads. As the paste becomes tacky, it will adhere to your fingertip, allowing you to remove the bead strip easily.

To equally space your dots, pipe the top and bottom, then 3 O'clock and 9 O'clock, using the scribed line as a reference.
Название: 08_resize.jpg
Просмотров: 0

Размер: 78.5 Кб
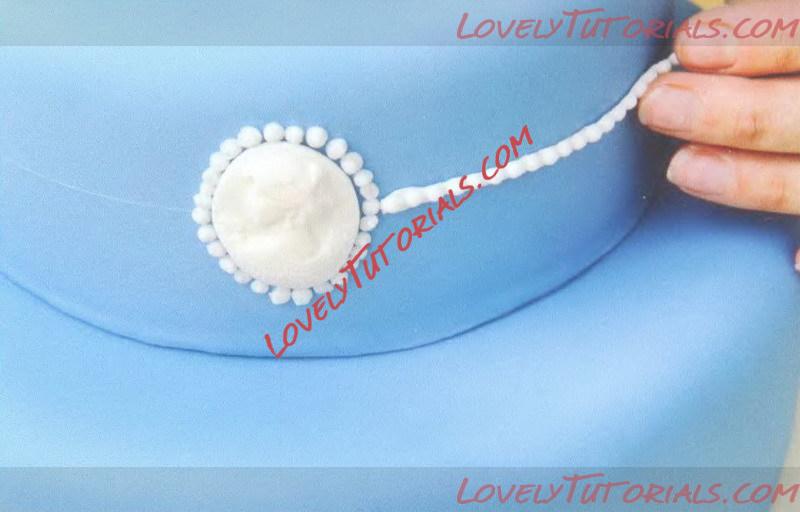
8Paint the scribed line with sugar glue. Place this first strip of beads on the scribed line next to the cameo. Repeat until the scribed line is fully covered.
Название: 09_resize.jpg
Просмотров: 1

Размер: 87.1 Кб
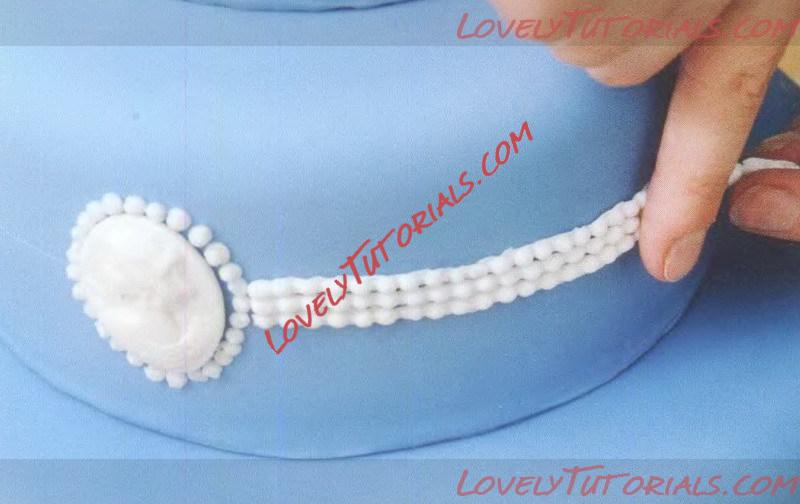
9 Repeat steps 7 and 8 and add a line of beads above and below. Use a No. 2 nozzle to pipe a snail trail around the base of each cake.
Название: 10_resize.jpg
Просмотров: 2

Размер: 89.9 Кб
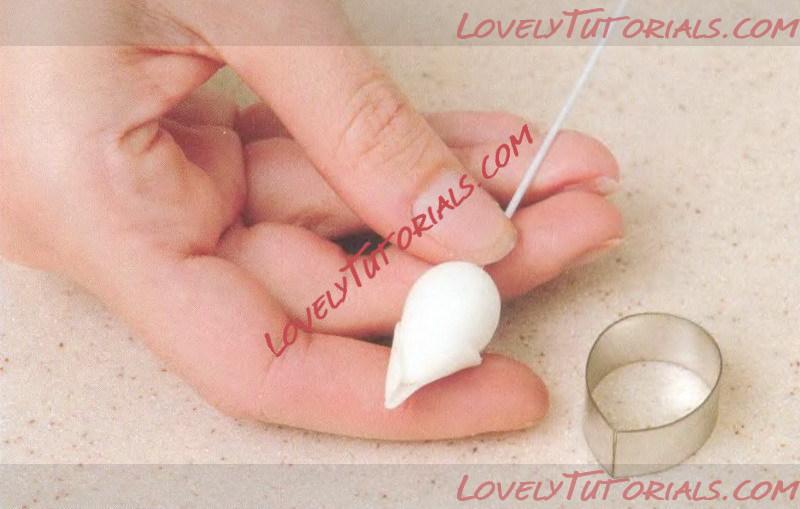
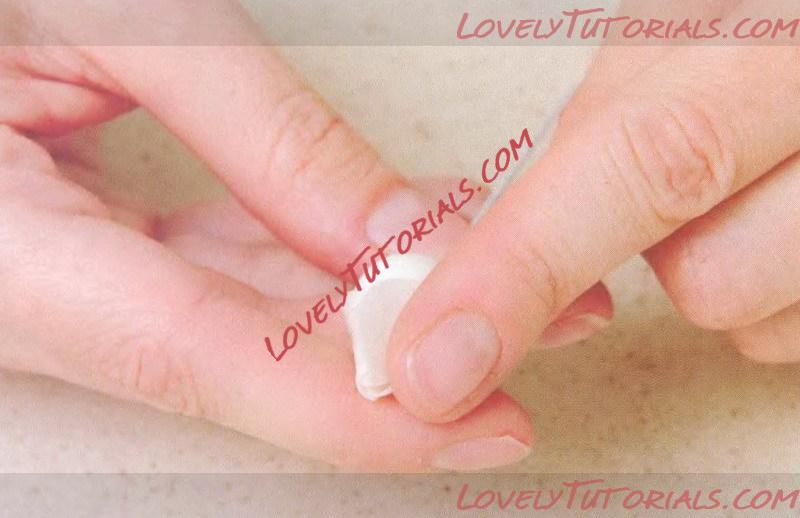
10 Insert a hooked 18g wire into a cone of flower paste and leave to dry. With the smallest cutter, cut 10 rose petals from white flower paste. Soften the edges with a ball tool and apply sugar glue down the right hand side. Take the first petal and wrap it around the cone, pull the right hand side tight.
Название: 11_resize.jpg
Просмотров: 1

Размер: 91.6 Кб
11 Place the second petal inside the open edge of the first and close the first tightly. Work anti-clockwise, place the third petal
over the edge of the first, and the fourth over the edge of the third.
Wrap petals two and three tightly around the cone.
Название: 12_resize.jpg
Просмотров: 3

Размер: 73.9 Кб
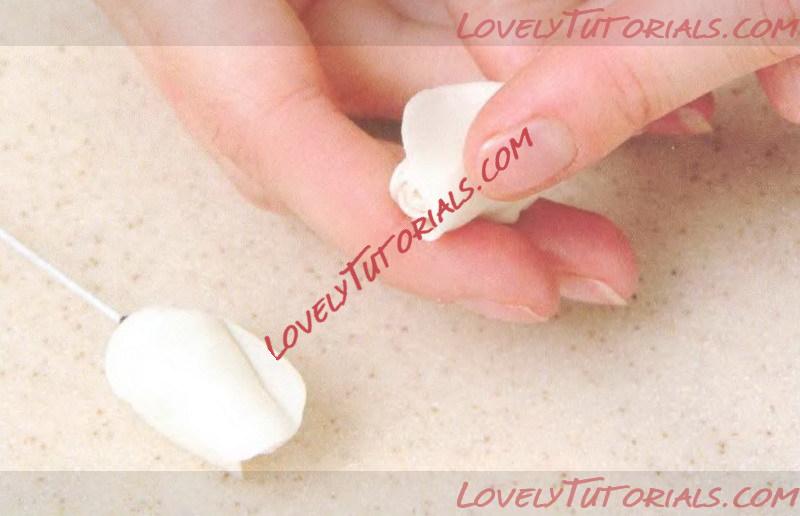
12 Repeat with petals five to seven and eight to ten, leaving petal ten open.
Название: 13_resize.jpg
Просмотров: 2

Размер: 88.0 Кб
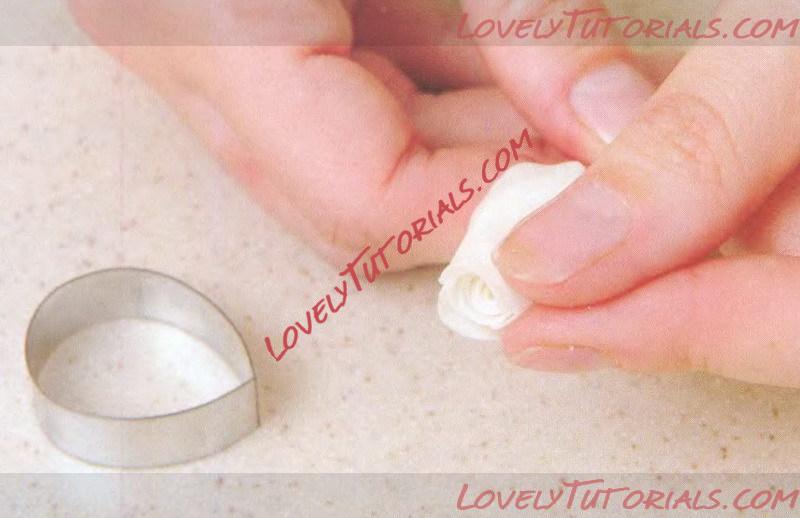
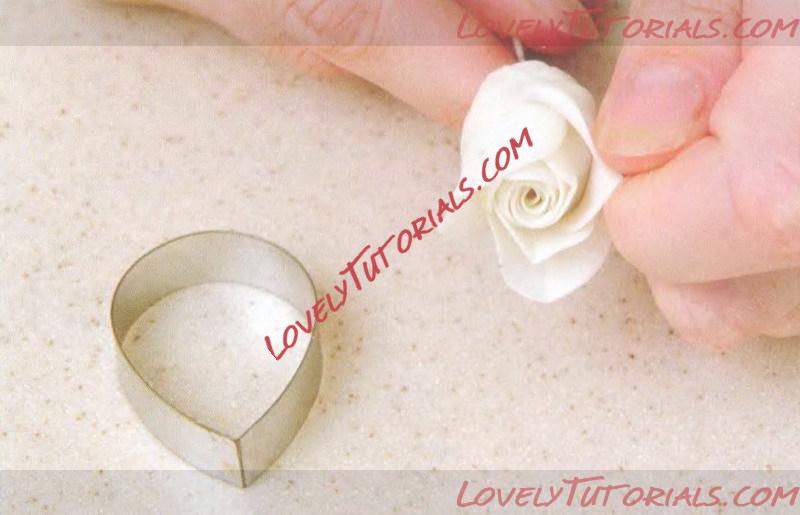
13 With the next size cutter, cut three petals. Soften the edges and ball the base of each petal. Arrange the three petals like
the previous layers but this time pinch the top edge of each petal and leave very slightly open.
Название: 14_resize.jpg
Просмотров: 2

Размер: 80.8 Кб
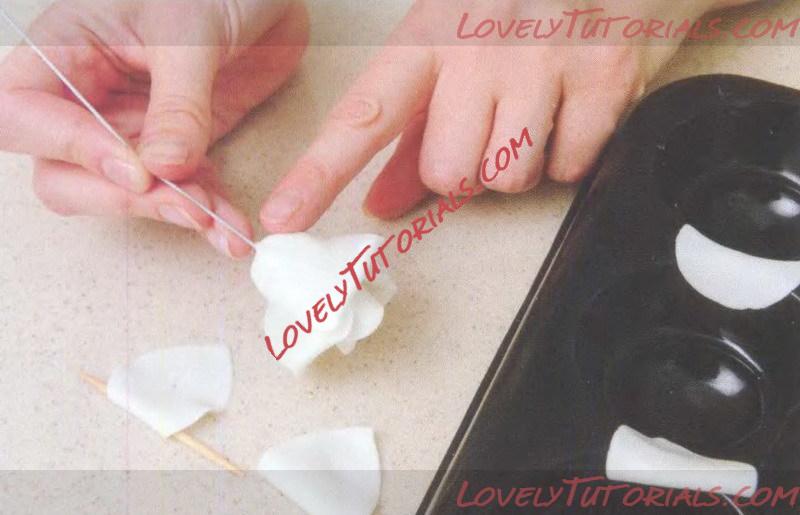
14 Cut three petals with the next size cutter, soften the edges and vein firmly with the rose petal veiner, pinch again and roll back the open edge with a cocktail stick.
Название: 15_resize.jpg
Просмотров: 3

Размер: 86.3 Кб
15 Cut out 8-10 petals with the largest size cutter, soften and shape as in step 14. Leave to firm up over an apple tray. Ball the base of each petal and apply sugar glue. Hold the rose upside down and stick on four petals, top, bottom, left and right.
Название: 16_resize.jpg
Просмотров: 1

Размер: 80.0 Кб
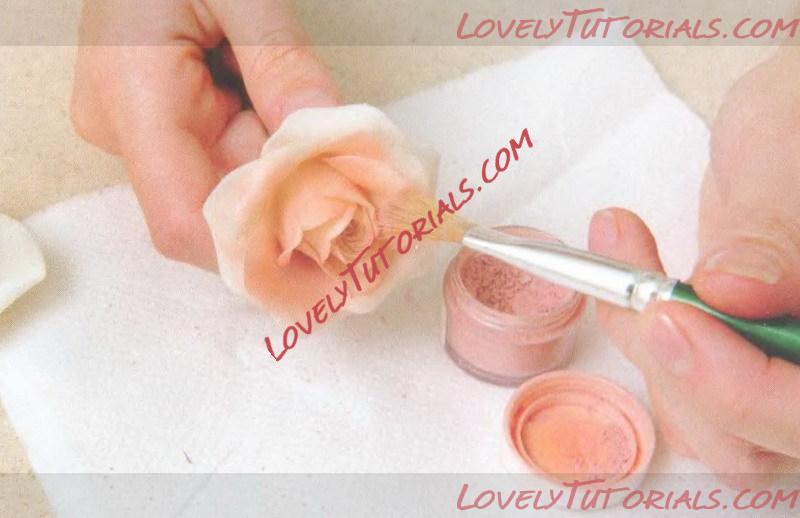
16 Turn the rose upright to check the position and adjust as needed. Turn upside down again and add more petals as needed, turn upright to check and adjust. Leave to firm up by hanging upside down, then dry thoroughly upright. Once dry, dust the roses with damask rose dusting powder.
Название: 17_resize.jpg
Просмотров: 0

Размер: 91.3 Кб
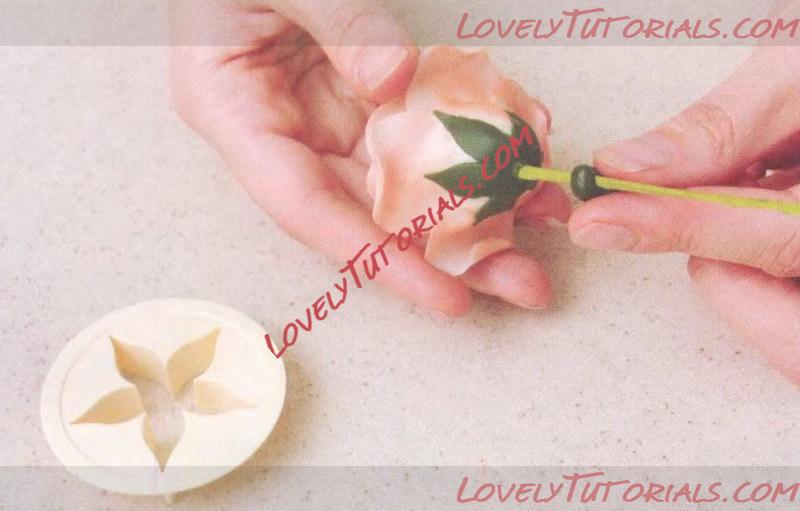
17 Strengthen the rose stems by taping in an additional 18g wire. Add a calyx and hip to each rose and once dry, dust with a mixture of ruscus and juniper dusts.
Название: 18_resize.jpg
Просмотров: 3

Размер: 86.2 Кб
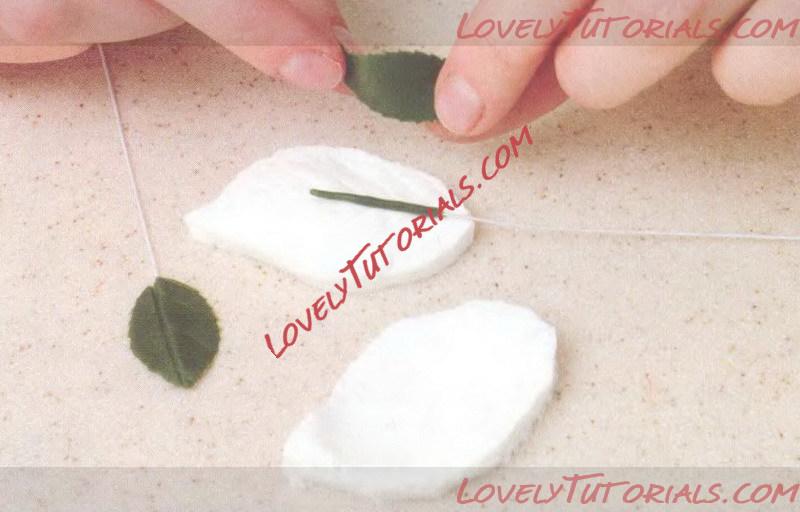
18 Cut and vein 6 rose leaves from dark green flower paste and insert 26g wires. Once dry, dust these also with a mixture of ruscus and juniper dusts.
Название: 19_resize.jpg
Просмотров: 0

Размер: 101.2 Кб
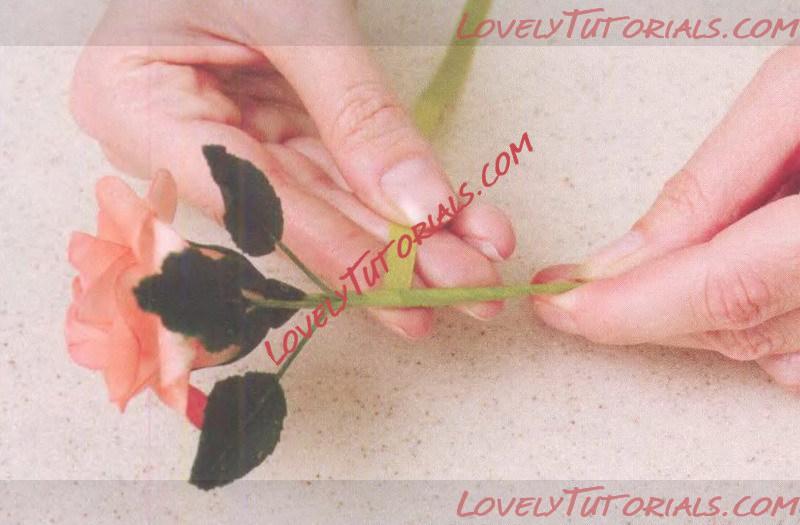
19 Tape the stems of the leaves and then tape the leaves together in groups of three. Tape the leaves to the rose.
Steam the two completed flowers and leave to dry.
Название: 20_resize.jpg
Просмотров: 2

Размер: 73.8 Кб
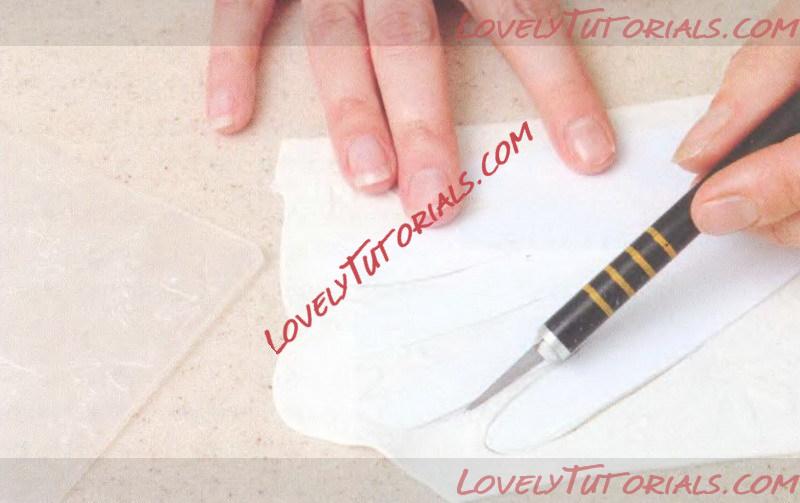
20 Roll out cream flower paste as thinly as possible. Emboss by placing it in the embossing folder and rolling over this firmly. Cut out the glove shape.
Название: 21_resize.jpg
Просмотров: 1

Размер: 73.9 Кб
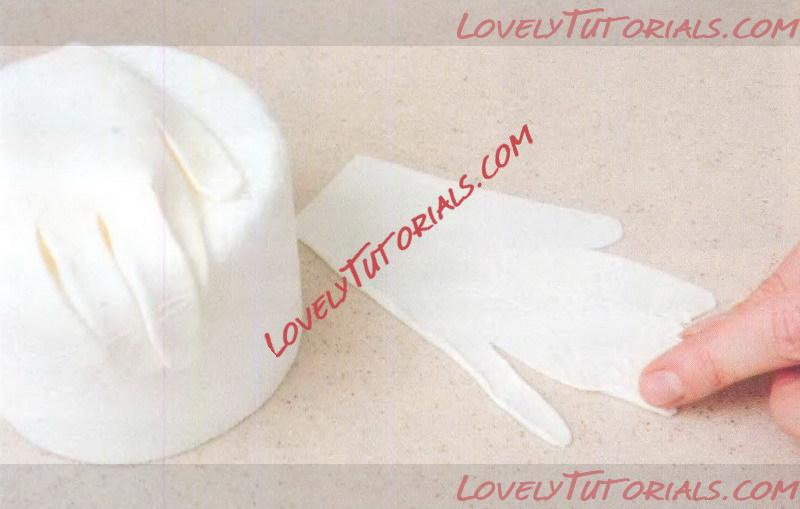
21 Turn the glove over and with a fingertip, roll over the very edge of the flower paste. Drape it over a 10cm (4in) dummy and support various parts with small pieces of foam to give the glove some movement. Leave to dry.
Название: 22.jpg
Просмотров: 2

Размер: 172.2 Кб
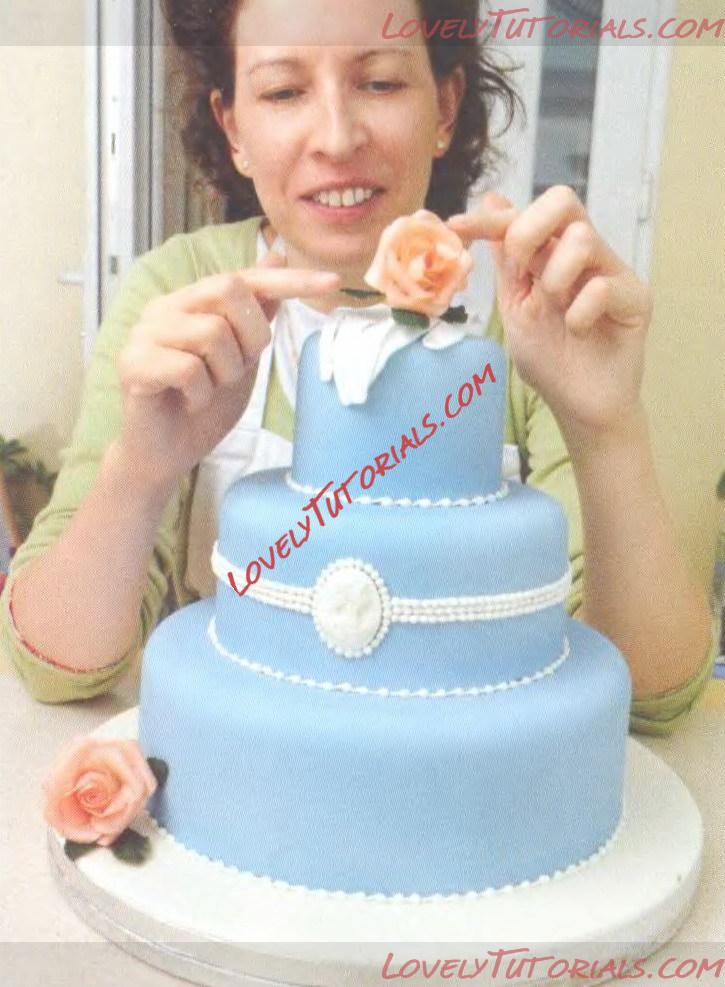
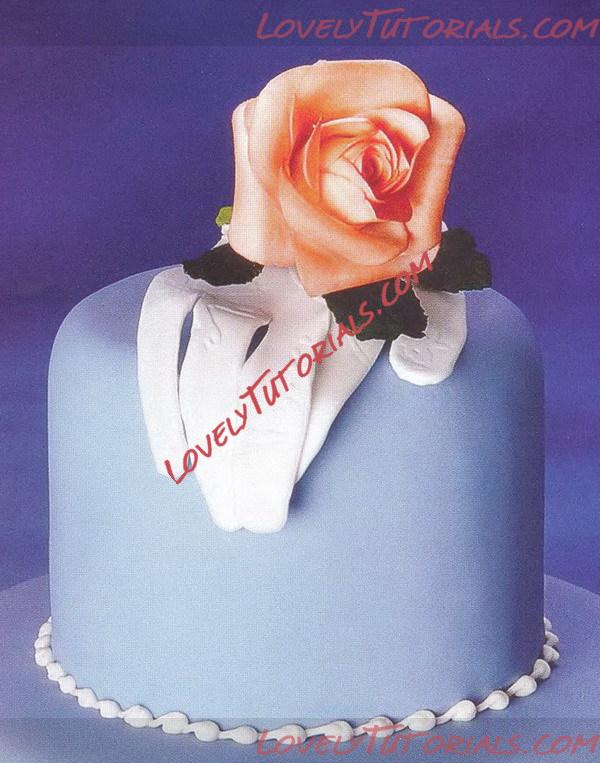
22 Place the dry glove over the top tier, support sections with small amounts of sugarpaste and secure in place with sugar glue. Trim the stems of the two roses. Place one at the left hand side of the base drum and the second on the top of the cake; secure each with a small amount of sugarpaste. Finish with a length of blue ribbon.
Название: 00.jpg
Просмотров: 15

Размер: 138.9 Кб

Название: 23.jpg
Просмотров: 3

Размер: 35.6 Кб

МК взят с журнала Cake Craft & Decoration February 2012
Ответить с цитированием
Ответ

Метки
3-d, 3-д, 3d, , artesanatos passo a passo, biscuit, bolo, bolo de noiva, bonecos de biscuit, braut und bräutigam, bride, bride and groom topper, bride figurine, brud og brudgom, brudeparet og glam, bruiloft beeldje op de taart, bryllup figur på kagen, bryllupskake, cake, cake decorating, cake decorating techniques, cerâmica plástica, como fazer passo a passo biscuit topo de bolo noivinhos, corpo noivos esculpido em isopor, curso de modelado, cвадебный торт, decoración de tortas, decorare le torte, decorazioni, deko fondant, dekorace na dort, dekoracija, dekoracije, dekorasyon, dort, eldiven, estatueta noivos em porcelana, estatuilla del pastel de bodas, figur bryllupskake, figur for bryllup kake, figuras, figure making tutorials, figuren, figures, figurice, figurice od fondana, figurine de gâteau de mariage, figurine de mariage sur le gâteau, figurines, figurinhas, figurky, figurky nevěsty a ženicha určené na svatební dort, figúrky, figür modelleme, fimo, fondan, fondant, fondant wedding couple how to, fondente, forskjellige bryllupskake-figurer, fotopostup, gant, glove, groom & bride wedding cake topper, groom and bride figurine, guante, guanto, gum pasta, gumpaste, gül, gâteau de mariage, handschoen, handschuh, handske, handsken, hanske, hochzeit figur auf dem kuchen, hochzeitstorte, hochzeitstorte figurine, hochzeitstorten figur, honey moon, how to, how to make dress for bride, how-to's, jak na, kage dekoration, kagedekoration, kake, kakebaking, kesztyű, krok za krokem, käsine, la modélisation, los novios, luna de miel, luva, marcipanové figurky, marido i mujer, mariée et le marié, marshmallow, matrimonio, mermaid, modelado, modelagem, modelare, modelerte figurer, modeling, modeling paste, modeliranje, modellazione, modelleme, modellering, modellieren, modellierpaste, modelləşdirmə, modelovanie, modelování, modelowanie, motivtorten, mănuşă, nevěsta a ženich, noiva sereia, noivinhos, noivinhos de biscuit, noivinhos topo de bolo, noivos de biscuit, noivos para topo de bolo de casamento, noivos personalizados, ozdoby, pap, pap noiva, par de noivos, paso a paso, passo a passo, passo-a-passo, pastel de bodas topper figurita, pirštinė, polymer clay, poročna torta, postupak za ukrasavanje, pravljenje figurica za torte, předměty z marcipánu, roos, rosa, rose, rožė, rukavica, rukavice, ruusu, ruža, rózsa, róża, rękawica, růže, schritt für schritt anleitung, schritt-für-schritt, sculpting, soggetti, souvenirs de bodas, sposa, sposi per torta nuziale, sposini, sposo, statuina, statuina per torta nuziale, steg, steg for steg, step by step, step-by-step, sugarcraft, sugarpaste, svadobný párik, svadobná torta, svatební dort, svatební figurka na dort, tecnicas de decoracion, tecniche, topo de bolo, topo do bolo, toppers, torta, torta de la boda, torta nuziale, torte, torten dekorieren, torti, toy keks, trandafir, trin for trin, trin-for-trin, trinn for trinn, tutorial, tutorial de fabricação de noivos em biscuit, tutorial modelado pareja de novios, tutorijal, vestido noiva, vintage blue wedding cake step by step, wedding cake, wedding cake figurines, wedding cake topper "bride and groom" tutorial, wedding dress, wedding figurine on the cake, wedding figurines topper tutorial, weddong cake, zuckerfigürchen, मॉडलिंग, モデル, ケーキの上の結婚式の置物, 婚禮蛋糕上的雕像, 建模, 케이크에서 결?식 작은 입상, γάντι, γαμήλια τούρτα, τριαντάφυλλο, как слепить жениха и невесту из мастики -how to make fondant groom, как сшить платье для невесты, вясельны торт, полимерная глина, пошагово, пальчатка, перчатка, мк, мк свадьбный торт в стиле винтаж, моделиране, майстер-класи, маршмеллоу, мастика, мастер-класс, медовый месяц, жених и невеста, жених и невеста из мастики, лепка, ліплення, роза, рукавичка, ружа, ръкавица, украшение тортов, свадебное платье, свадебная пара из мастики мк, свадебные фигурки на торт, свадебный костюм, свадебный торт, сватбена торта, сахарная мастика, троянда, фигурки, фигурка на торт, фигурка жениха и невесты, фимо, фрак, фігурки, фігуркі, холодный фарфор, шаг за шагом


©2022 Lovely Tutorials