МК взят с сайта http://sweeteatscakes.blogspot.com/
Огромная благодарность Автору sweeteatscakes за МК
Topsy-Turvy Stand Tutorial Part 2
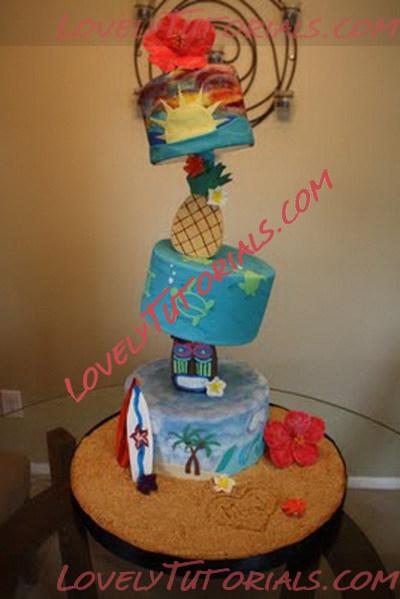
Ok, so since the first post I made with this stand was so popular I thought I would post more pictures of how the stand was made. I had some questions the first time, so hopefully this post will better show how to make the stand.
I start off with my pipe screwed in to my flange which is attached to my board. (Ok, so I don't have a pictue of the seperate parts so I used the old picture from my previous post). The flange is a little bulky so make sure you cover it with something so the cake will sit flat. (I covered it with left over fondant, and then placed sand on the board to make the cake sit level). You may need to cut out a portion of the bottom cake to fit over the flange.
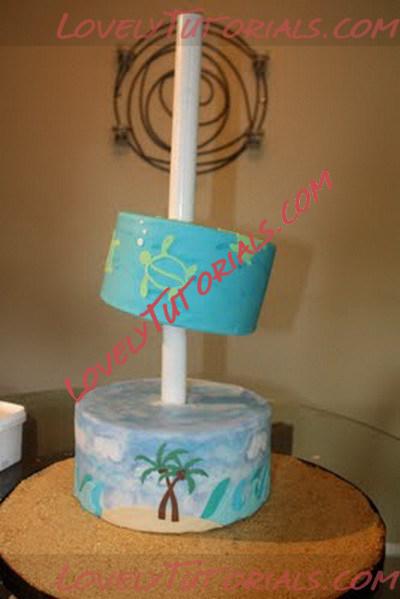
Then slide your first tier over the pipe and onto the board.
Next, slide the PVC over the pipe, and insert it into the bottom tier of the cake.
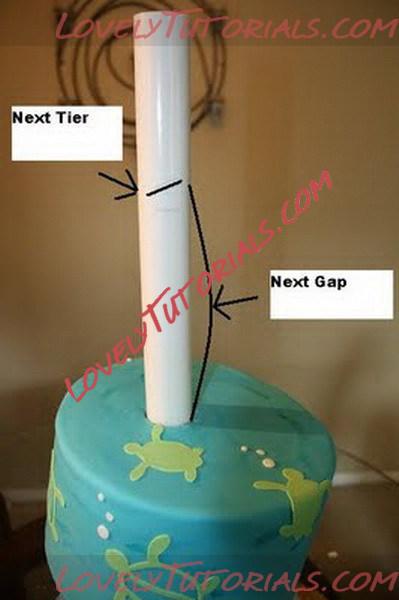
Ok, now you need to decide how much of a gap you want between the tiers of cake. I was making pretty large decorations to fit between the tiers so I made the gap pretty large. Then mark where you want the tier to fall and at what angle you want the next tier to sit at.
Then cut your PVC pipe to the angle you marked.
Then slide your next tier over the pipe to rest on the PVC. Remember under each tier I have acrylic plates with holes in the center. The holes are only large enough to fit the black pipe through. The PVC pipe is to large, and therefore the tier will rest on the PVC. You can also use wood plates with holes cut in them instead of acrylic. The tiers will not slide, or turn, or twist on the pole. The cake will stay in place! Trust me. Then slide your PVC into the cake and again mark how large you want the next gap.


Now at this point I had to run to Home Depot because my black pipe was not large enough to fit into the top tier. I usually like to have the black pipe inserted about halfway into the top tier in order to hold it into place. (I cover the pipe in electrical tape so it does not come in contact with the cake). I did not measure my pipe before starting this process, so I had to unstack everything and restack it on the new pipe. Since I was running low on time these are the last pictures I have.(Sorry)! I usually like to cover the PVC in matching fondant before decorating around it. I used a little piping gel to make the fondant stick to the PVC pipe.

I hope everyone had a wonderful labor day weekend. I cannot believe summer is already over. I am looking forward to my favorite time of year, and my favorite holiday coming up. I cannot wait to start decorating, and making treats for Halloween! yay! I hope that this tutotrial answered some questions for people. If not please feel free to ask and I will try to explain.

