МК взят с сайта http://sweeteatscakes.blogspot.com/
Огромная благодарность Автору sweeteatscakes за МК
Topsy-Turvy Stand Tutorial
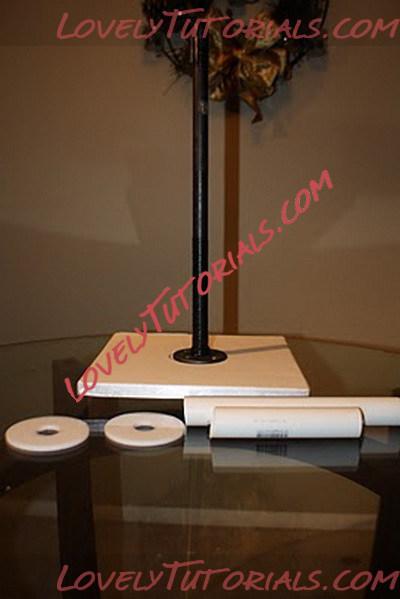
I have a lot of people ask me how I make my topsy-turvy cakes without them falling over. Well, I have decided to do a brief tutorial to show everyone exactly how it is done. The first photo shows what I use in order to make the stand. I have a center support pole which I measure to the size of the tiers. If I have three cakes 4" tall with a 2" space between each tier, I don't want a pole taller then about 14", because I don't want the support pole to show through the top of the cake. I then have acrylic rounds cut to the size of my tiers with a hole in the middle to fit the support pole through. (You can also use wood and wrap it with food-safe material). The hole should not be so large that the PVC can also fit through it, only the middle support pole.

The second photo shows how the stand looks set up without the cakes on it. Please keep in mind that I always have the PVC touching the cake, and not just the support pole. I also wrap the support pole in electrical tape and Saran wrap, to ensure that the pole does not come in contact with the cake. You can see a slight tilt to the acrylic rounds. You can cut the angles for the PVC to be as extreme as you wish, just be aware that a slight angle will have a pretty large impact on the angle.
The third photo shows the first cake on the stand with the PVC pipe through the cake. It also shows the angle I wish to cut the pipe at to achieve the desired tilt I want for the next cake.
The next photo shows the second tier dropped on the first tier. The weight of the tier rest on the PVC pipe and acrylic round, not on the tier below. You can see that some of the pipe shows, but you can easily cover that with fondant decorations. In order to get the cake on the pole at the angle I want, I use the pre-cut pipe as my guide, and use a plastic dowel to start the hole. Then, I widen the hole to fit the PVC through the cake without damaging the cake tier.
The last photo shows all of the cakes stacked up on top of each other, repeating the process until I have a finished cake. I would then go ahead and cover the gaps with decorations so that they could not be seen.

