|
|
МК торт "3Д коробка с кольцом" -Ring box cake tutorial
|

07.04.2012, 17:53
|
|
Администратор
|
|
Регистрация: 07.09.2010
Сообщений: 7,669
|
|
 МК торт "3Д коробка с кольцом" -Ring box cake tutorial
МК взят с сайта modern-baking.com
Огромная благодарность Автору за МК
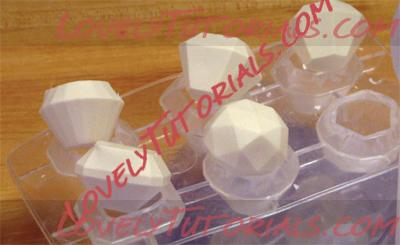
1. To create the diamond ring cake, make the ring and box lid a few days ahead of time. To begin, create the diamond by melting white chocolate and pouring it into a jewel-shaped mould. Freeze for five minutes.
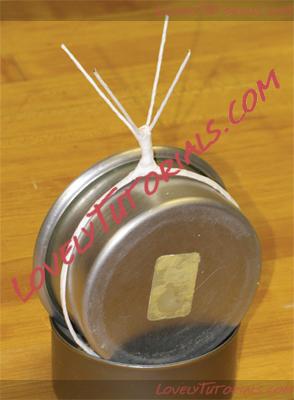
2. For the ring setting, use four lengths of 18-gauge floral wire. About 1-in. from the ends of the wire, twist all four strands together several times. Then, divide the wires by two and shape into a circle. Do not complete the circle; straighten the ends to anchor the ring in the cake. Wrap floral tape around the wire to cover any exposed metal. Use a 3-in. cake pan to form the wire into the perfect ring shape.
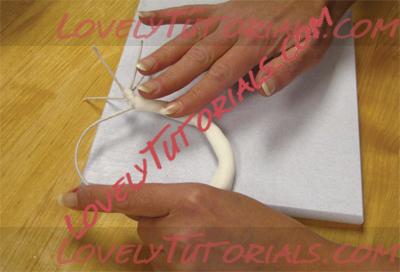
3. Roll two ropes of gumpaste, and use a small knife to slice halfway through the rope. Wrap a gumpaste rope around each side of the ring band.
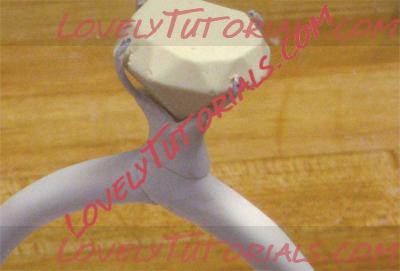
4. Use gumpaste to cover the base of the prongs. Then, place the chocolate diamond in the middle of the prongs and gently fold them to hold the diamond in place. Roll small ropes of gumpaste to cover the prongs. Set the ring aside to allow the gumpaste to harden.
5.To make the lid for the ring box, use a thick piece of cardboard as the foundation. The 4.5-in. square cake pan makes the perfect template for cutting the cardboard.
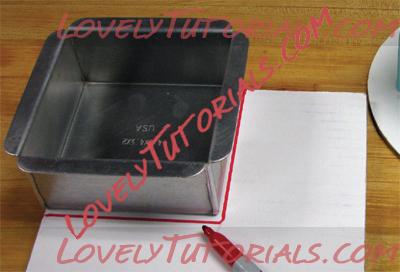
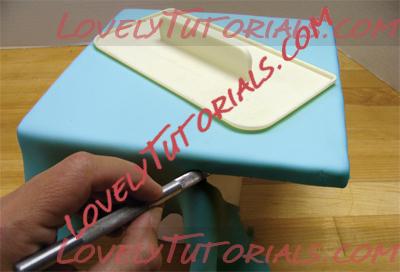
6. Sheet blue fondant (see tinting instructions in step 12) to cover the cardboard. Apply a small amount of piping gel to the cardboard, and cover it with the fondant. Fold the fondant over the sides, and trim it along the bottom of the cardboard.
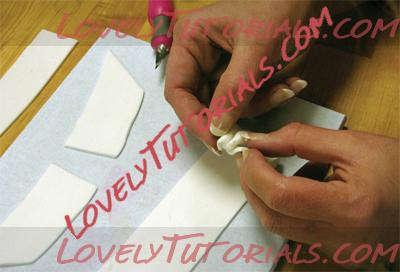
7. To create the bow, sheet white fondant and cut it into two strips of equal width. Pinch pleat all four ends of the strips. Cut one strip in half at an angle to form the tails.
8. For the bow, fold the ends of the other fondant strip toward the center. Lightly brush gum glue onto the fondant where the two ends meet.
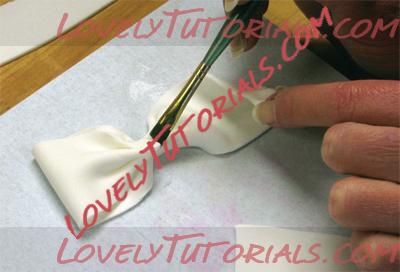
9. Insert small rolls of paper towel to help the loops dry in the correct shape. Wrap a small piece of pleated fondant around the center of the bow. Place the ribbon tails over small rolls of paper towel to help them dry in the correct shape as well.
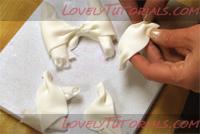
10. To assemble the bow on the box lid, sheet two strips of white fondant and criss-cross them over the lid. Once the ribbon components are dry, attach the tails to the box lid using royal icing. Place the bow on top of the tails, securing with royal icing.
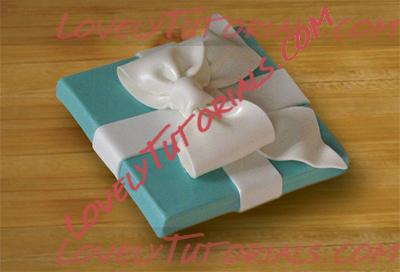
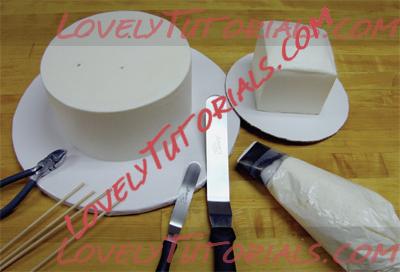
11. Once the ring and box lid are assembled and dry, you can begin to create the final cake. Prepare an 8-in. round and a 4.5-in. square cake with white icing. Leave the top of the square cake slightly domed to provide a little “puff” for the ring. Dowel the round cake with supports for stacking. Note that the dowels are offset to one side. This cake isn’t center stacked; you will need room for the box lid to sit alongside the square cake.
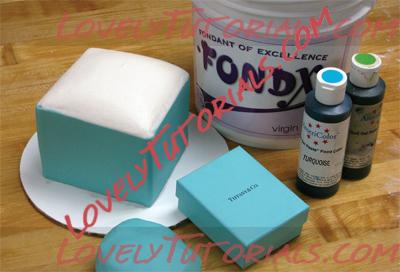
12. Tint white fondant robin’s egg or Tiffany blue. This is a hard color to perfect, but turquoise and mint green in a 5:1 ratio should be close. Sheet the blue fondant to cover the sides of the square cake.
13. Stack the cakes, and add a center dowel to keep them from shifting. Trim the dowel to icing level. Use an airbrush to add a thin turquoise bottom border around the 8-in. round. Then, use round tip No. 10 to pipe a simple, white bead border.
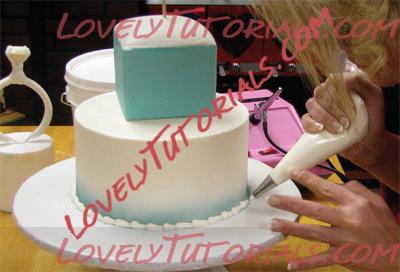
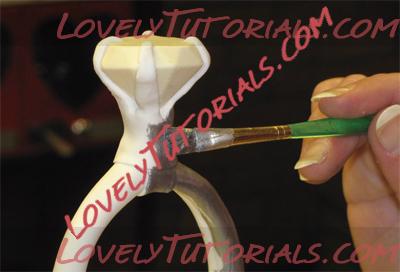
14. Insert the ring into the square cake. Paint the mounting using silver luster dust mixed with vodka or lemon/ clear vanilla extract.
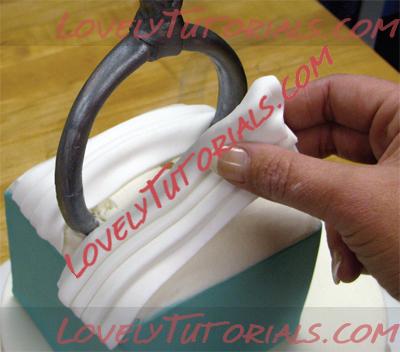
15. Sheet white fondant and pleat it to cover the top of the square cake, giving definition to the “puff” of the box. Trim the white fondant where it meets the blue fondant around the sides of the cake. Finish the ring box by adding a thin strip of blue fondant around the top of the cake where the white and blue fondant meet.
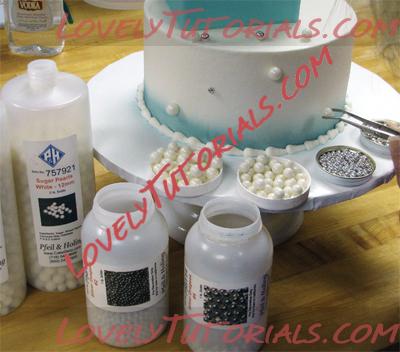
16. Place 10mm and 12mm pearls and 4mm and 8mm silver dragees along the sides and top of the round cake to add a little pop. Add a few to the top of the ring box as well.
17. Prop the box lid against the side of the square cake. Hold it in place with a small amount of royal icing. Airbrush the entire cake with pearl color to make it sparkle.
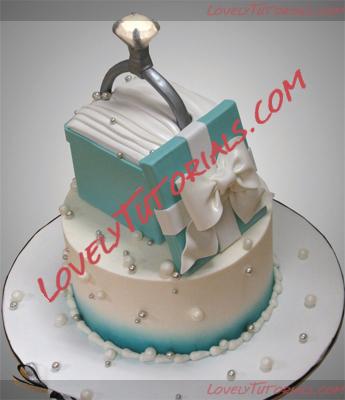 A lot of different engagement box cake ideas see here
множество идей тортов шкатулок смотрите здесь
|
 |
|
Метки
|
3d bizcocho, 3d bolo, 3d cake, 3d dort, 3d kage, 3d kager, 3d kake, 3d kek, 3d pastel, 3d tarta, 3d torta, 3d torte, 3d torti, 3d torty, 3d κέικ, addım-addım təlimat, adım, adım adım yönergeler, artesanatos passo a passo, bemutató, bolando bolos, box, bridal, bridal shower, cake, cake decorating, cake decorating techniques, confeitando bolos, decoracion de pasteles, decoración de tortas, decorada en fondant, decorare le torte, decorazioni, deko fondant, dekorace na dort, dekoracija, dekoracije, dekorasyon, dekorácie, diamond, diamond ring box cake, engagement, engagement cake, fender, fimo, flower paste, fondan, fondant, fondente, fondente di zucchero, fotopostup, foundant, gebak, glazuur, gum pasta, gum paste, gumpaste, hand-made, handmade, how to, how-to's, instrucţiuni, instrukcijas, instrukcje, jak na, jewelry, kage dekoration, kagedekoration, kakebaking, korak, korak za korakom navodila, korak-po-korak upute, koristeet ja koristelu, krok, krok po kroku, krok za krokem, krok-za-krokem, las instrucciones, las técnicas, le tecniche, les techniques, lukie, marshmallow, masa flexible, master-class, master-klasse, master-klasy, meistras klasės, metodikas, mistr třídy, modeling paste, modelling past, motivtorten, návod, opplæringen, pamoka, pap, pas, pas-cu-pas, paso, paso a paso, passo, passo a passo, passo-a-passo, passo-passo le istruzioni, pasta de miel, postup na 3d torty, postupak za ukrasavanje, proposal cake, pâtisserie, ring, ring box cake tutorial, schmelzend, schritt für schritt anleitung, schritt-für-schritt, schritt-für-schritt-anleitungen, stap, stap-voor-stap, stap-voor-stap instructies, steg for steg, steg-för-steg, steg-för-steg-instruktion, step, step by step, step-by-lépésre, step-by-step, step-by-step instructions, sugarcraft, sugarpaste, suikerglazuur, technieken, techniken, techniki, techniky, technikák, techniques, tecnicas de decoracion, tecniche, tehnici, tehnike, teknikker, teknikler, tips och trix, torte, torte decorate, torten dekorieren, torti, trin, trin for trin, trin-for-trin, trin-for-trin instruktioner, trinn, trinn for trinn, trinn-for-trinn-instruksjoner, tutorial, tutoriale, tutorias, tutorias/ideas para decorar los bizcochos, tutoriel, tutorijal, tårtbottnen, tårtor, técnicas, ukrašavanje torti, uputstvo za dekoraciju, will you marry me cake, zuckermasse, सजा केक, ट्यूटोरियल मास्टर वर्ग, कदम, कदम दर कदम निर्देश, तकनीक, étape, étape par étape les instructions, öğretici, žingsnis, žingsnis po žingsnio, 宗師級教程,一步,一步一步的指示� � �技術,udžbenik, 裝飾蛋糕, βήμα, βήμα προς βήμα οδηγίες, οδηγίες βήμα βήμα, παντεσπάνι art, τεχνικές, φροντιστήριο, инструкция, как сделать, крок за кроком, крок за крокам, покроково, пошагово, пошаговые фотки, пакрокава, миниатюра, мк, мк торт "3д коробка с кольцом", майстор-класа урок, майстар-клас, майстер-клас, майстер-класи, маршмеллоу, мастика, мастер-класс, зд торт, зд торта, ручной работы, ручная работа, украшение тортов, сахарная мастика, уроки прикрашання, стъпка, стъпка по стъпка инструкции, техники, техника, техніка, туториал, туторіал, тэхніка, шаг за шагом, інструкцыя, інструкція  |
|

