|
|
Как сделать красивый бантик-How to make a beautiful bow V3
|

24.04.2012, 12:42
|
|
Администратор
|
|
Регистрация: 07.09.2010
Сообщений: 7,669
|
|
|

25.04.2012, 17:40
|
|
Администратор
|
|
Регистрация: 07.09.2010
Сообщений: 7,669
|
|
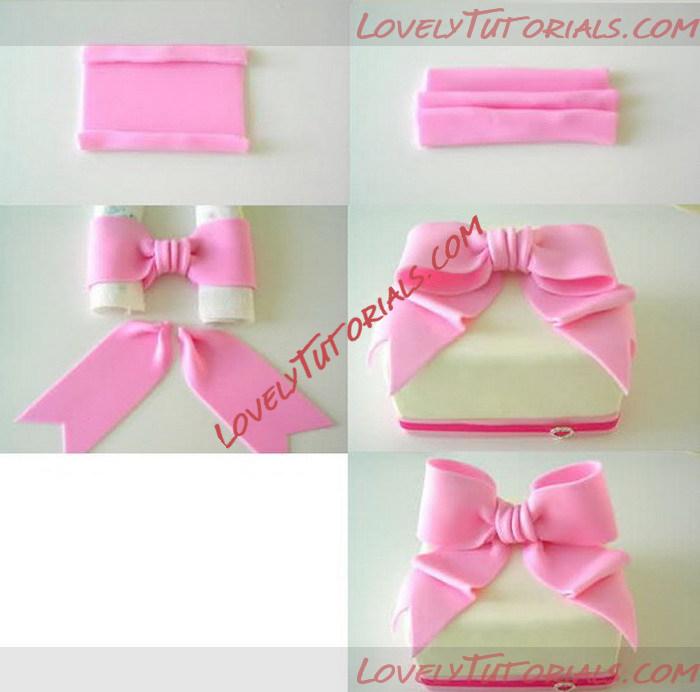
 How to make a gum paste bow
Огромная благодарность Louise за Мастер-класс
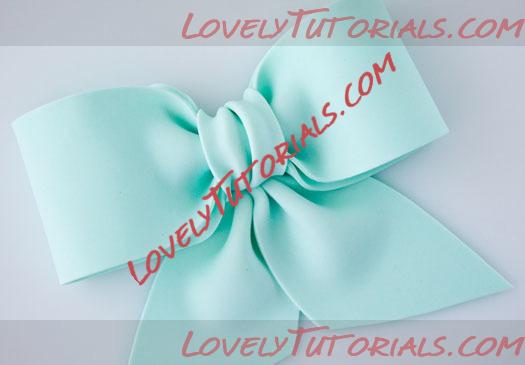
Gum paste bows are essential when making gift box cakes, but they look also pretty as a top or side decoration on other types of cakes. By using textured rolling pins, embossing tools, shimmer or lustre dusts. Can you make different looks for your gum paste bows. The bow can be made out of gum paste only, but I like to use equal parts (50/50) of rolled fondant icing and gum paste mixed together. This gives in my opinion a better paste to work with.
To prevent the “fondant gum paste” from cracking when making the bow, you need to roll it out rather thinly. A pasta machine is great help if you have one. I dont have any specific measures on how large or small the bow loops should be, when I make my bows. But you can make a paper template for the bow loops if you like. Here is my way, on how to make a gum paste bow.
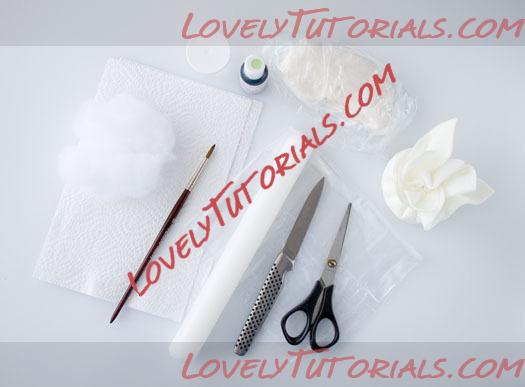 This is what I use:
Equal parts of rolled fondant and gum paste, mixed well together
Food gel paste color
Rolling pin
Small knife
Tylo glue
Small brush
Polyester fiber
Kitchen paper
Cornstarch for dusting
1 Plastic bag
A pair of scissors
A ruler (not showing on the photo)
Optional:
Shimmer or lustre dust
Soft brush
Textured rolling pins
Embossing tools
Paper template for the bow loops
Pasta machine
Step 1:
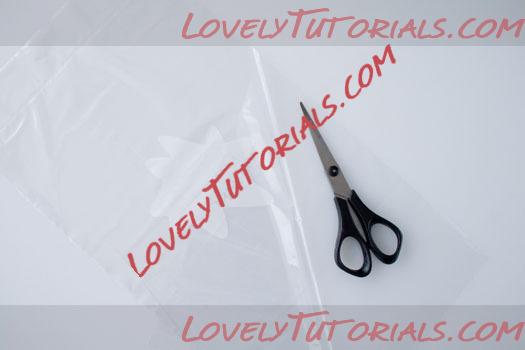
Take the plastic bag and cut down one of the sides with the scissors.
 Step 2:
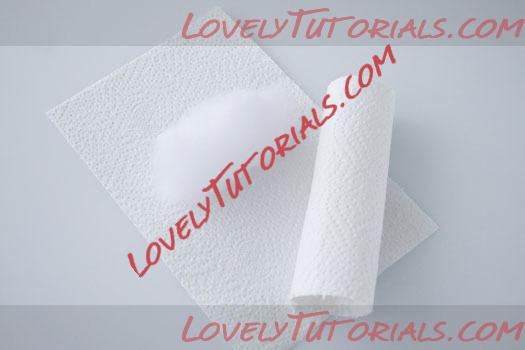
Take some of the polyester fiber and wrap it in a piece of kitchen paper. Adjust the amount of polyester fiber to the size of your bow loops. Remember to make two of them.
 Step 3:
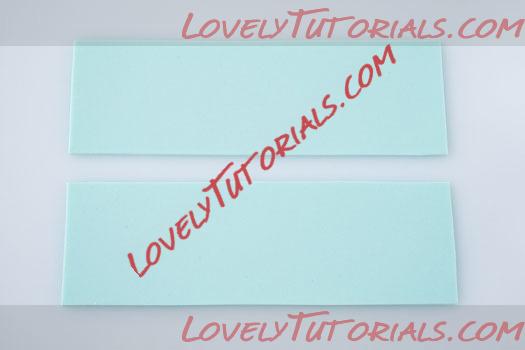
Color your paste with food gel color and roll out the paste thinly with a rolling pin (or a pasta machine). Take the knife and a ruler (or your paper template) and cut two (long) pieces for the bow loops. If you want to use a textured rolling pin, then use it when you have rolled out your paste thinly, but before cutting out the bow loop pieces. You could also use embossing tools or brush the two pieces with shimmer or lustre dust, before placing them in the plastic bag.
 Step 4:
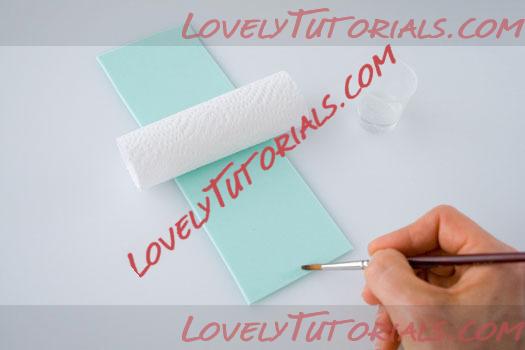
Take one of the bow loop pieces and brush a little tylo glue at one of the ends. Place one of the polyester fiber rolls in the middle.
 Step 5:
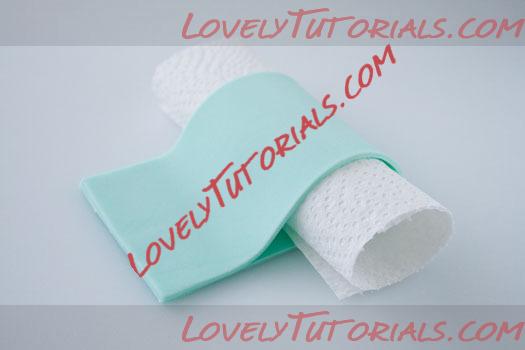
Fold the bow loop around the polyester fiber roll.
 Step 6:
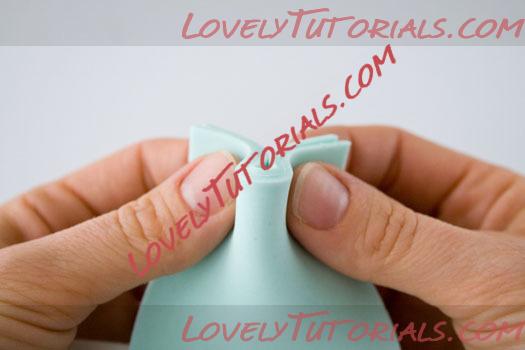
Take the end of the loop and start in the middle by going back and forth to make pleats.
 Step 7:
Secure the pleats with a little tylo glue. Repeat steps 4-5-6-7 with the other bow loop.
TIP! If you want the bow to stand up, instead of laying down. Then place the bow loops in a standing position before continuing.
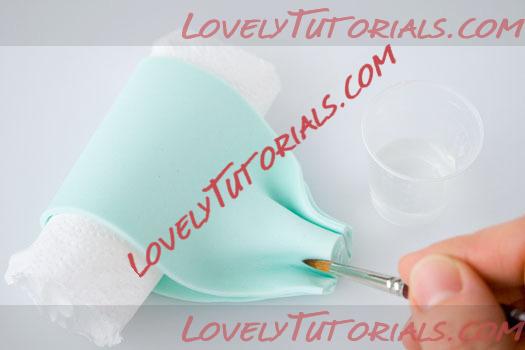 Step 8:
Trim the ends and brush ends with a little tylo glue.
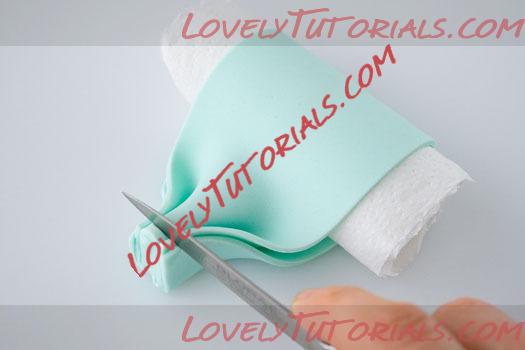
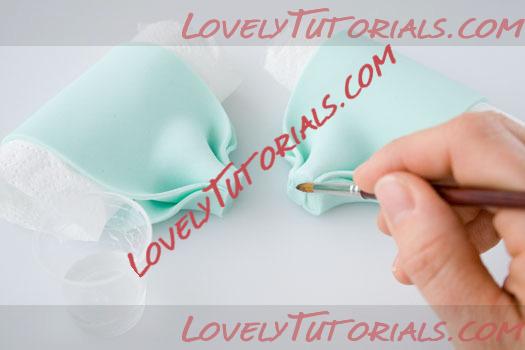 Step 9:
Place the two bow loops together and let them dry a bit before you continue with the next step.
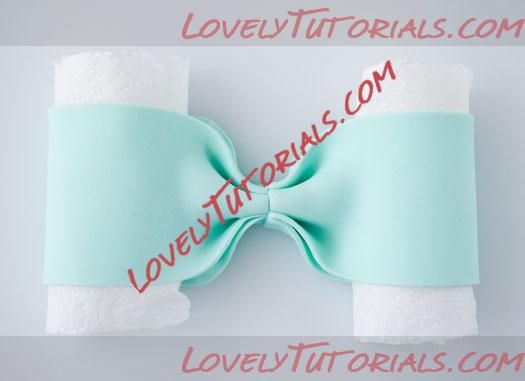 Step 10:
Roll out some paste thinly and cut a small piece for the middle of the bow and make some pleats.
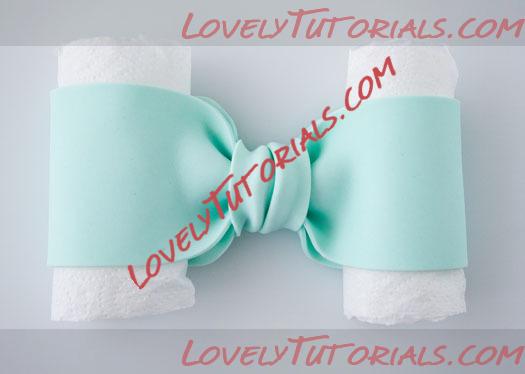
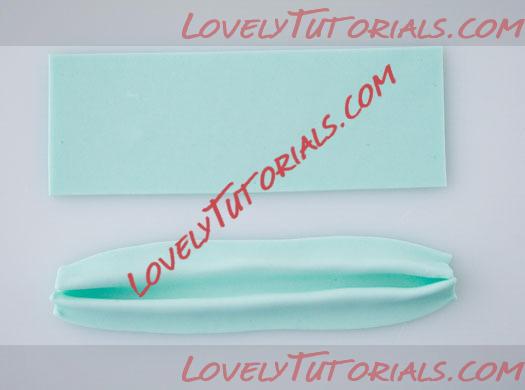 Step 11:
Brush a little tylo glue on the back of the piece and wrap it around the bow. Trim with the knife if necessary. Let the bow dry completely, if you are not planning to make tails for the bow.
Note: Remove the polyester fiber rolls when the bow are dry.
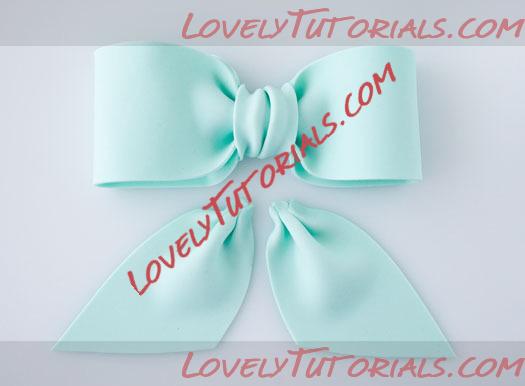
 Step 12:
If you want tails on your bow? Then roll out some more paste. Cut the tails in the same width as the bow loops. Pleat the ends and attach the tails with a little glue to the bow.
Note: I often wait with the bow tails, until the bow is to be placed on the cake. This makes it more easy to place the tails in the right position.
|

26.04.2012, 09:03
|
|
Администратор
|
|
Регистрация: 07.09.2010
Сообщений: 7,669
|
|
|

24.05.2012, 13:20
|
|
Администратор
|
|
Регистрация: 07.09.2010
Сообщений: 7,669
|
|

МК с сайта http://loravo.keyartstudio.com
Спасибо Автору за МК!
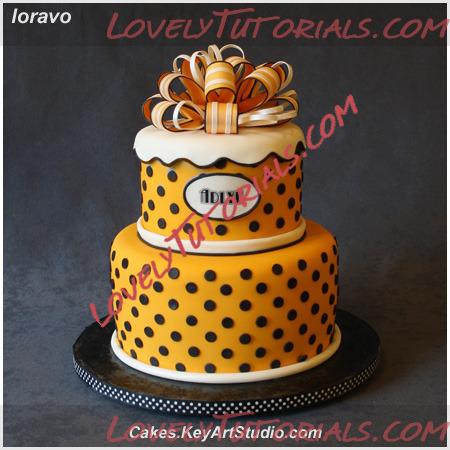
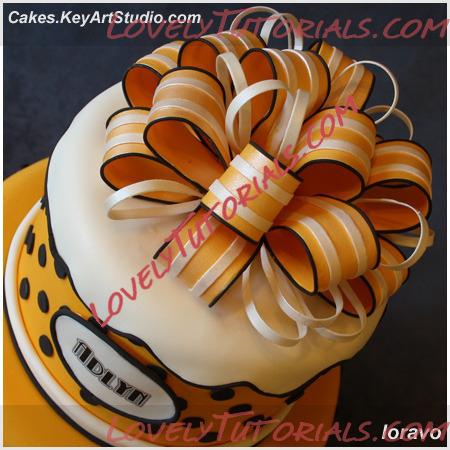
Все черные горошины я вырезала и засушила заранее, бант тоже, так что на украшение ушло всего 2 часа (думала, провожусь дольше).
Для тех, кто спрашивал, как делать окантовочки на бантиках:
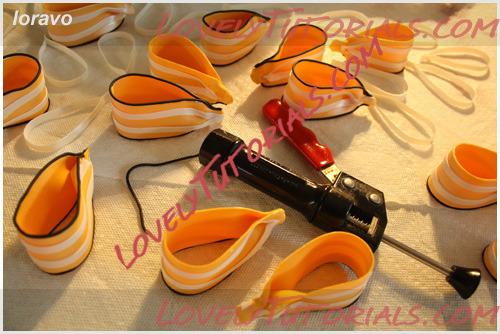
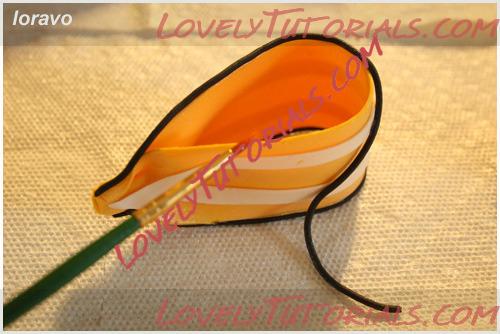
|

07.06.2012, 12:45
|
|
Администратор
|
|
Регистрация: 07.09.2010
Сообщений: 7,669
|
|
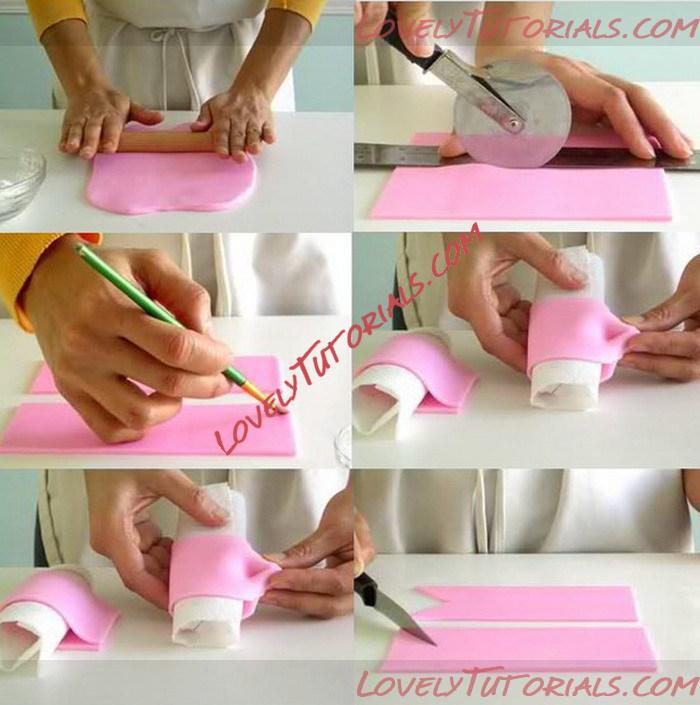
Огромная благодарность Автору? за МК
|

08.06.2012, 07:41
|
|
Администратор
|
|
Регистрация: 07.09.2010
Сообщений: 7,669
|
|
 Stripey bow/Ribbon tutorial
Огромная благодарность Shereen's Cakes & Bakes за Мастер-класс
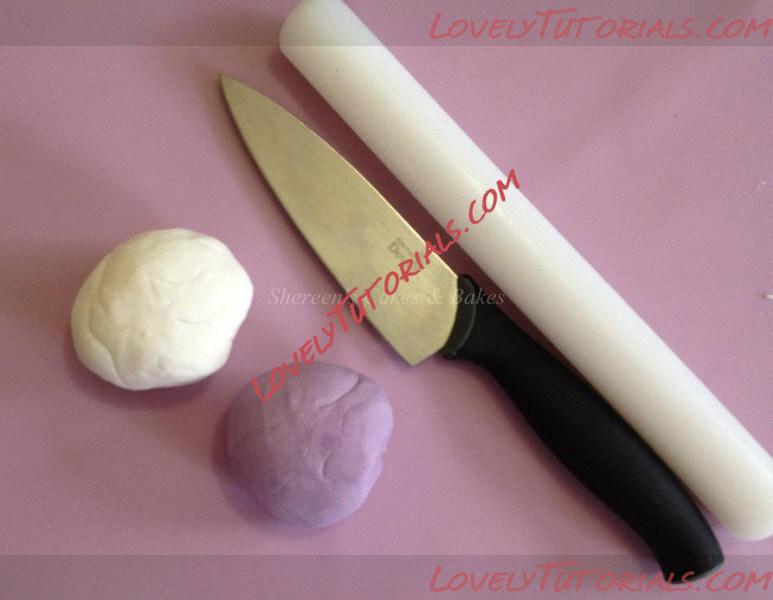
What you need:
Sharp Knife
Rolling Pin
2 colours of your choice modelling paste (250g sugar paste mixedw ith 1 tsp gum tragacanth, leave overnight in a bag to settle)
or you can use just sugar paste, I prefer modelling paste
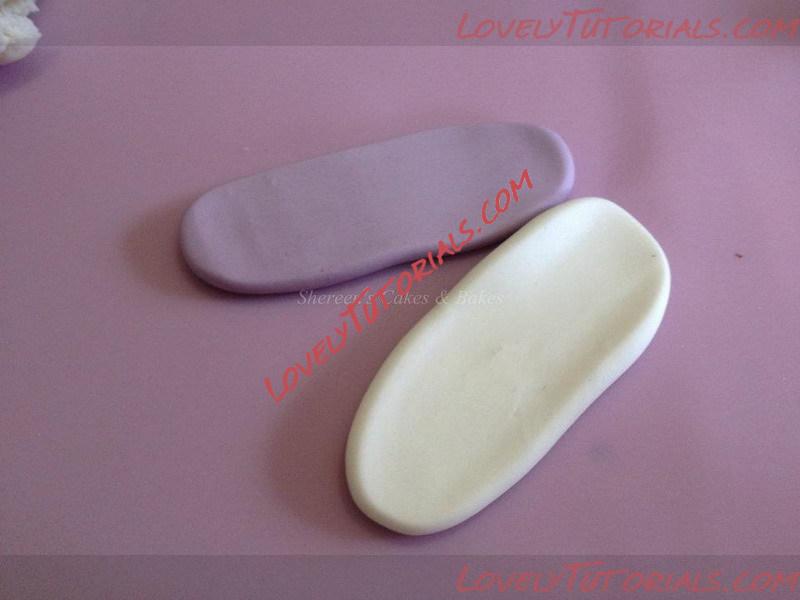
roll your colours into a sausage shape and then flatten/stretch a bit with your rolling pin about 5mm thick, can be thicker if you like, these were about 10cm long and 3cm wide, the wider and longer the bigger the bow - tip, try and work fast with your sugarpaste or modelling paste so it stays 'warm' and a little tacky so it sticks together and you don't need glue
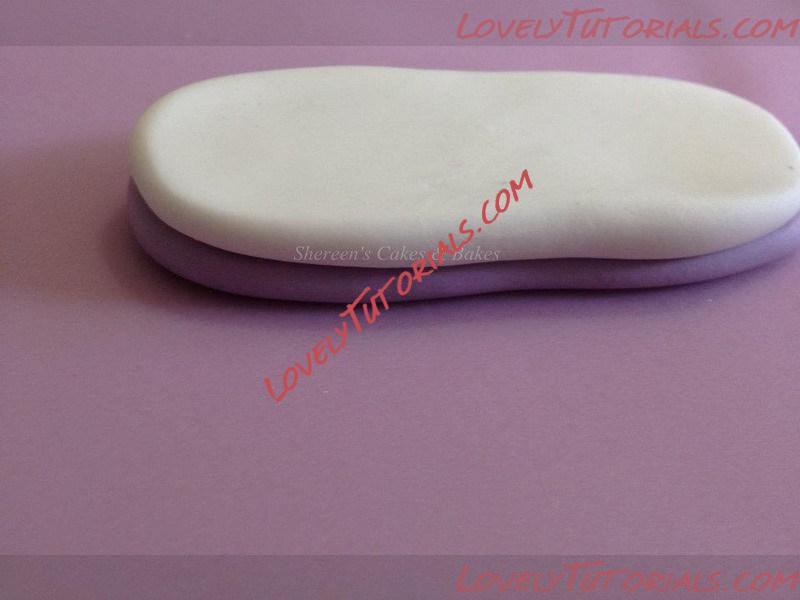
start layering 1 colour at a time
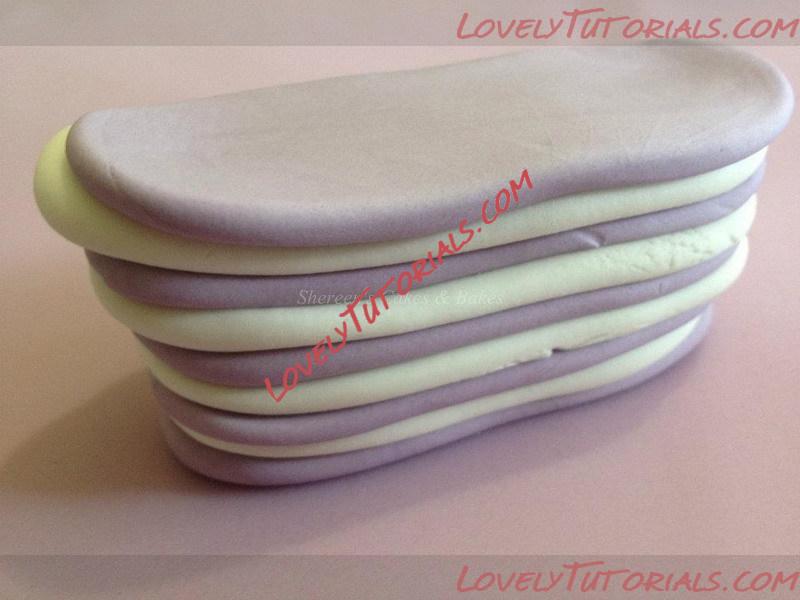
Your stack of icing - make however many stripes you want and press downa little on it to make it all stick together
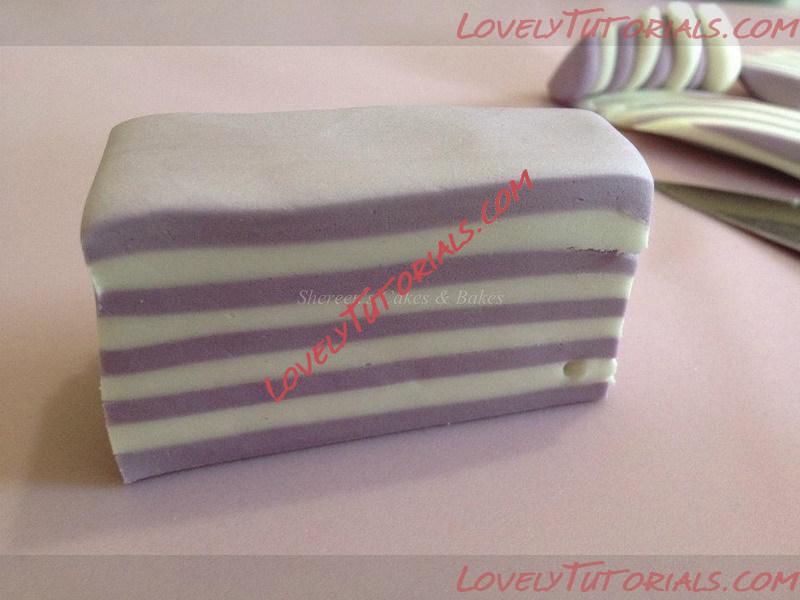
using your sharp knife, trim the edges, you can see the icing is pretty well stuck, if your icing is too dry this won't work too well
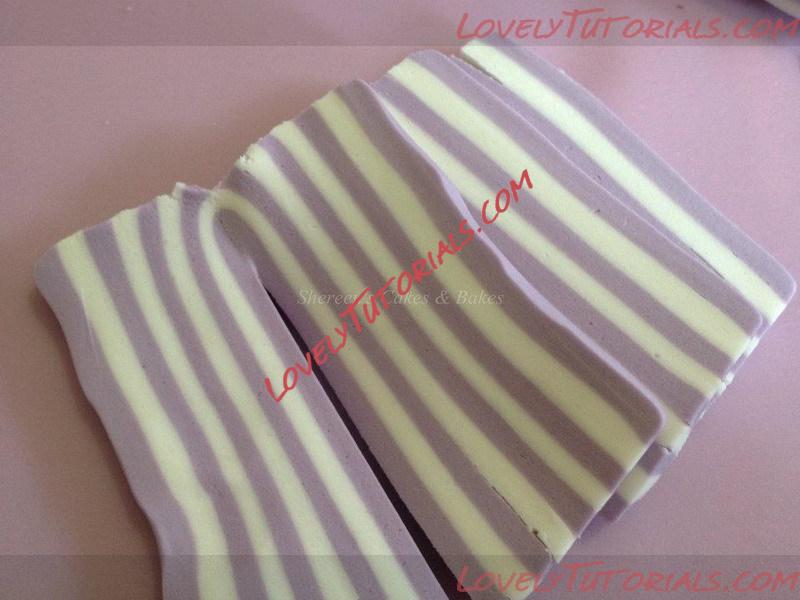
cut strips from your block, these are about 5mm thick
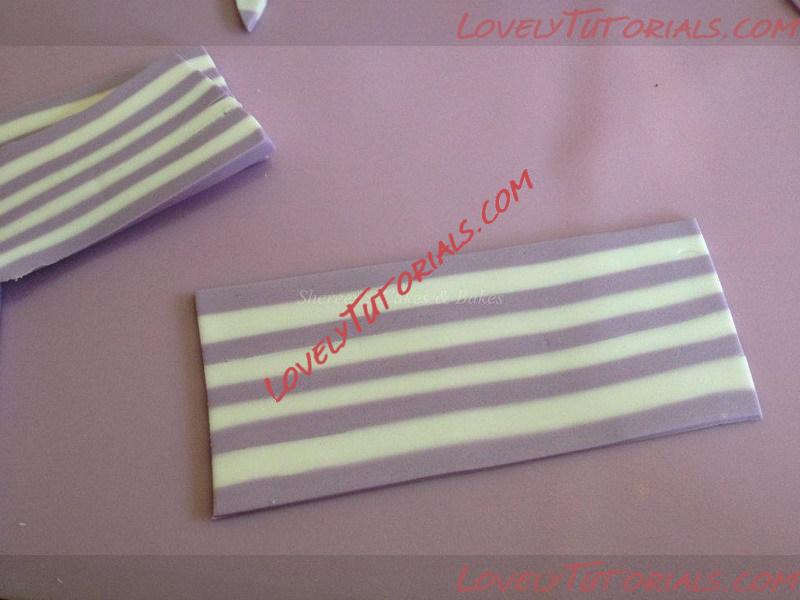
roll it out with your rolling pin and trim the edges
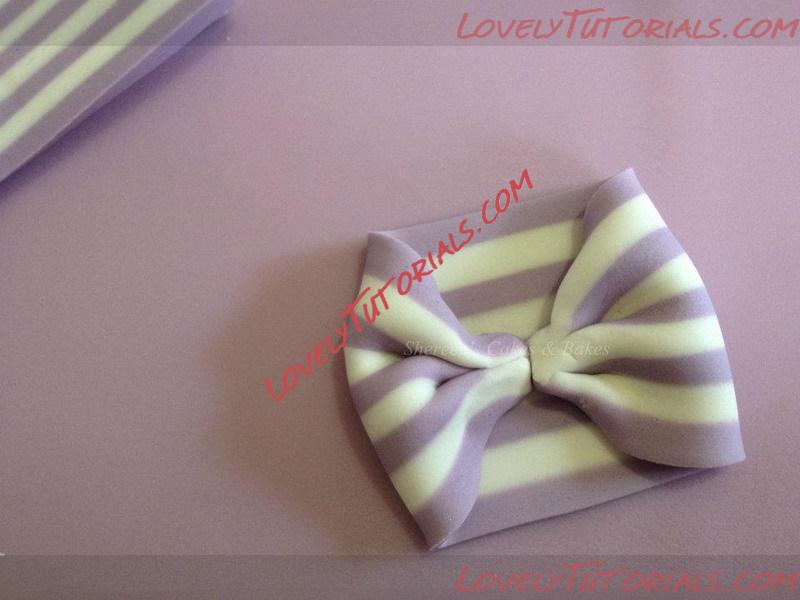
bring your edges in and fold and pinch them in the middle and stick down trim off the excess between the bow to give you the bow shape
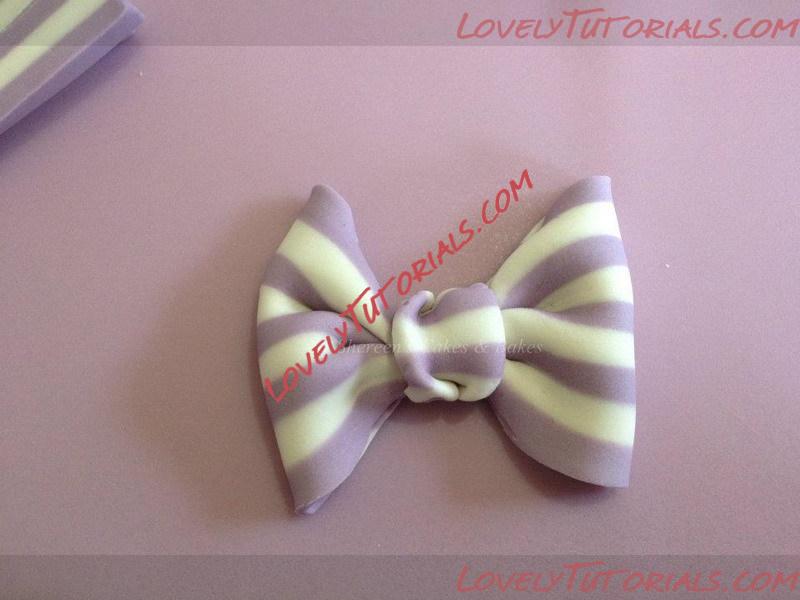
add some more stripey icing to the middle and glue it on - set aside to dry. This was a smallish bow so I didn't need to add anything into the bows to get the shape. but if your bow is bigger, just use some bubble wrap, kitchen paper towel or rolled cling film to place inside the bow to shape it (see my other bow tutorial in my albums)
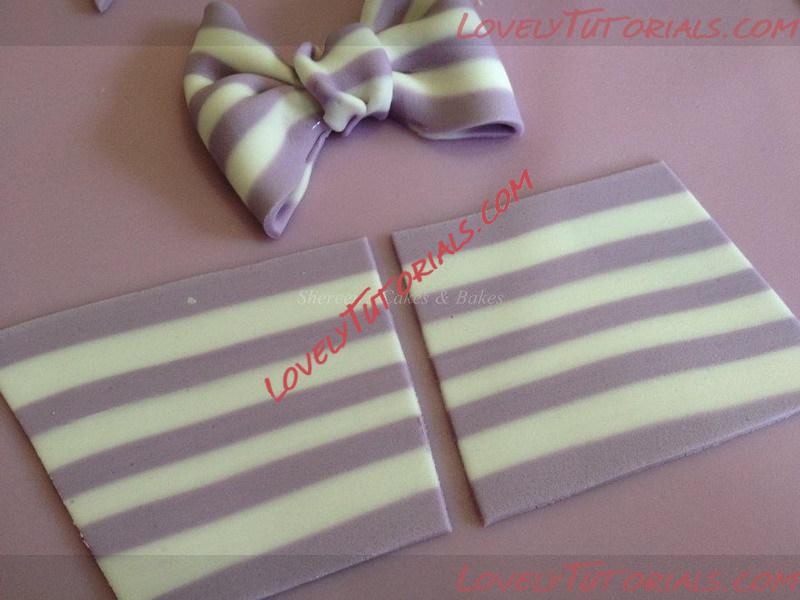
to make the ribbons roll out more icing and cut in the middle and cut each edge at an angle
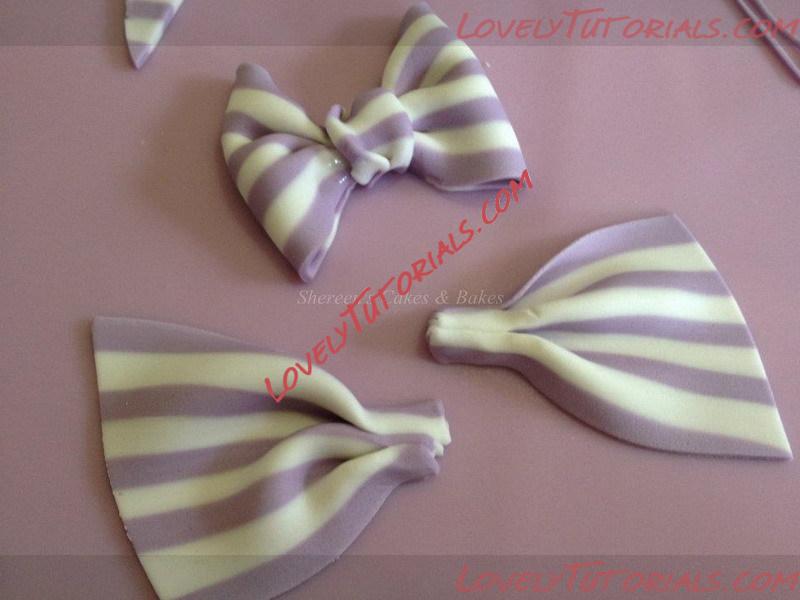
fold and pinch the straight sides
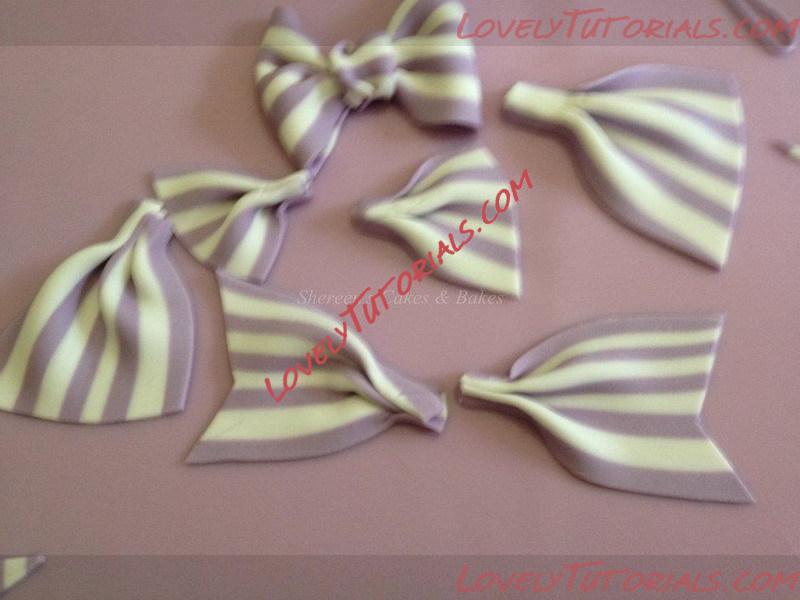
I made extra ribbons here to make a big statement bow ;-) the bottom 2 I cut a 'V' into the icing for a different finish
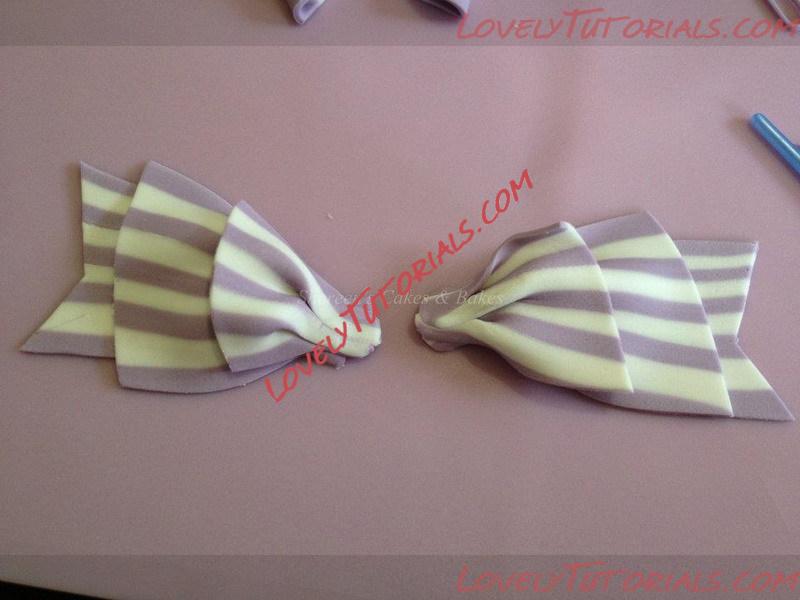
Use some glue to layer and stick them on as pictured
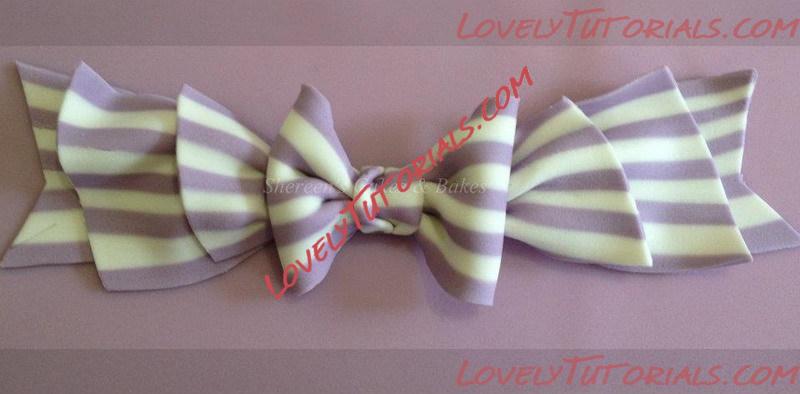
Add your bow to the middle and voila you have a VERY big stripey bow with ribbons
|

08.06.2012, 07:49
|
|
Администратор
|
|
Регистрация: 07.09.2010
Сообщений: 7,669
|
|
 Quick & Easy Bow - No template needed
Огромная благодарность Shereen's Cakes & Bakes за Мастер-класс
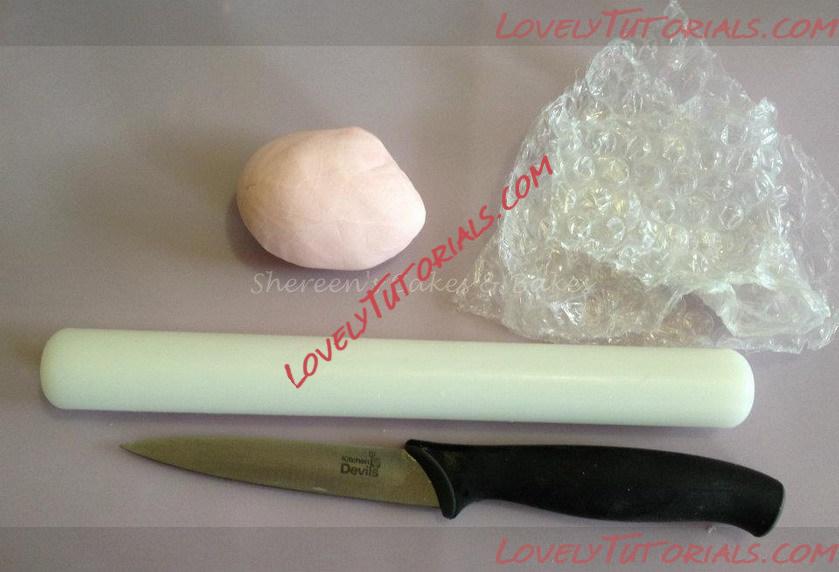
What you need: - Sharp knive, some bubble wrap or clingfilm, modelling paste and rolling pin (modelling paste - 225g fondant and 1 tsp gum tragacanth)
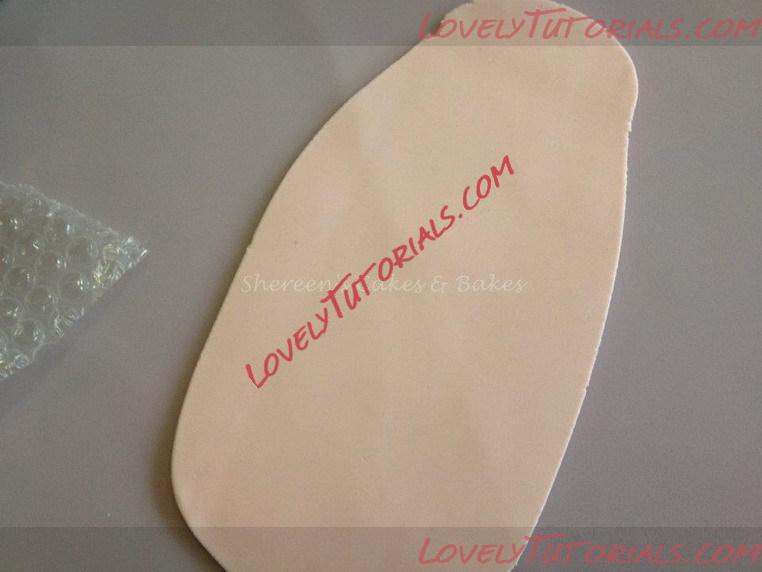
Roll out your modelling paste about 1mm thick
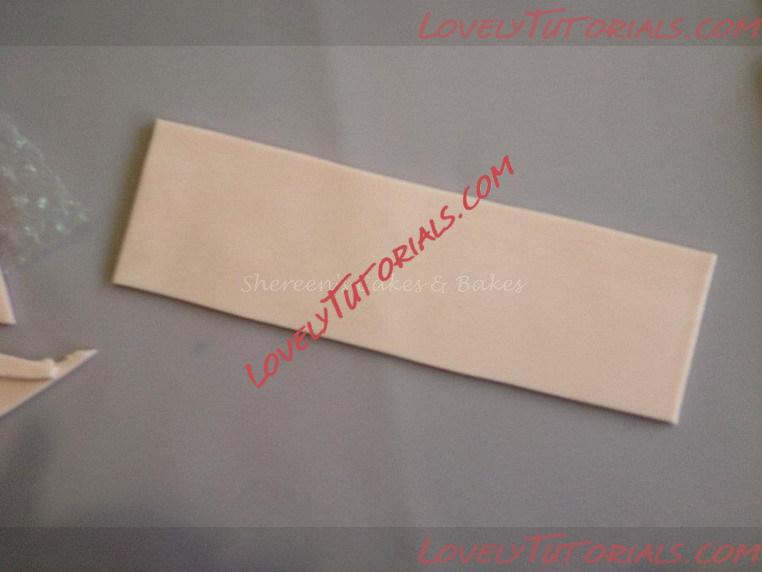
Cut the edges straight as pictured so you have a long rectangular shape
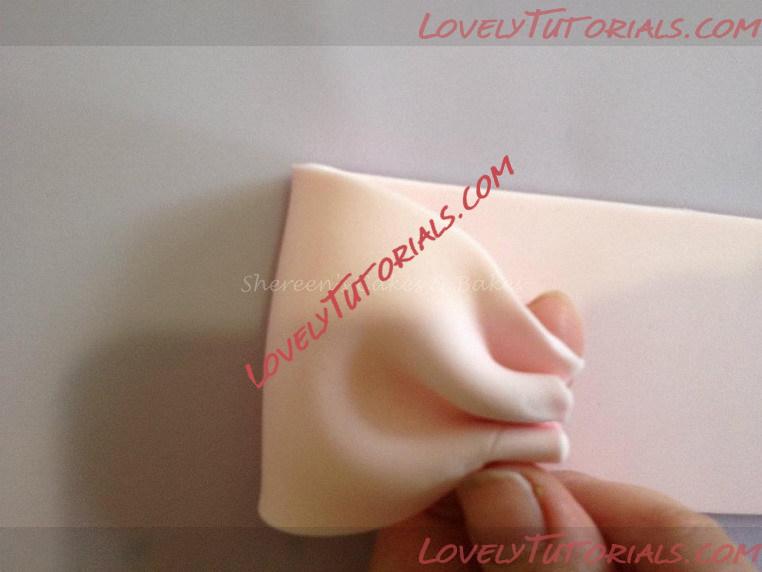
Fold the edge piece in to the middle and gather it as picutred
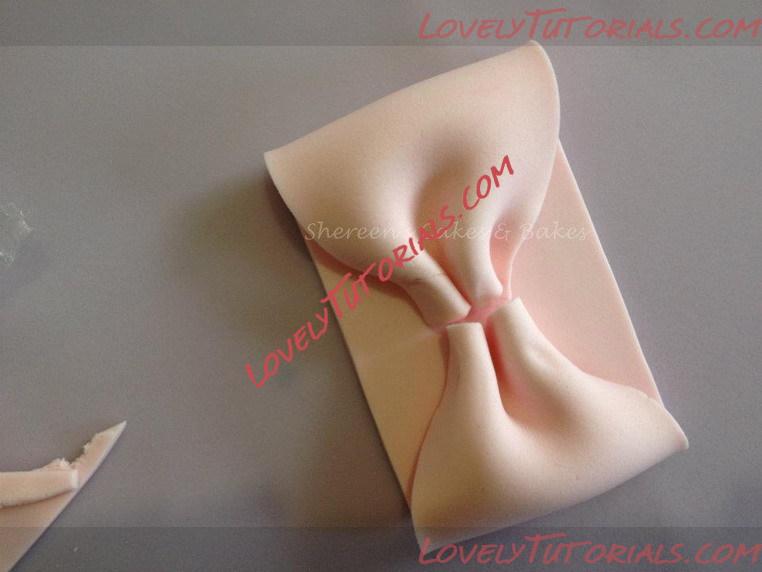
Do the same for both sides so they look like this in the middle
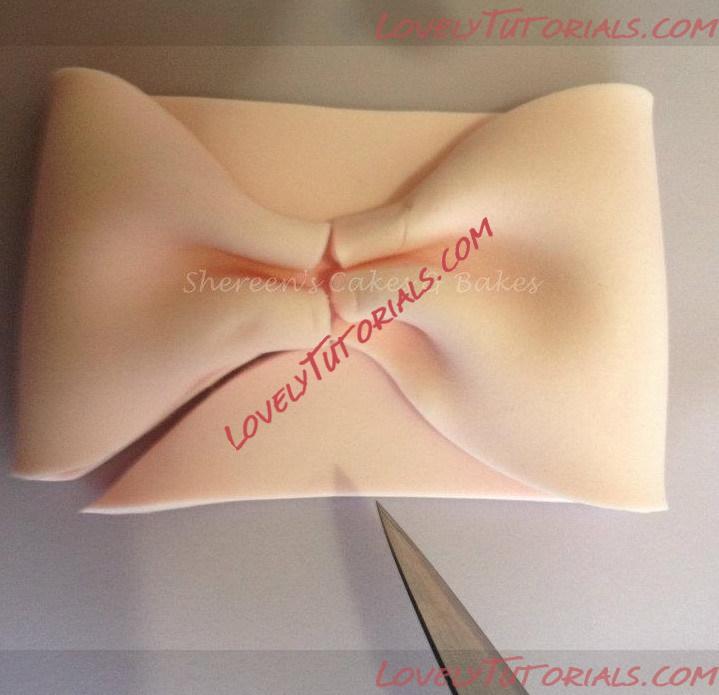
glue the middle down and hten using your knife cut around the bow to get the correct shape
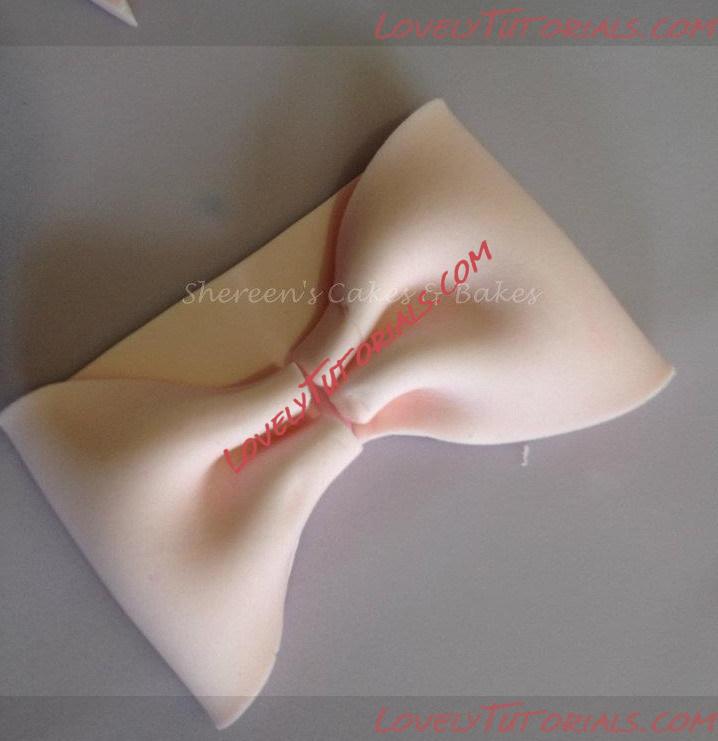
1 side trimmed and tidy
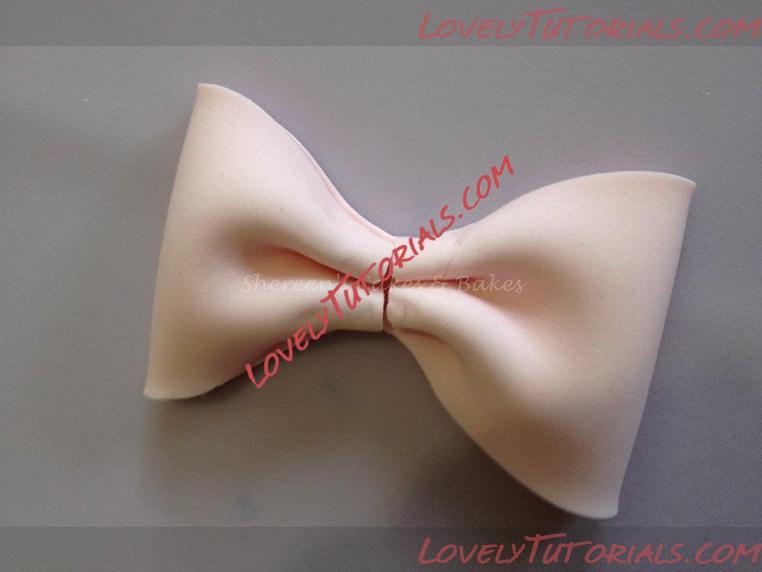
both sides trimmed and tidy
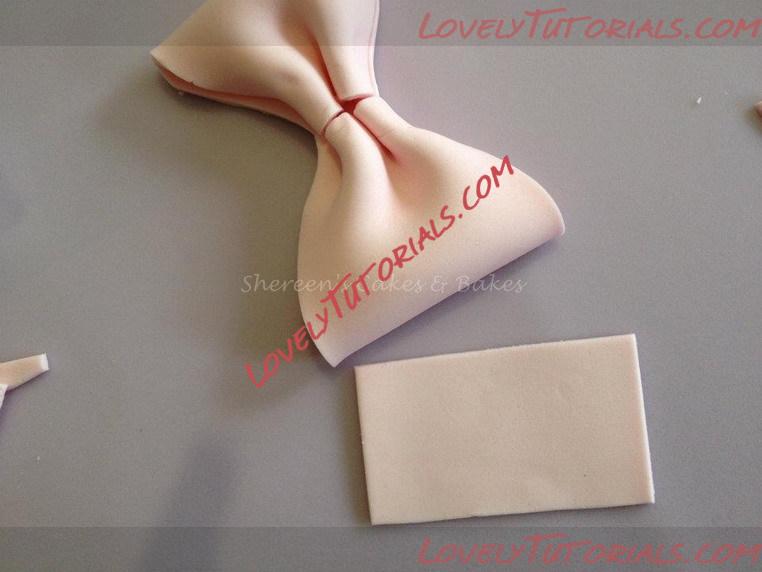
roll out another piece of paste and cut a rectangular shape, this is for the middle make this fairly thin and you are folding/gathering it too
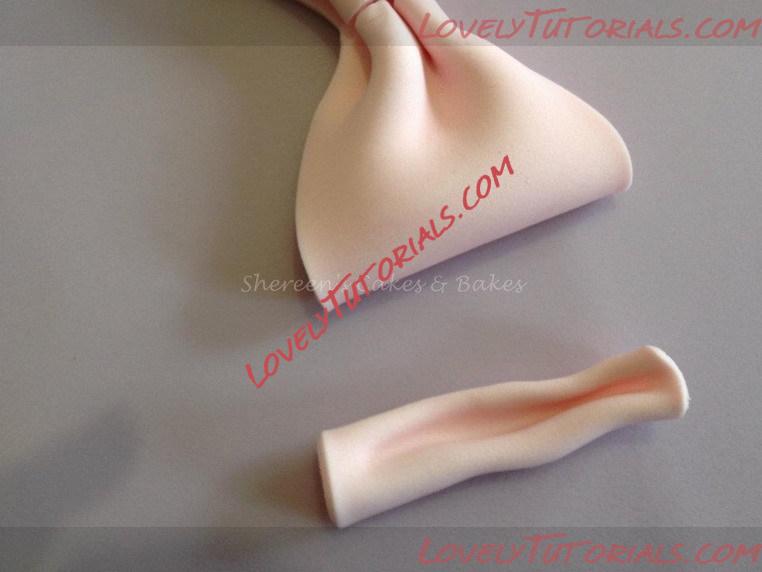
Fold and gather the middle rectangle
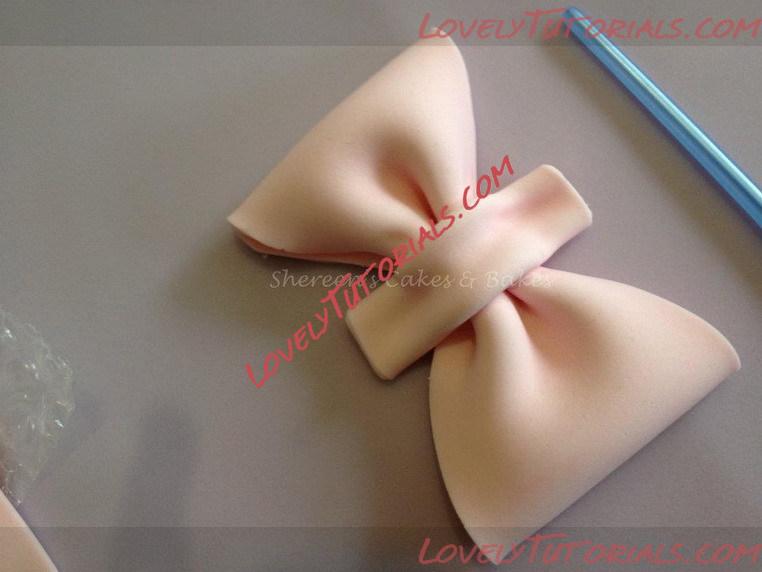
add glue across the middle of your bow and on the back of the middle piece and attach
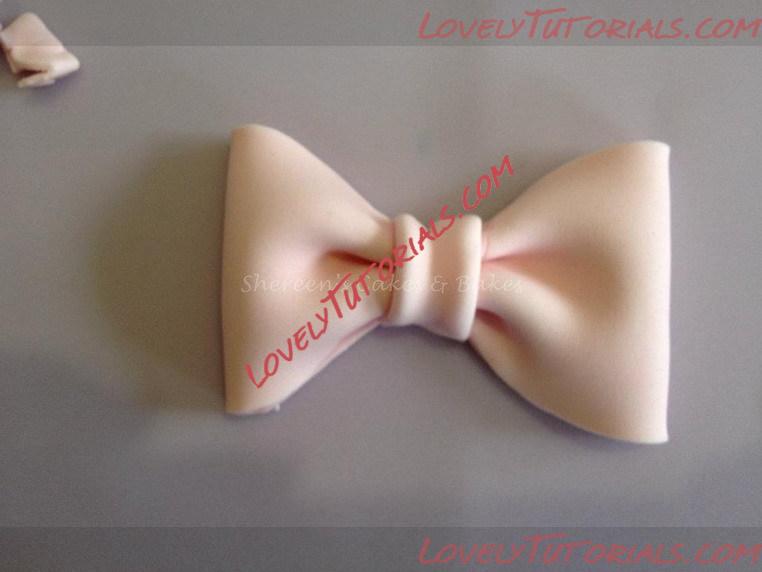
trim off the ends and press neatly into place
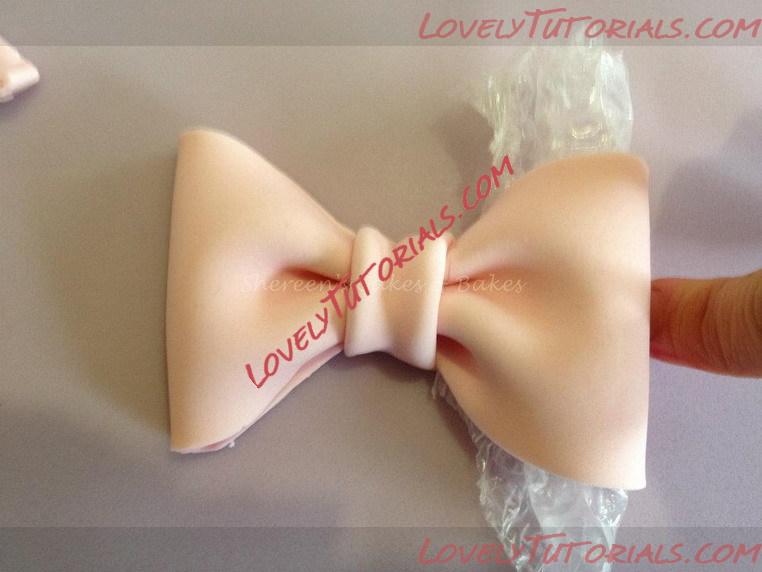
To get your bow nice and 'full' of character Roll up some bubble wrap or Clingfilm and put it in the sides to round your bow nicely, leave to dry like this
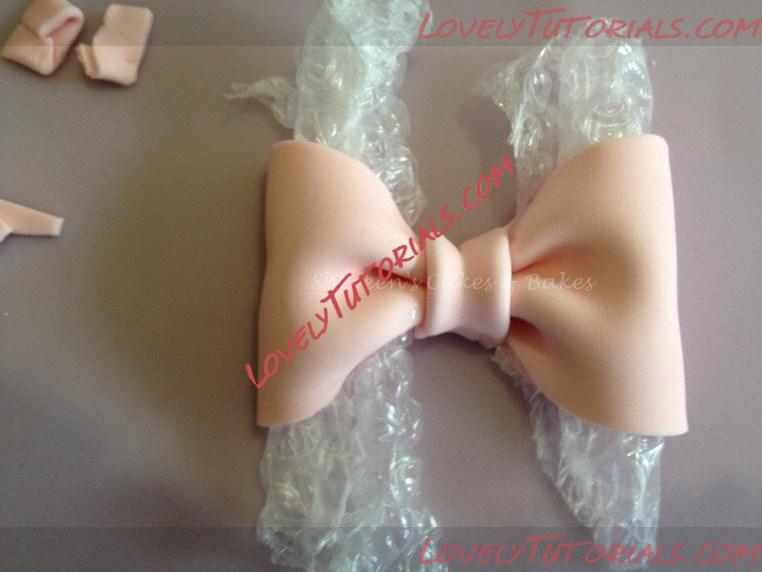
both sides left drying
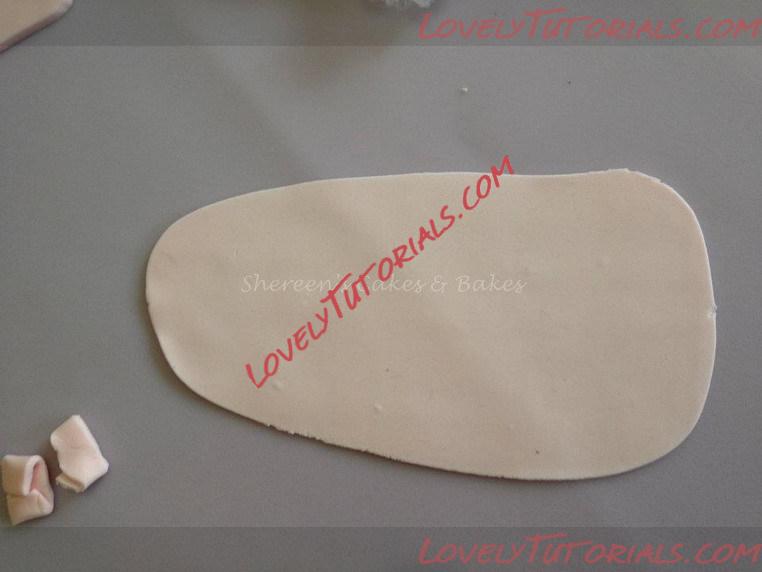
Roll out some more paste, fairly thin (this step can be left until later, when you are ready to attach your bow to the cake) it shapes better stuck directly on the cake
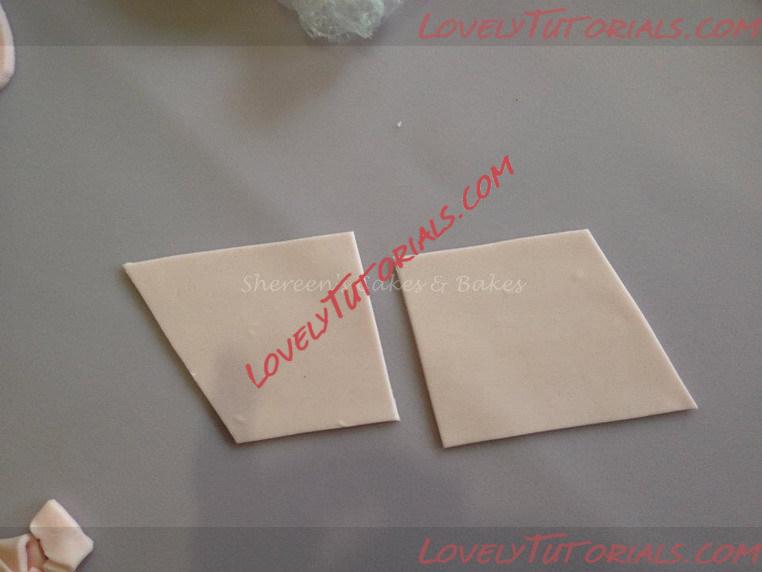
Cut a rectangle again and the cut that in half and each end cut to an angle as pictured
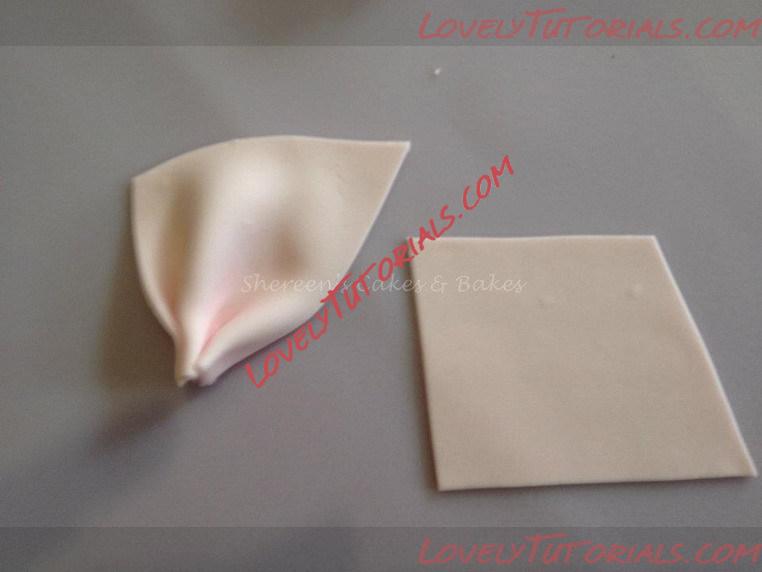
Gather the straight ends as pictured
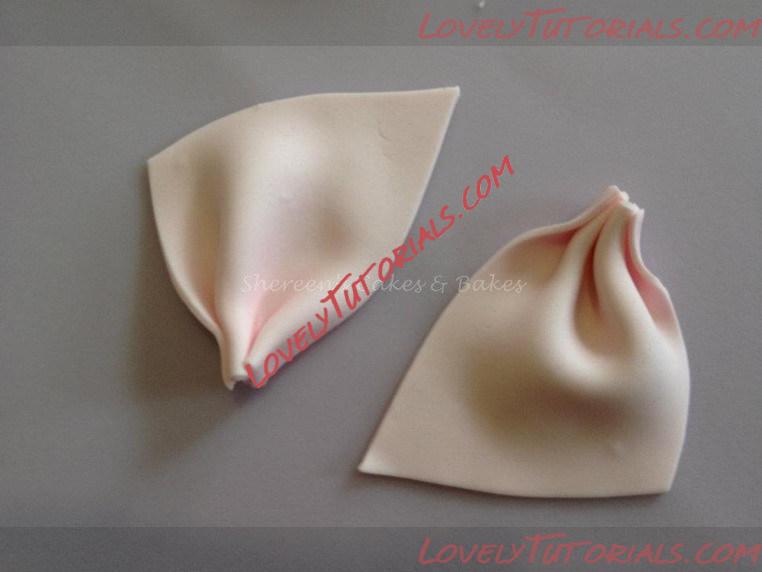
Gather both ends of the ribbon part
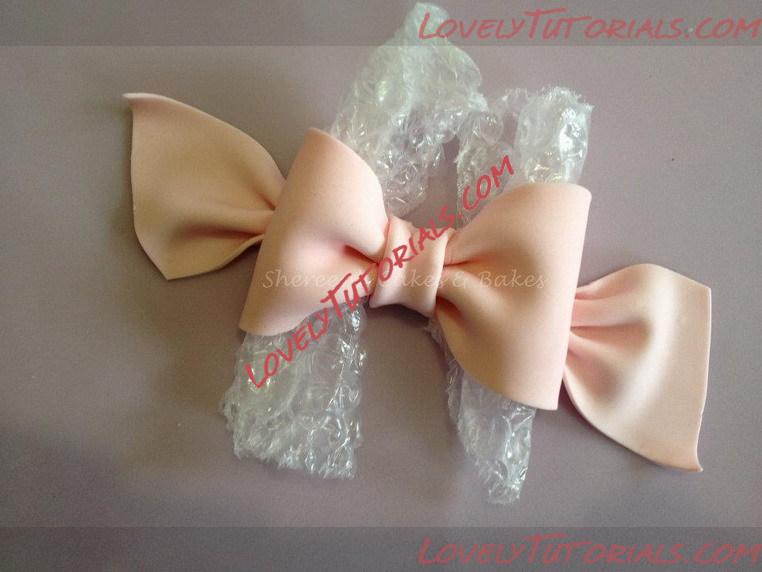
Attach the ends behind the bow. I have just set these up to be pictured but the bow I made for the cake, I left the bow to dry a bit and then made the ribbon parts and shaped and stuck them directly to the cake while they were still 'wet' and then stuck the bow on top - HAVE FUN! ps ... don't forget to remove your bubble wrap or clingfilm he he he
|
 |
|
|
Метки
|
3d figures, addım-addım təlimat, adım, adım adım yönergeler, arc-noeud, arco-nó, artesanatos passo a passo, bemutató, birthday cake, biscuit, bogenknoten, bolando bolos, bolos decorados, boog-knoop, bow, bow-düğüm, bow-knot, bow-knut, bow-knute, cake decorating, cake decorating techniques, cake topper, cake toppers, cake tops, cerâmica plástica, character figures, characters, children's cake, cold porcelain, confeitando bolos, csomó, curso de modelado, decoracion de pasteles, decoración de tortas, decorada en fondant, decorare le torte, decorazioni, deko fondant, dekorace na dort, dekoracija, dekoracije, dekorasyon, dekorácie, especializada em modelagem de biscuit, fender, figur kager, figuras, figure making tutorials, figuren, figures, figurice, figurice od fondana, figurine on the cake, figurines, figurinhas, figurky, figúrky, figür modelleme, fimo, fiocco passo-passo, fixando a cabencinha, flower paste, fondan, fondant, fondente, fondente di zucchero, fotopostup, foundant, fundă, gebak, glazuur, gum pasta, gum paste, gumpaste, hand-made, handmade, how to, how to make a beautiful bow, how-to's, instrucţiuni, instrukcijas, instrukcje, jak na, kage dekoration, kagedekoration, kakebaking, keula-solmu, korak, korak za korakom navodila, korak-po-korak upute, koristeet ja koristelu, krok, krok po kroku, krok za krokem, krok-za-krokem, la modélisation, laivapriekio mazgas, las instrucciones, las técnicas, le tecniche, leptir-čvor, les techniques, luk-uzel, luk-uzol, lukie, marcipanové figurky, marshmallow, marsipanfigurer, masa flexible, master-class, master-klasse, master-klasy, meistras klasės, metodikas, mistr třídy, modelado, modelagem, modelando a barriga, modelando a cabencinha, modelando a perninha, modelando as maozinhas, modelando o cabelinho, modelando o corpinho, modelando os bracinhos, modelando os pezinhos, modelare, modelerte figurer, modeling, modeling paste, modeliranje, modellazione, modelleme, modellering, modellieren, modellierpaste, modelling, modelling past, modelləşdirmə, modelovanie, modelování, modelowanie, motivtorten, návod, opplæringen, orelhas, ozdoby, pamoka, pap, pas, pas-cu-pas, paso, paso a paso, passo, passo a passo, passo-a-passo, passo-passo le istruzioni, pasta de goma, pasta de miel, pasta flexible, pasta laminada, pintura dos olhos, pocelana fria, polymer clay, postupak za ukrasavanje, pravljenje figurica za torte, pâtisserie, předměty z marcipánu, schmelzend, schritt für schritt anleitung, schritt-für-schritt, schritt-für-schritt-anleitungen, sculpting, soggetti, souvenirs, stap, stap-voor-stap, stap-voor-stap instructies, steg for steg, steg-för-steg-instruktion, step, step by step, step-by-lépésre, step-by-step, step-by-step instructions, styrofoam, sugarcraft, sugarpaste, suikerglazuur, technieken, techniken, techniki, techniky, technikák, techniques, tecnicas de decoracion, tecniche, tehnici, tehnike, teknikker, teknikler, telgopor, topo de bolo, topo do bolo, topos de bolo, torte, torte decorate, torten dekorieren, torti, trin, trin for trin, trin-for-trin, trin-for-trin instruktioner, trinn, trinn for trinn, trinn-for-trinn-instruksjoner, tutorial, tutoriale, tutorias, tutorias/ideas para decorar los bizcochos, tutoriel, tutorijal, técnicas, udžbenik, ukrašavanje torti, uputstvo za dekoraciju, zuckerfigürchen, zuckermasse, सजा केक, ट्यूटोरियल मास्टर वर्ग, कदम, कदम दर कदम निर्देश, तकनीक, मॉडलिंग, モデル, étape, étape par étape les instructions, íj, öğretici, 一步, 一步一步的指示術, žingsnis, žingsnis po žingsnio, 宗師級教程, 建模, 裝飾蛋糕, βήμα, βήμα προς βήμα οδηγίες, οδηγίες βήμα βήμα, παντεσπάνι art, τεχνικές, τόξο-κόμβων, φροντιστήριο, инструкция, как сделать, как сделать красивый бантик, крок за кроком, крок за крокам, покроково, полимерная глина, пошагово, пошаговые фотки, пакрокава, персонажи, миниатюра, мк, моделиране, майстор-класа урок, майстар-клас, майстер-клас, майстер-класи, маршмеллоу, мастика, мастер-класс, бант, лепка, лък възел, ліплення, ручной работы, ручная работа, украшение тортов, сахарная мастика, уроки прикрашання, стъпка, стъпка по стъпка инструкции, техники, техника, техніка, туториал, туторіал, тэхніка, фигурки, фигурка на торт, фимо, фігурки, фігуркі, холодный фарфор, шаг за шагом, інструкцыя, інструкція  |
|

