|
|
Как использовать трафареты для тортов -HOW TO: Stencil
|

03.03.2012, 19:52
|
|
Администратор
|
|
Регистрация: 07.09.2010
Сообщений: 7,669
|
|
 Как использовать трафареты для тортов -HOW TO: Stencil
МК взят с сайта madewithloveby.me
Огромная благодарность Автору за МК
Stencils are a brilliant way of creating beautiful designs on cookies, cupcakes, or layer cakes.
Here is my step by step guide to using one of the fabulous, time saving tools.
1. Roll out your sugarpaste, making sure you roll it out to the correct thickness for the end design. Roll the sugar paste out onto a clean, flat surface making sure you use either icing sugar or trex underneath so that you can manoeuver the sugar paste after you’ve finished stencilling.
2. Make your royal icing. Dont forget to add the colour to the icing if you want to stencil in colour!
Consistency wise i find toothpaste consistency works best. Any thinner and it will run under the stencil, much thicker and you cant spread it.
3. Once you have your paste rolled out lay your stencil over the top.
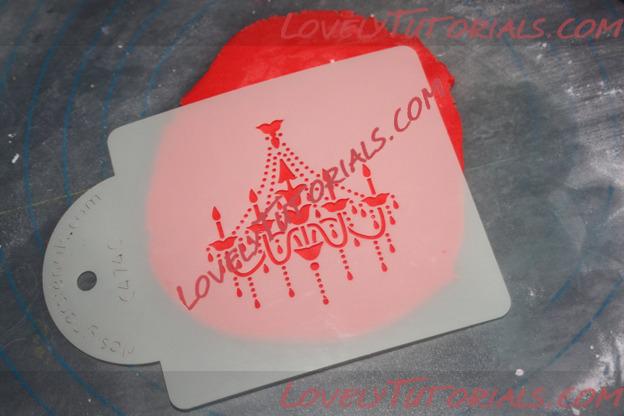 4.
4. If you are confident enough you can just hold down the stencil with your finger and thumb, but if you prefer that extra security you can also dollop a little royal icing on the edge of the stencil to secure it onto the sugarpaste whilst you work.
5. Once you have the stencil secured roll the rolling pin over the top to slightly emboss the pattern through the stencil.
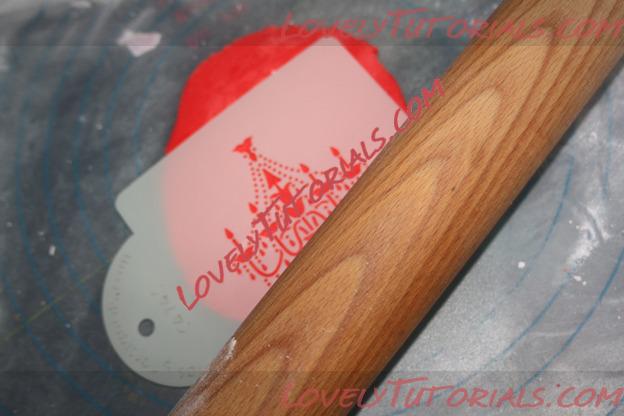 6. 6. Begin spreading the royal icing carefully over the top of the stencil. Do this with either the broad side of a knife or preferably a pallet knife. Keep the strokes in one direction and just skim across the top until the whole stencil is covered in a thin layer of icing.
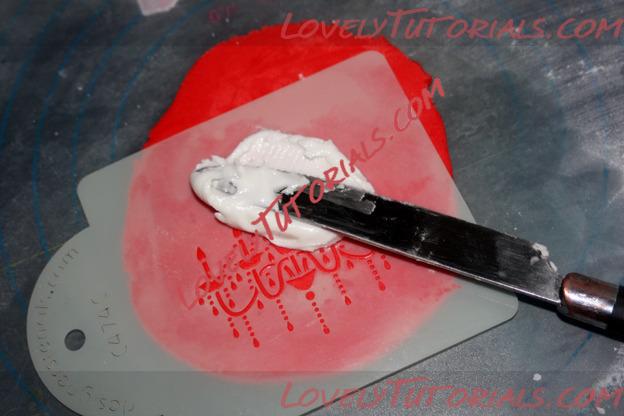 7. 7. Make sure all of the stencil is well covered, but dont allow the icing to get too thick.
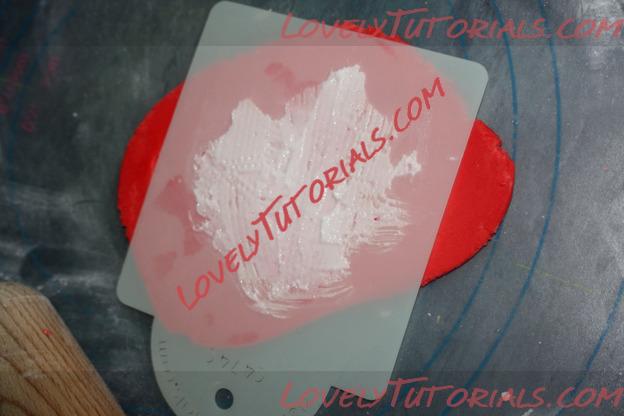 8.
8. Leave the stencil on the sugar paste for a minute to give the icing time to begin setting.
9. Gently peel back the plastic stencil, starting with one edge and bending it back on itself to reveal the stencilled pattern underneath. If your royal icing is the correct consistency it will leave a beautiful pattern behind.
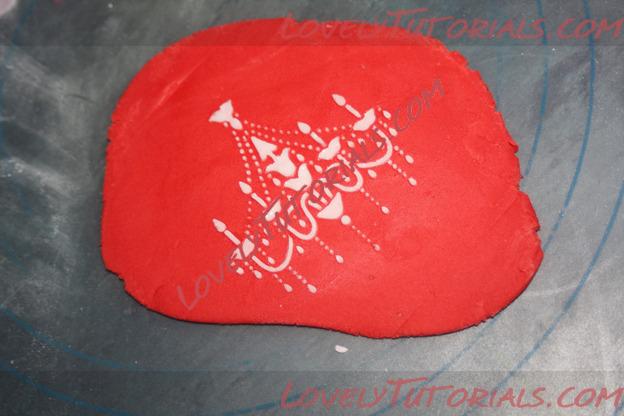
Finally, once you have revealed your gorgeous pattern from underneath the stencil you can use your regular cutters to cut/shape the sugar paste and place it onto your cookies or cupcakes as normal.
Tip* Make sure you lift and place your sugar paste before the icing completely dries, as you risk it cracking if you wait to long before trying to move it.
Once you’ve mastered this you will find it has so many applications you’ll not know what you did without it!!
Tip* If you are decorating the top of a cake you can stencil directly onto the already iced cake, but i would advise you practice first, as its hard to ‘un-do’ a stencil once you’ve done it!
From stencilling cookies to decorating the top of wedding cakes to printing beautiful patterns on the top of cupcakes.
|

04.08.2012, 15:41
|
|
Администратор
|
|
Регистрация: 07.09.2010
Сообщений: 7,669
|
|
|
 |
|
Метки
|
3d figures, addım-addım təlimat, adım, adım adım yönergeler, arte en azucar, artesanatos passo a passo, australian stringwork, azúcar gla, bemutató, birthday cake, biscuit, bolando bolos, bolos decorados, cake decorating, cake decorating techniques, cake topper, cake toppers, cake tops, cerâmica plástica, character figures, characters, children's cake, clara de huevo, cold porcelain, confeitando bolos, cukru pudru i białek, curso de modelado, decoracion de pasteles, decoración de tortas, decorada en fondant, decorare le torte, decorazioni, deko fondant, dekorace na dort, dekoracija, dekoracije, dekorasyon, dekorácie, egg whites, embroidery accents, especializada em modelagem de biscuit, fender, figur kager, figuras, figure making tutorials, figuren, figures, figurice, figurice od fondana, figurine on the cake, figurines, figurinhas, figurky, figúrky, figür modelleme, fimo, fixando a cabencinha, flower paste, fondan, fondant, fondente, fondente di zucchero, fotopostup, foundant, gebak, glaseado, glaseado blanco, glaseado real, glassa, glassúr, glasur, glasyr, glaze, glazuur, glaçage, gum pasta, gum paste, gumpaste, hand-made, handmade, how to, how-to's, icing sugar, instrucţiuni, instrukcijas, instrukcje, jak na, kaavain, kage dekoration, kagedekoration, kakebaking, korak, korak za korakom navodila, korak-po-korak upute, koristeet ja koristelu, kristyr, krok, krok po kroku, krok za krokem, krok-za-krokem, küche, la modélisation, las instrucciones, las técnicas, le tecniche, les techniques, lukie, lukier królewski, marcipanové figurky, marshmallow, marsipanfigurer, masa flexible, master-class, master-klasse, master-klasy, matrica za, meistras klasės, metodikas, mistr třídy, modelado, modelagem, modelando a barriga, modelando a cabencinha, modelando a perninha, modelando as maozinhas, modelando o cabelinho, modelando o corpinho, modelando os bracinhos, modelando os pezinhos, modelare, modelerte figurer, modeling, modeling paste, modeliranje, modellazione, modelleme, modellering, modellieren, modellierpaste, modelling, modelling past, modelləşdirmə, modelovanie, modelování, modelowanie, motivtorten, návod, opplæringen, orelhas, ozdoby, pamoka, pap, pas, pas-cu-pas, paso, paso a paso, passo, passo a passo, passo-a-passo, passo-passo le istruzioni, pasta de goma, pasta de miel, pasta flexible, pasta laminada, pintura dos olhos, piping methods, plantilla, pocelana fria, pochoir, polewa, polymer clay, postupak za ukrasavanje, pravljenje figurica za torte, puderzucker, pâtisserie, předměty z marcipánu, royal icing, schablone, schmelzend, schritt für schritt anleitung, schritt-für-schritt, schritt-für-schritt-anleitungen, sculpting, soggetti, souvenirs, stampino, stap, stap-voor-stap, stap-voor-stap instructies, steg for steg, steg-för-steg-instruktion, stencil, stensil, step, step by step, step-by-lépésre, step-by-step, step-by-step instructions, styrofoam, sugarcraft, sugarpaste, suikerglazuur, sykurbráð, szablon, technieken, techniken, techniki, techniky, technikák, techniques, tecnicas de decoracion, tecniche, tehnici, tehnike, teknikker, teknikler, telgopor, topo de bolo, topo do bolo, topos de bolo, torte, torte decorate, torten dekorieren, torti, trafaretas, trin, trin for trin, trin-for-trin, trin-for-trin instruktioner, trinn, trinn for trinn, trinn-for-trinn-instruksjoner, tutorial, tutoriale, tutorias, tutorias/ideas para decorar los bizcochos, tutoriel, tutorijal, técnicas, udžbenik, ukrašavanje torti, uputstvo za dekoraciju, zuckerfigürchen, zuckerglasuren, zuckermasse, सजा केक, ट्यूटोरियल मास्टर वर्ग, कदम, कदम दर कदम निर्देश, तकनीक, मॉडलिंग, モデル, étape, étape par étape les instructions, öğretici, 一步, 一步一步的指示術, žingsnis, žingsnis po žingsnio, šablona, šablóna, şablon, 宗師級教程, 建模, 裝飾蛋糕, βήμα, βήμα προς βήμα οδηγίες, οδηγίες βήμα βήμα, πολυγραφώ, παντεσπάνι art, τεχνικές, φροντιστήριο, инструкция, королевская глазурь, как сделать, крок за кроком, крок за крокам, глазурь, покроково, полимерная глина, пошагово, пошаговые фотки, пакрокава, персонажи, миниатюра, мк, моделиране, майстор-класа урок, майстар-клас, майстер-клас, майстер-класи, маршмеллоу, мастика, мастер-класс, айсинг, белкого-рисовальная масса, лепка, ліплення, ручной работы, ручная работа, украшение тортов, сахарная мастика, уроки прикрашання, стъпка, стъпка по стъпка инструкции, техники, техника, техніка, трафарет, трафарэт, туториал, туторіал, тэхніка, фигурки, фигурка на торт, фимо, фарбувати по трафарету, фігурки, фігуркі, холодный фарфор, шаг за шагом, шаблон, інструкцыя, інструкція  |
|

